Playground
The Playground is an interactive environment where you can experiment with function code and test it instantly without creating a function. Perfect for learning, prototyping, and quick iterations.
What is the Playground?
The Playground is a code sandbox that lets you:
- ✅ Write and test function code instantly
- ✅ Experiment with different runtimes (Python, JavaScript, TypeScript)
- ✅ Test with custom JSON payloads
- ✅ See results immediately
- ✅ Save working code to create a function later
Benefits:
- 🚀 No deployment needed - Test code without creating functions
- ⚡ Instant feedback - See results in seconds
- 🔄 Quick iteration - Change code and retest immediately
- 💡 Learn by doing - Experiment with examples
- 💾 Save when ready - Convert to function with one click
Accessing the Playground
From Functions Page
Click the Playground button on the Functions page:
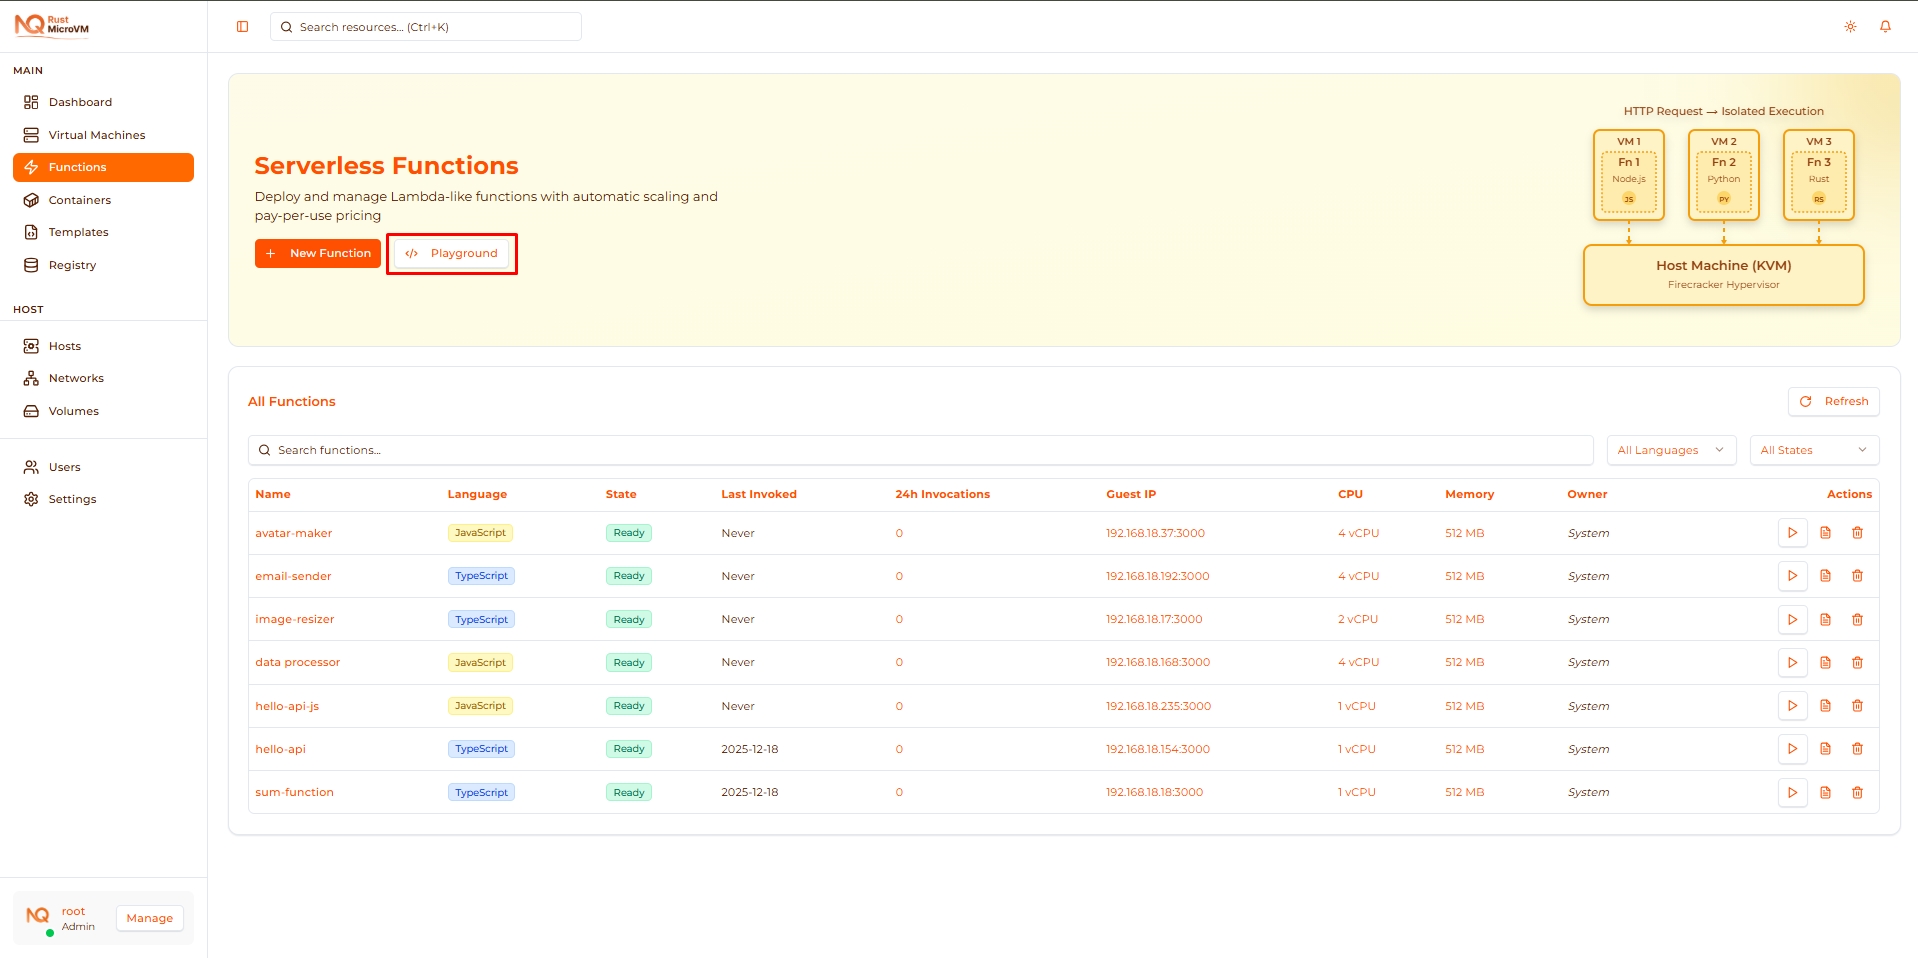
Location: Functions page header, next to “New Function” button
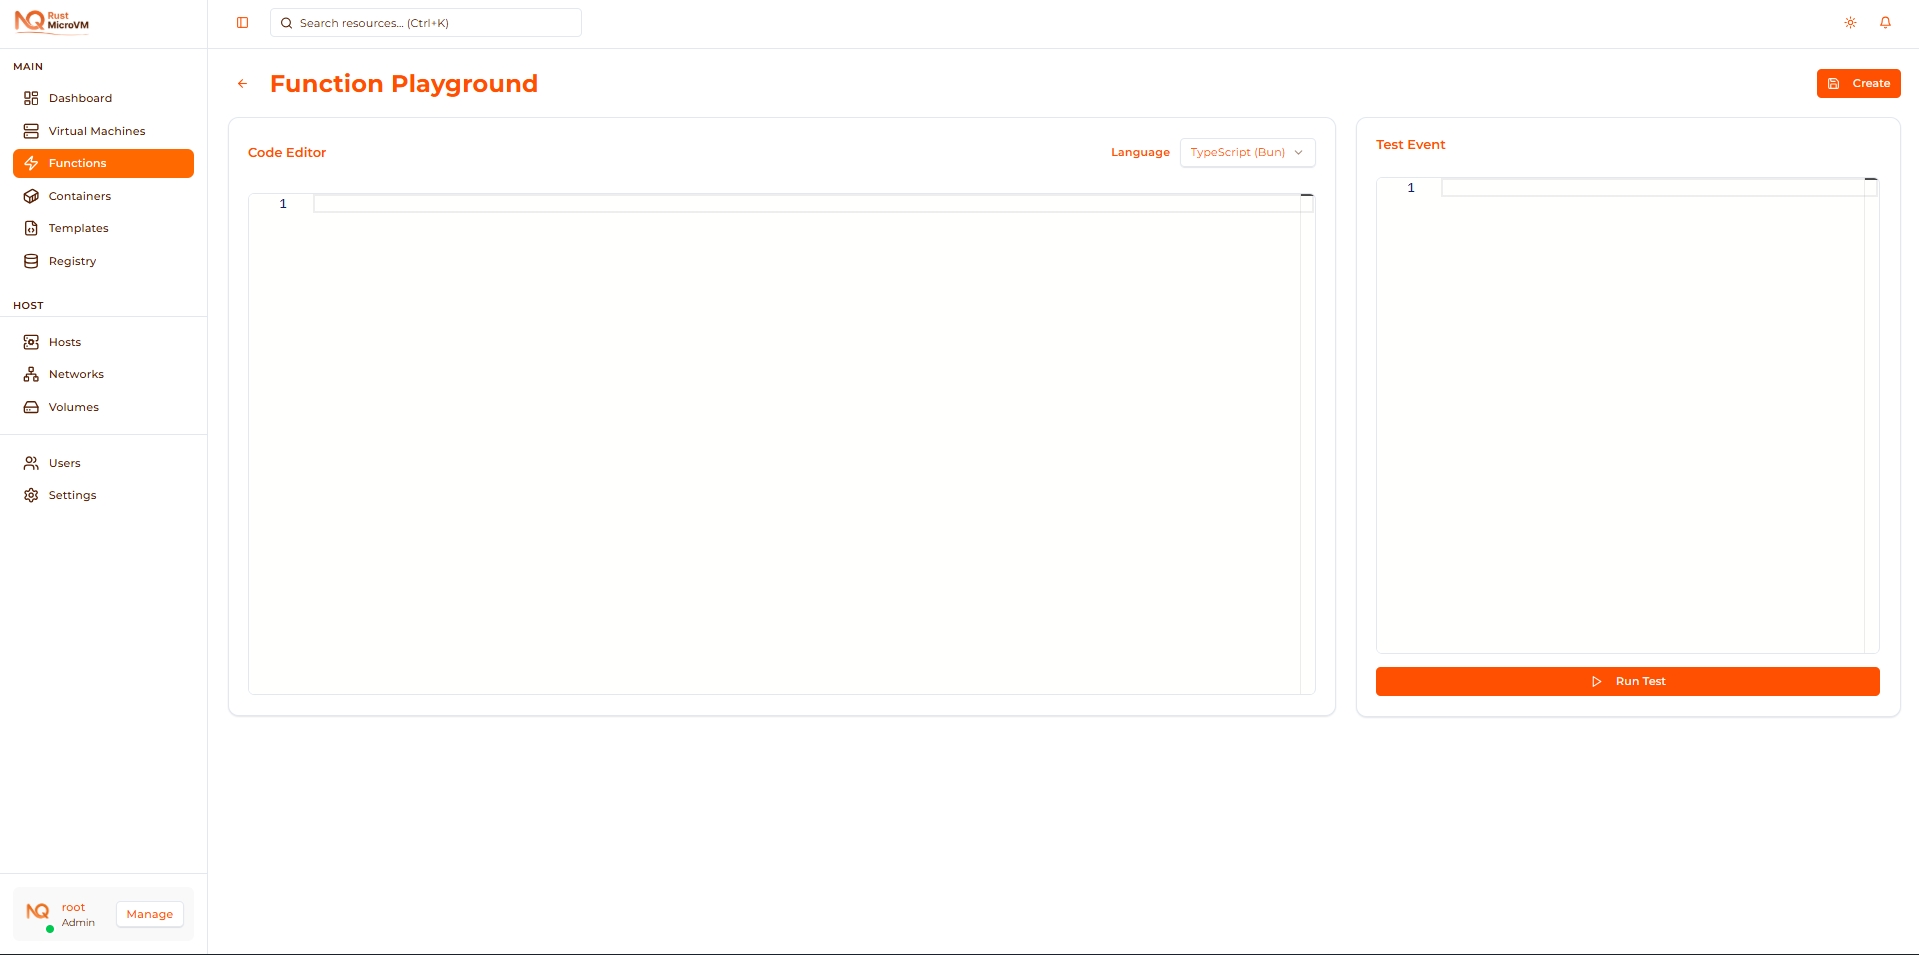
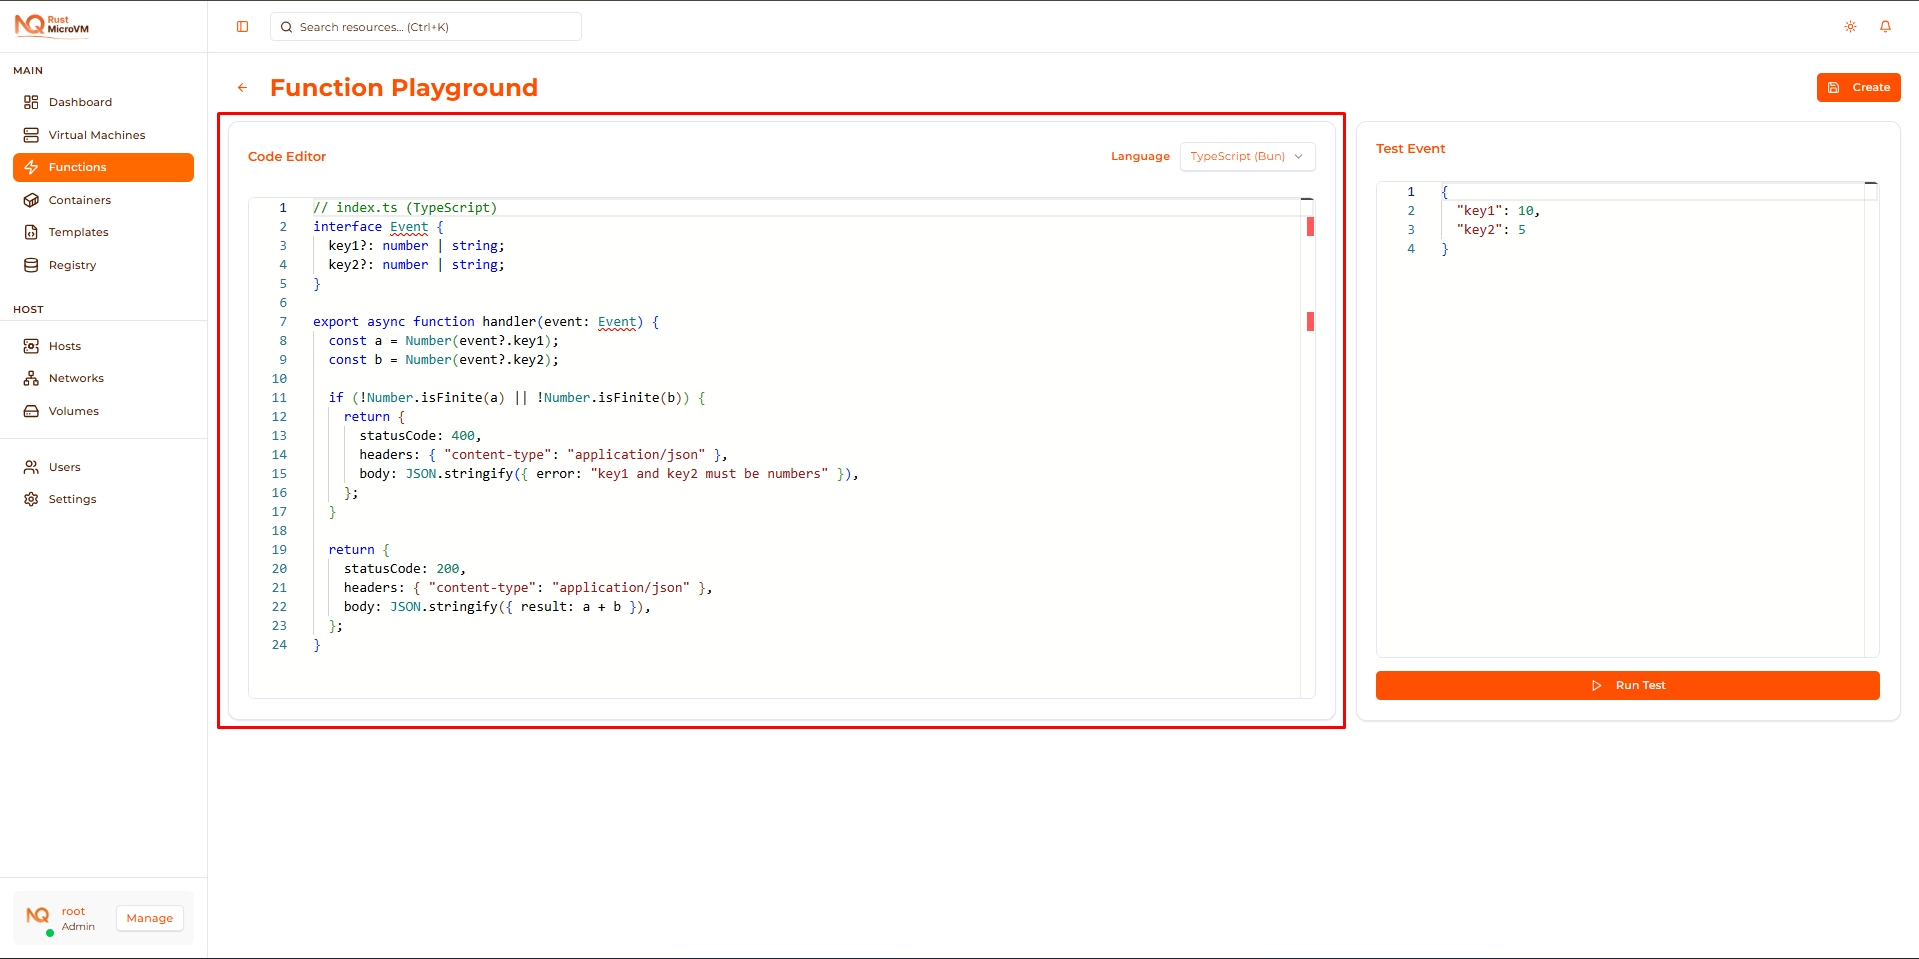
Playground Interface
The Playground has three main sections:
- Configuration - Select runtime
- Code Editor - Write your function code
- Test Panel - Input event and view results
Step 1: Select Runtime
Choose the programming language:
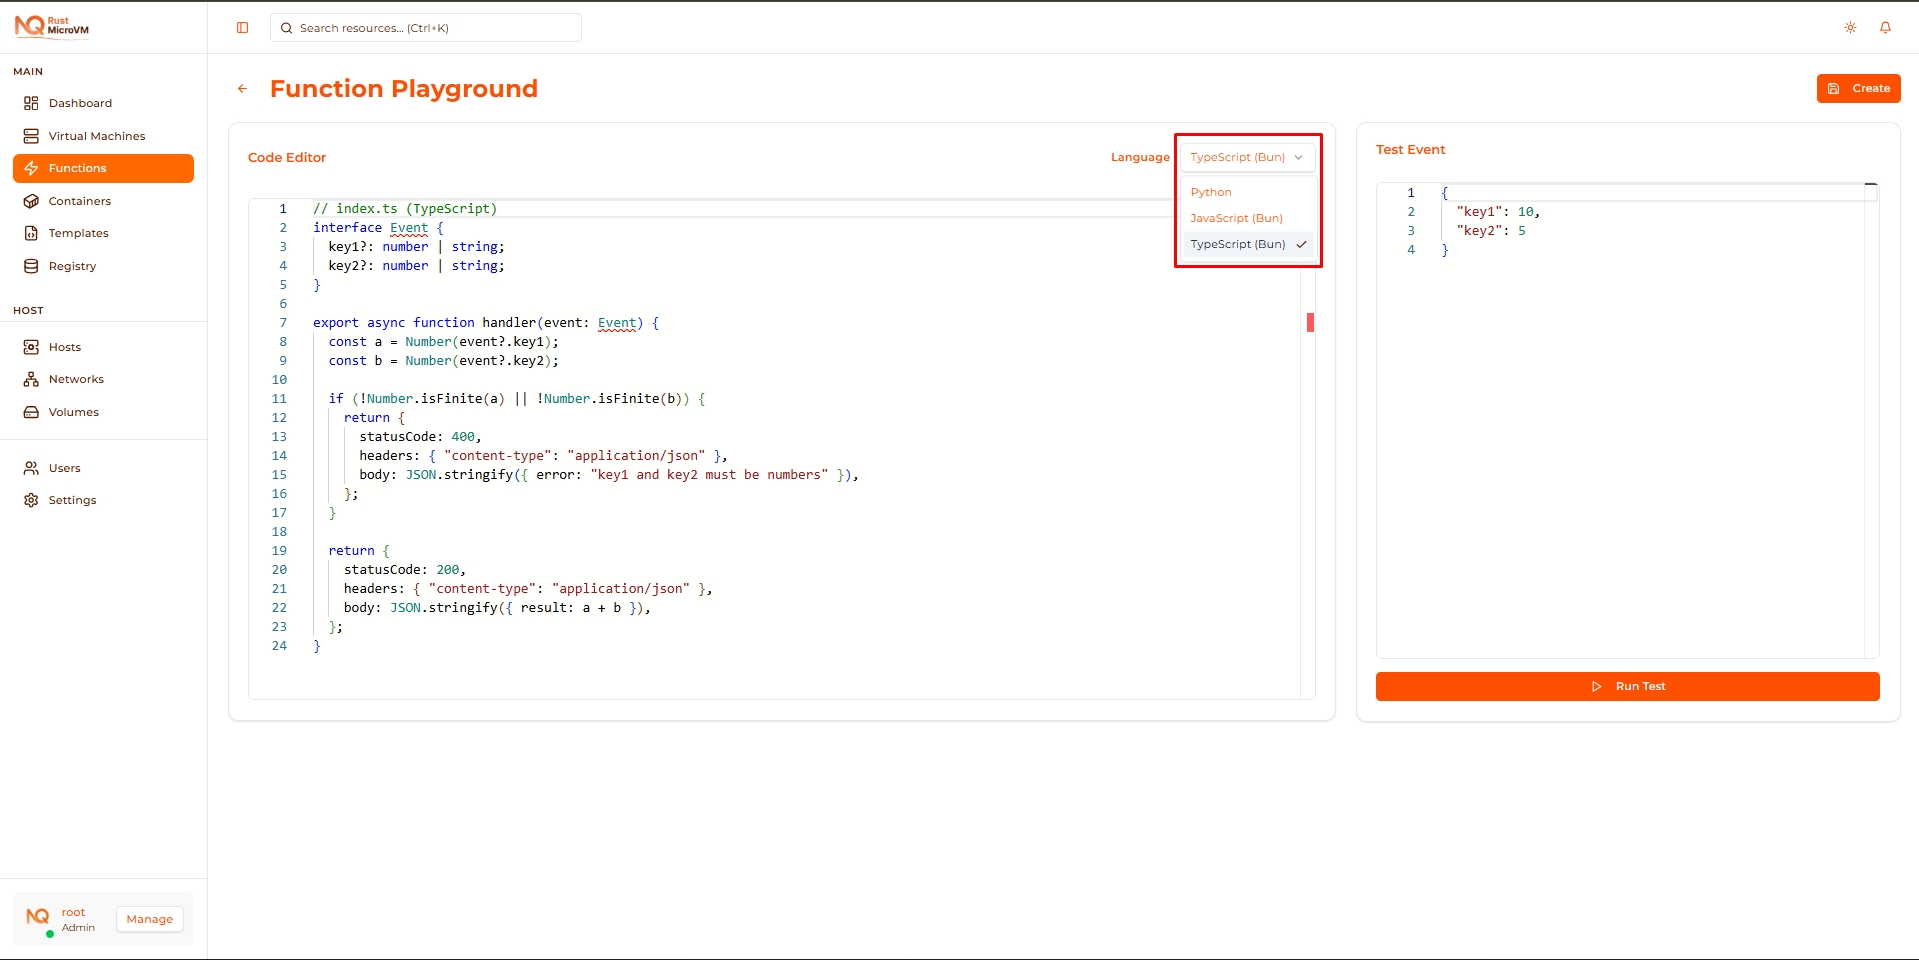
Available runtimes:
- Python (Python 3.11)
- JavaScript (Bun)
- TypeScript (Bun) - Default
What happens when you change runtime:
- Code editor updates with default template for selected language
- Previous code is replaced (not saved automatically)
- Test event remains the same
Tip: Start with TypeScript for type safety, or Python for simplicity.
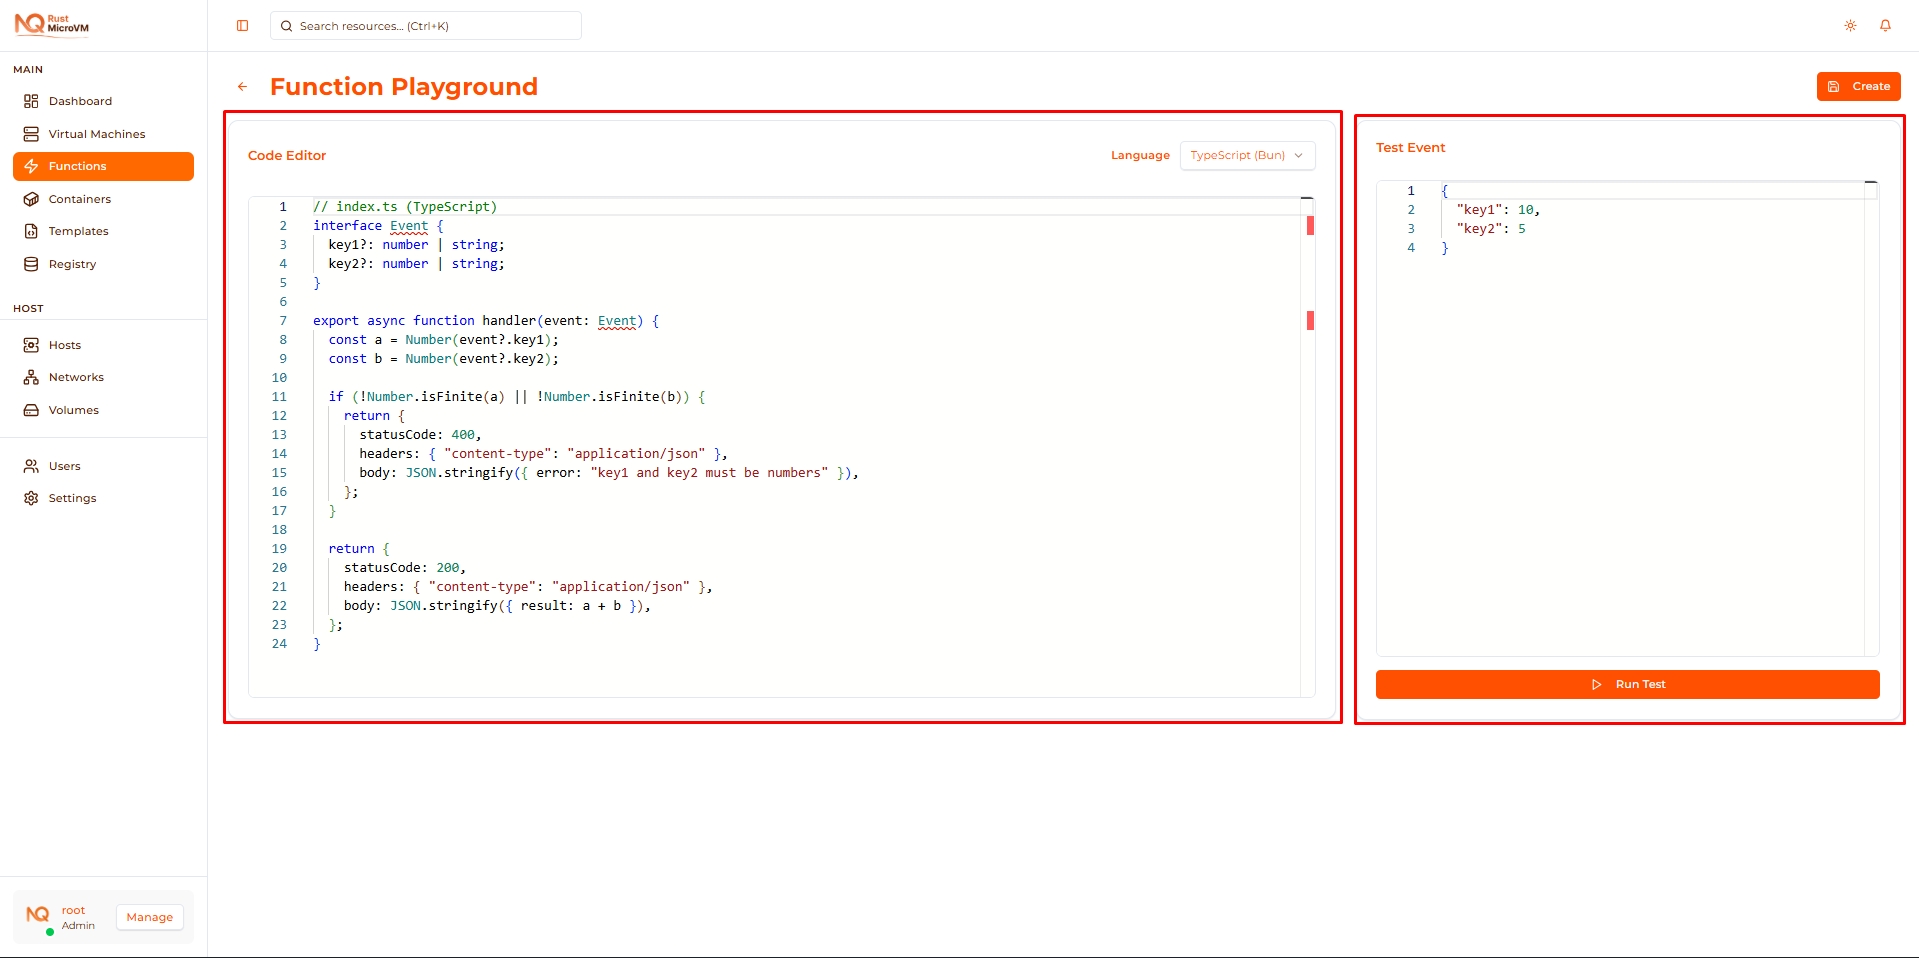
Step 2: Write Function Code
Use the Monaco code editor to write your function:
Editor Features
The editor provides:
- ✅ Syntax highlighting - Color-coded code
- ✅ Auto-completion - IntelliSense suggestions
- ✅ Error detection - Real-time syntax checking
- ✅ Multi-cursor editing - Edit multiple lines at once
- ✅ Code folding - Collapse/expand code blocks
Default Templates
Each runtime has a default calculator function:
Python:
  # index.py  (Python 3.11)
def handler(event):
    try:
        a = float(event.get("key1"))
        b = float(event.get("key2"))
    except Exception:
        return {
            "statusCode": 400,
            "headers": {"content-type": "application/json"},
            "body": '{"error":"key1 and key2 must be numbers"}',
        }

    return {
        "statusCode": 200,
        "headers": {"content-type": "application/json"},
        "body": '{"result": %s}' % (a + b),
    }
TypeScript:
  // index.ts (TypeScript)
interface Event {
  key1?: number | string;
  key2?: number | string;
}

export async function handler(event: Event) {
  const a = Number(event?.key1);
  const b = Number(event?.key2);

  if (!Number.isFinite(a) || !Number.isFinite(b)) {
    return {
      statusCode: 400,
      headers: { "content-type": "application/json" },
      body: JSON.stringify({ error: "key1 and key2 must be numbers" }),
    };
  }

  return {
    statusCode: 200,
    headers: { "content-type": "application/json" },
    body: JSON.stringify({ result: a + b }),
  };
}
Function Requirements
Your function must:
- Export or define a
handlerfunction - Accept one parameter:
event(dict/object) - Return an object with
statusCodeandbody
Valid structure:
  export async function handler(event) {
  // Your logic here
  return {
    statusCode: 200,
    body: JSON.stringify({ message: "Success" }),
  };
}
Step 3: Configure Test Event
Enter JSON payload to test your function:
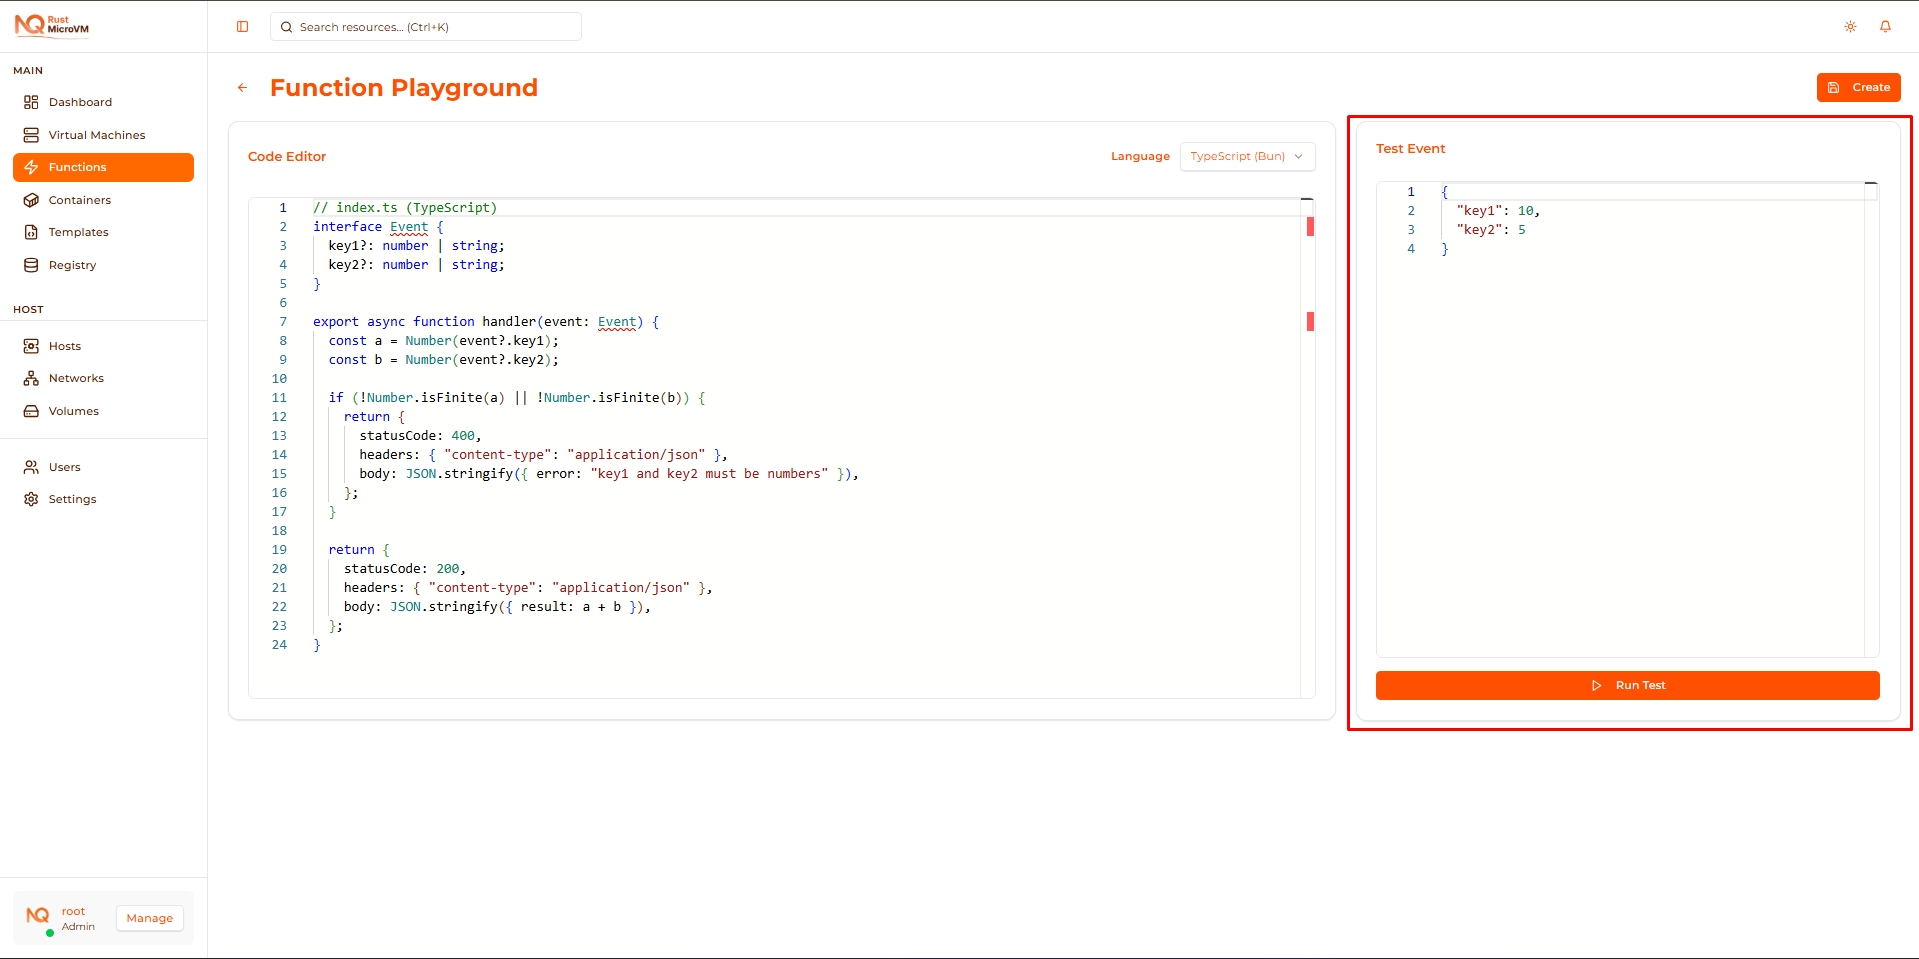
Test Event Editor
The test event panel has:
- JSON editor with syntax highlighting
- Real-time validation (shows if JSON is valid)
- Default payload matching the template function
Default test event:
  {
  "key1": 10,
  "key2": 5
}
Custom Test Events
Replace the default with your own JSON:
Example 1 - User registration:
  {
  "username": "alice",
  "email": "alice@example.com",
  "age": 30
}
Example 2 - Image processing:
  {
  "imageUrl": "https://example.com/photo.jpg",
  "width": 800,
  "height": 600,
  "format": "jpeg"
}
Example 3 - Data transformation:
  {
  "data": [
    {"name": "Alice", "score": 95},
    {"name": "Bob", "score": 87}
  ],
  "sortBy": "score"
}
Tip: Test with multiple payloads to verify different scenarios.
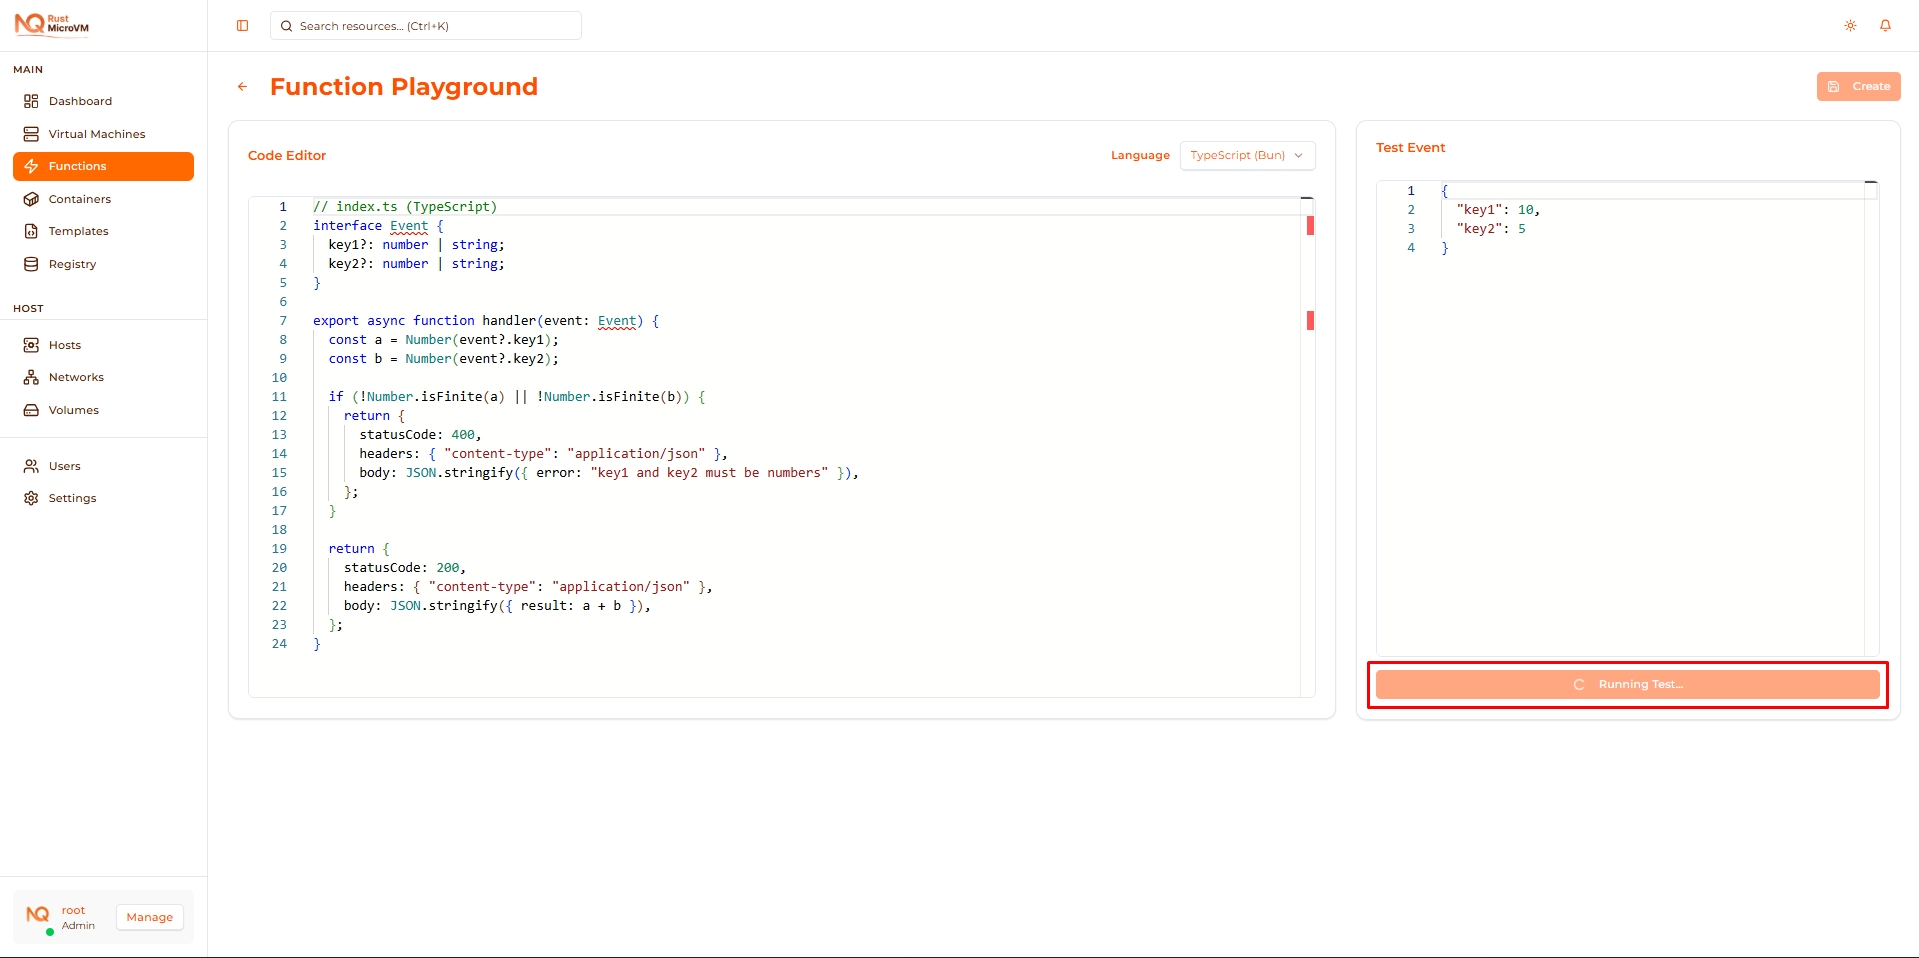
Step 4: Run Test
Click the Run button to execute your function:
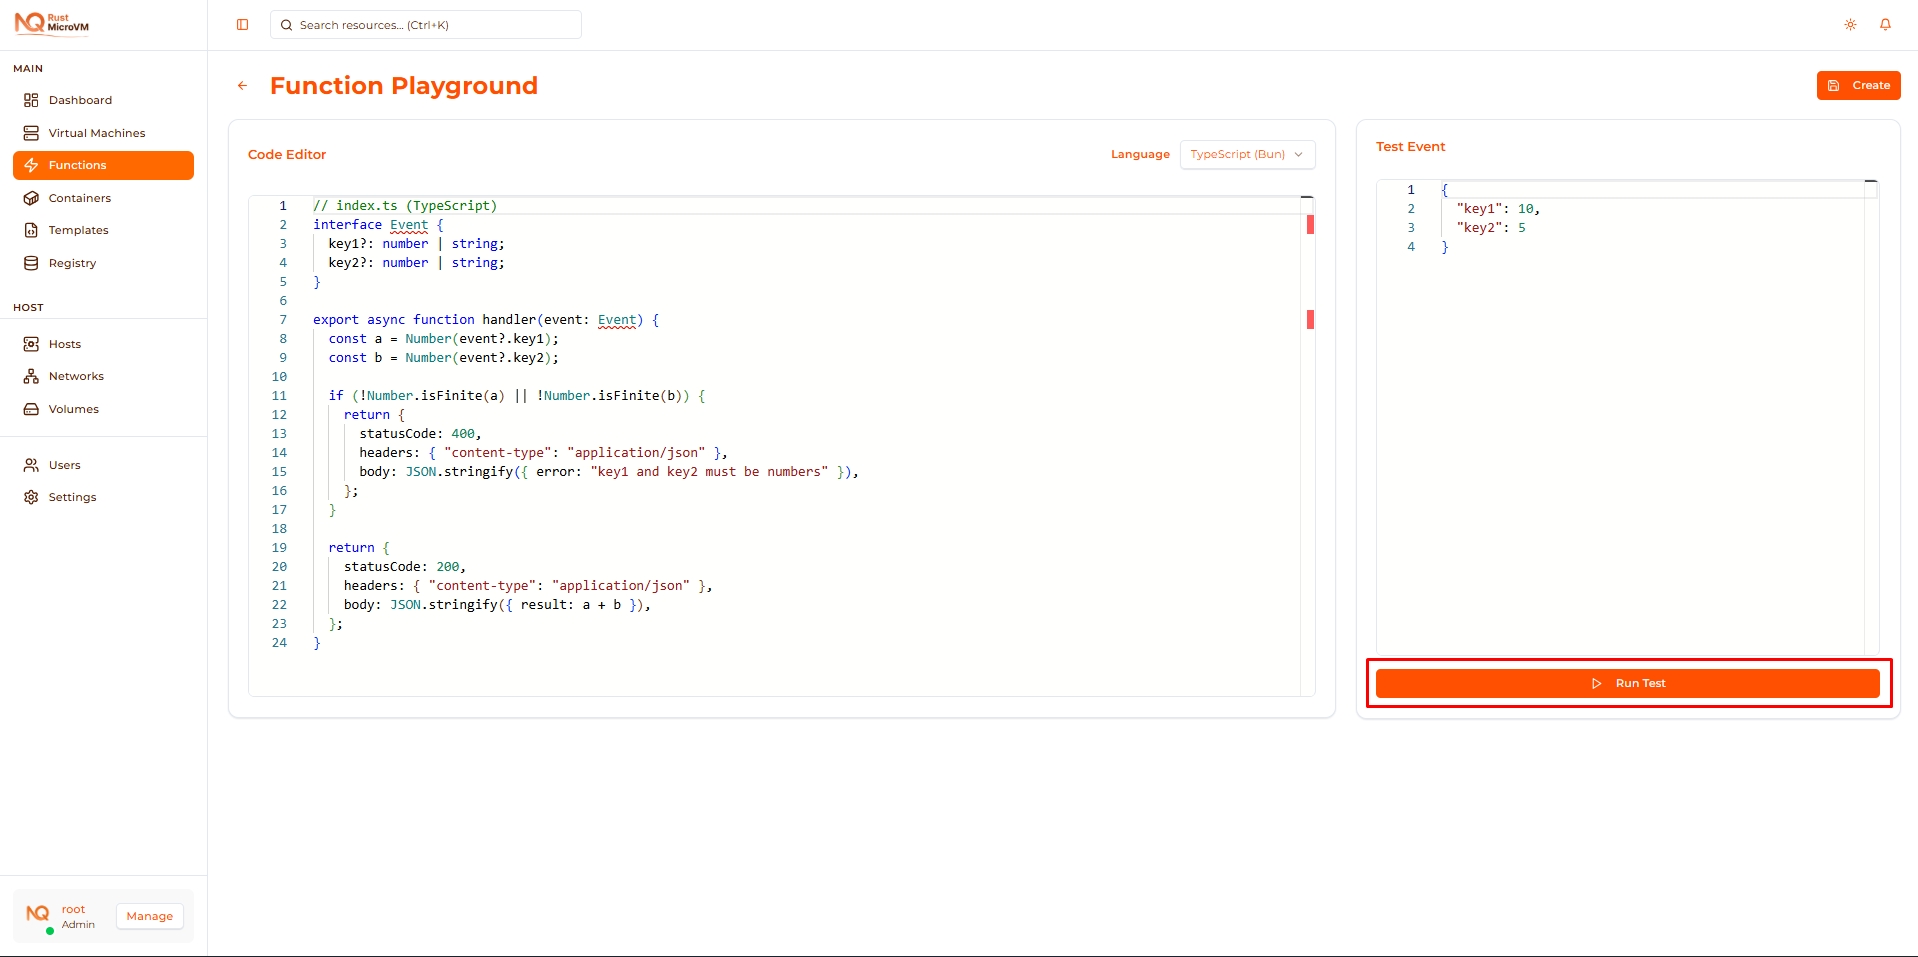
What Happens
When you click Run:
- Code is sent to backend test environment
- Function executes with your test event
- Results are displayed in Output panel
- Logs are shown below output
Time: Usually completes in 1-2 seconds
Step 5: View Results
After execution, results appear in the Output panel:
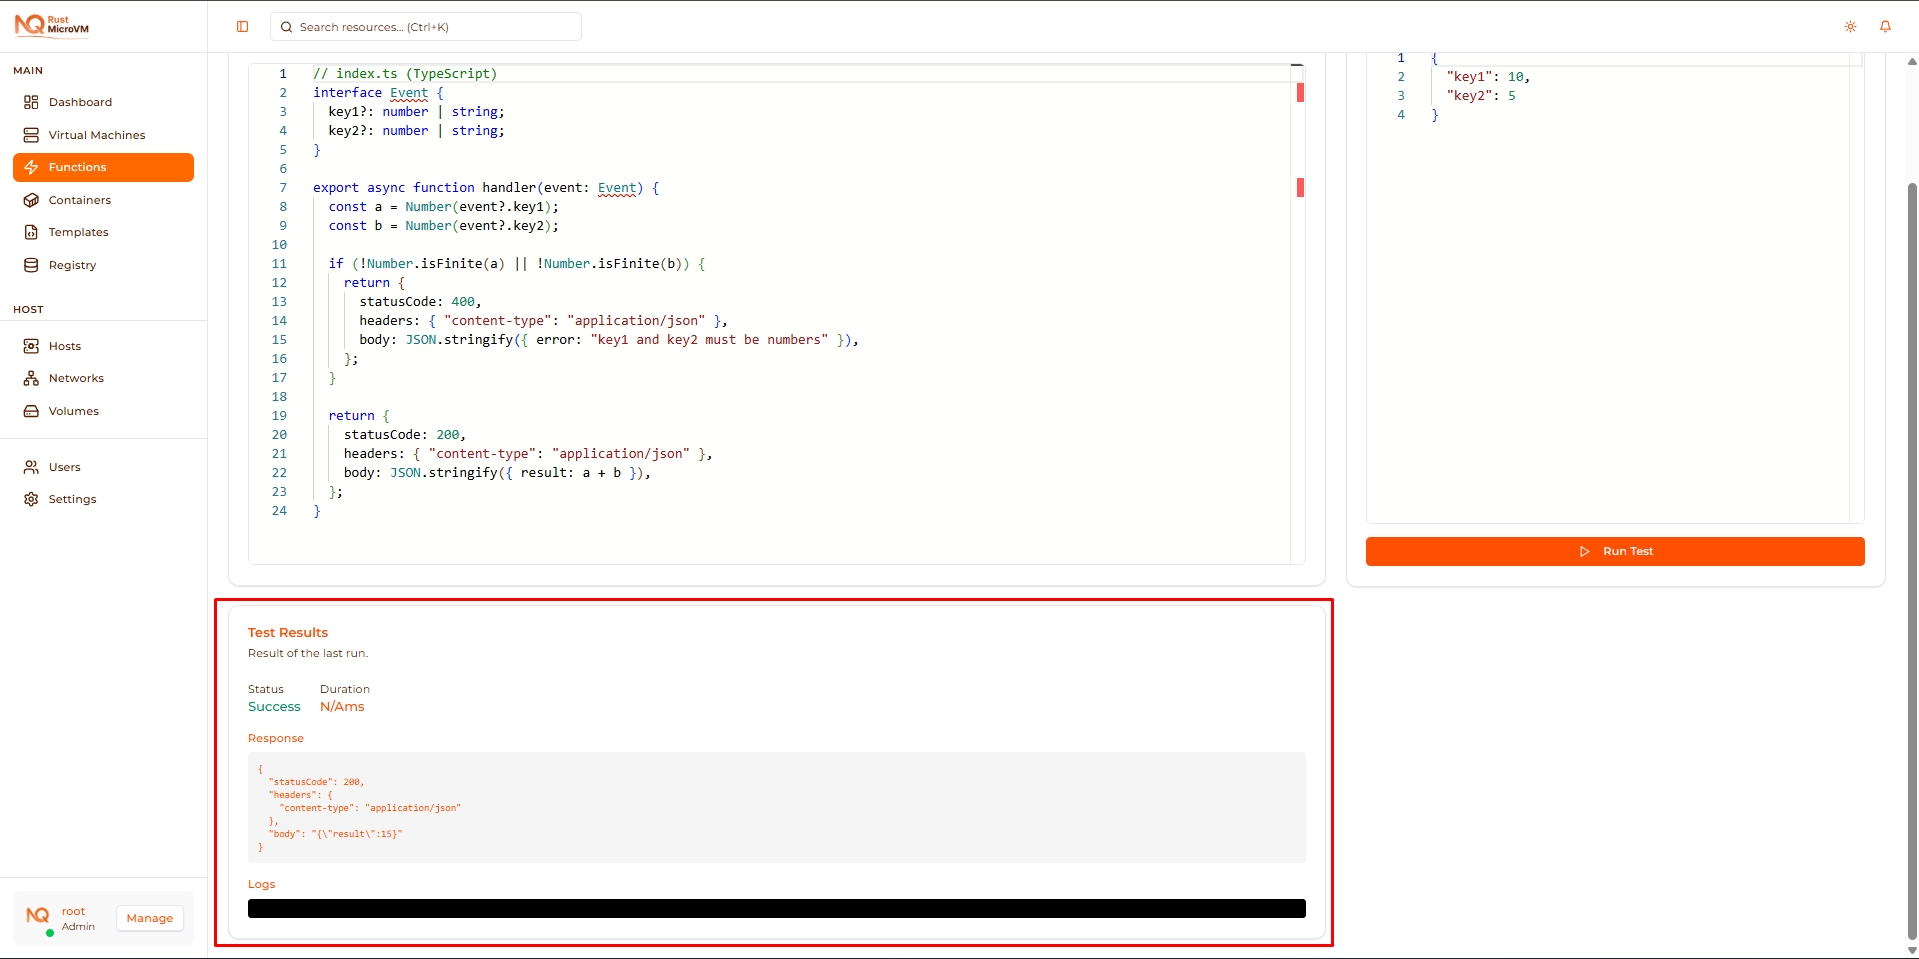
Output Panel
Shows the function’s return value:
Successful response:
  {
  "statusCode": 200,
  "headers": {
    "content-type": "application/json"
  },
  "body": "{\"result\": 15}"
}
Error response:
  {
  "statusCode": 400,
  "body": "{\"error\": \"key1 and key2 must be numbers\"}"
}
Step 6: Iterate and Improve
The Playground is perfect for rapid iteration:
Iteration Workflow
- Change code in editor
- Click Run to test
- View results and logs
- Repeat until it works

Example iteration:
Iteration 1 - Basic function:
  export async function handler(event) {
  return {
    statusCode: 200,
    body: JSON.stringify({ message: "Hello" }),
  };
}
Test: ✅ Works
Iteration 2 - Add parameter:
  export async function handler(event) {
  const name = event?.name || "World";
  return {
    statusCode: 200,
    body: JSON.stringify({ message: `Hello, ${name}` }),
  };
}
Test: ✅ Works
Iteration 3 - Add validation:
  export async function handler(event) {
  if (!event?.name) {
    return {
      statusCode: 400,
      body: JSON.stringify({ error: "name is required" }),
    };
  }

  return {
    statusCode: 200,
    body: JSON.stringify({ message: `Hello, ${event.name}` }),
  };
}
Test: ✅ Works with validation
Save to Functions
When your code works perfectly, save it as a function:
Click “Save to Functions”
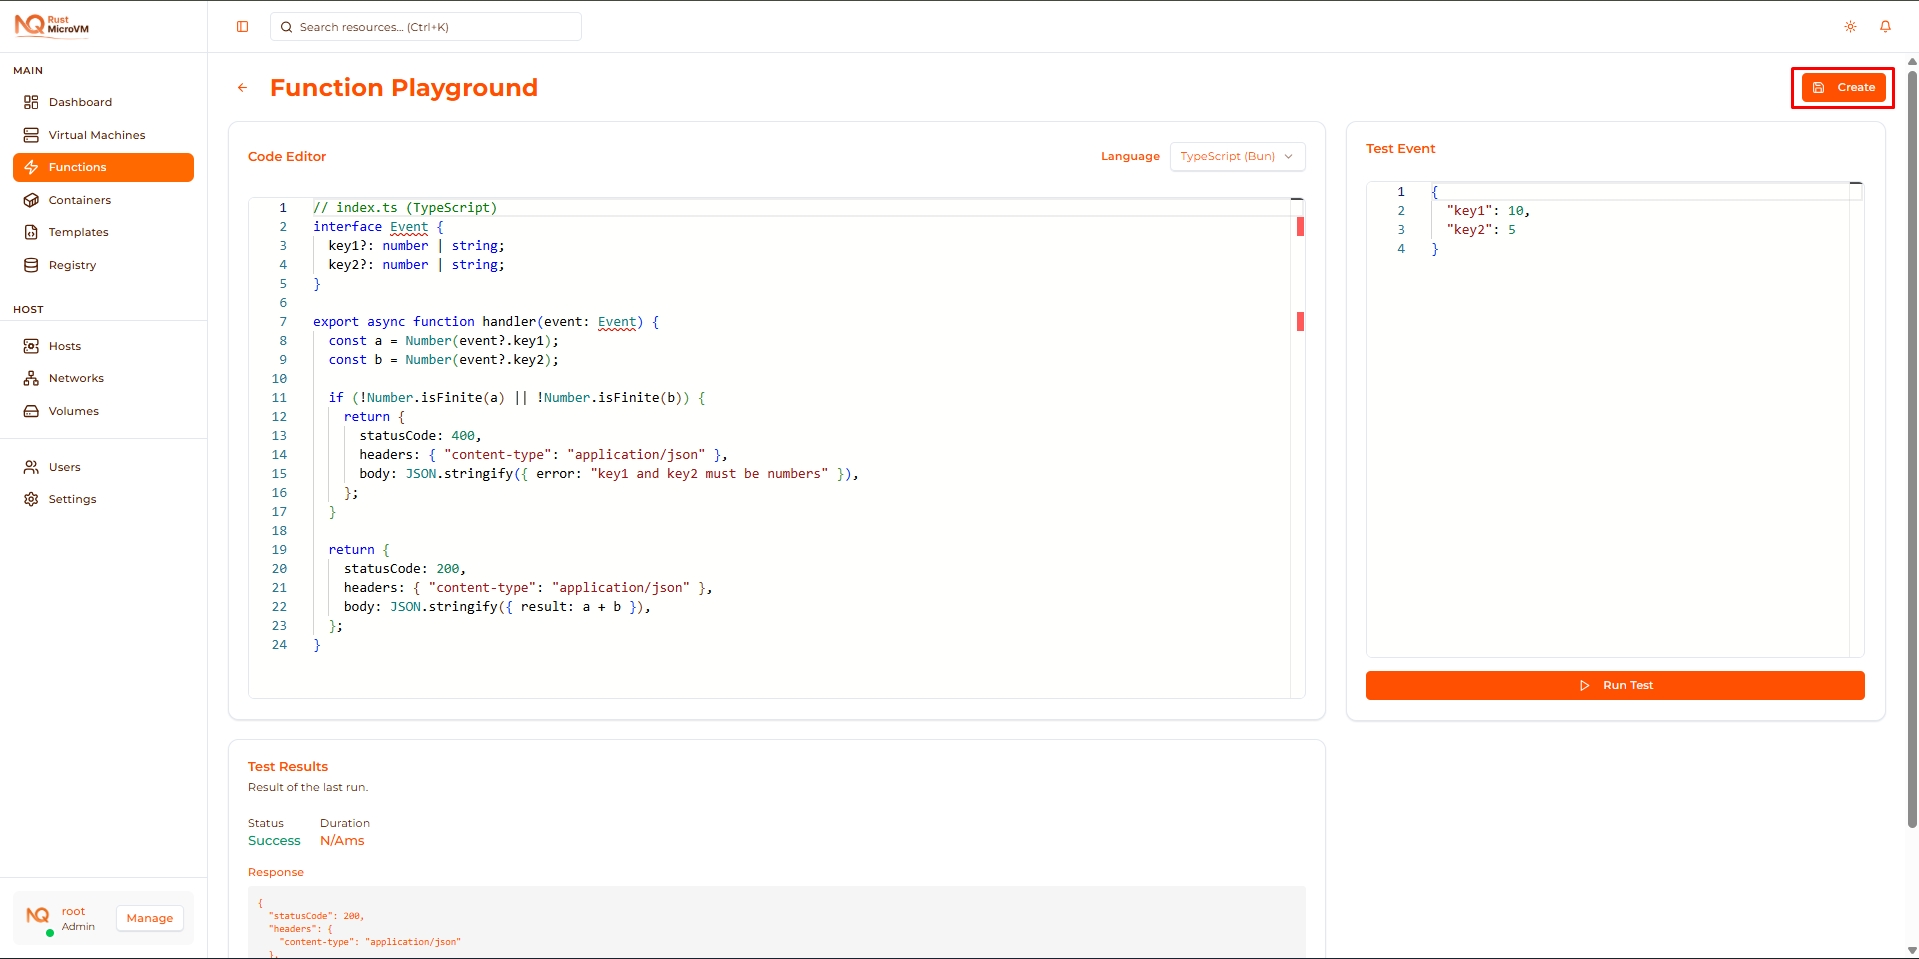
Location: Top-right corner of Playground
What Happens
- Current code, runtime, and test event are saved
- You’re redirected to New Function page
- Form is pre-filled with your Playground code
- Complete the setup (name, resources, etc.)
- Click Save to deploy
Benefit: Skip writing code again - just configure and deploy!
Navigation
Back to Functions
Click the Back arrow to return to Functions list:

Note: Your Playground code is not saved when you navigate away (unless you click “Save to Functions”).
Use Cases
1. Learning Serverless Functions
Perfect for beginners:
- Try the default templates
- Modify code and see what happens
- Experiment with different runtimes
- Learn function structure
Example: Modify the calculator to do multiplication instead of addition.
2. Prototyping New Ideas
Rapid development:
- Test algorithm before deploying
- Validate data transformations
- Experiment with external APIs
- Prototype business logic
Example: Test JSON transformation logic before creating a production function.
3. Testing Code Snippets
Quick validation:
- Test regex patterns
- Validate data parsing
- Check error handling
- Verify edge cases
Example: Test if your date parsing works with different formats.
4. Comparing Runtimes
Performance comparison:
- Write same logic in Python and TypeScript
- Test execution time
- Compare code complexity
- Choose best runtime for your use case
Example: Compare JSON parsing performance across runtimes.
5. Debugging Existing Functions
Isolate issues:
- Copy function code to Playground
- Test with specific payloads
- Add debug logging
- Fix issues, then update function
Example: Debug why a function fails with certain inputs.
Example Workflows
Example 1: Create a Greeting API
Goal: Function that greets users in different languages
Step 1: Open Playground, select TypeScript
Step 2: Write code:
  interface Event {
  name?: string;
  language?: string;
}

export async function handler(event: Event) {
  const name = event?.name || "Friend";
  const lang = event?.language || "en";

  const greetings: Record<string, string> = {
    en: "Hello",
    es: "Hola",
    fr: "Bonjour",
    de: "Hallo",
    ja: "こんにちは",
  };

  const greeting = greetings[lang] || greetings.en;

  return {
    statusCode: 200,
    headers: { "content-type": "application/json" },
    body: JSON.stringify({
      message: `${greeting}, ${name}!`,
      language: lang,
    }),
  };
}
Step 3: Test with different events:
{"name": "Alice", "language": "es"}
→ Response: "Hola, Alice!"
{"name": "Bob", "language": "ja"}
→ Response: "こんにちは, Bob!"
Step 4: Click “Save to Functions”, deploy as greeting-api
Example 2: JSON Data Validator
Goal: Validate incoming data structure
Step 1: Open Playground, select Python
Step 2: Write code:
  def handler(event):
    required_fields = ["email", "age", "name"]

    # Check required fields
    missing = [f for f in required_fields if f not in event]
    if missing:
        return {
            "statusCode": 400,
            "body": f'{{"error": "Missing fields: {", ".join(missing)}"}}',
        }

    # Validate email
    email = event["email"]
    if "@" not in email:
        return {
            "statusCode": 400,
            "body": '{"error": "Invalid email format"}',
        }

    # Validate age
    try:
        age = int(event["age"])
        if age < 0 or age > 150:
            raise ValueError()
    except:
        return {
            "statusCode": 400,
            "body": '{"error": "Age must be between 0 and 150"}',
        }

    return {
        "statusCode": 200,
        "body": '{"message": "Validation passed"}',
    }
Step 3: Test with invalid data:
{"name": "Alice", "email": "invalid", "age": -5}
→ Response: "Invalid email format"
Step 4: Test with valid data:
{"name": "Alice", "email": "alice@example.com", "age": 30}
→ Response: "Validation passed"
Tips and Tricks
Editor Shortcuts
Keyboard shortcuts (same as VS Code):
| Shortcut | Action |
|---|---|
Ctrl + S | Save to Functions |
Ctrl + F | Find in code |
Ctrl + H | Find and replace |
Ctrl + / | Toggle comment |
Alt + Up/Down | Move line up/down |
Ctrl + D | Select next occurrence |
Ctrl + Shift + K | Delete line |
F11 | Toggle fullscreen |
Debugging Tips
✅ Add logging:
  # Python
print(f"Event received: {event}")
print(f"Processing key1: {event.get('key1')}")
  // TypeScript
console.log("Event received:", event);
console.log("Processing key1:", event?.key1);
✅ Test edge cases:
- Empty payload:
{} - Missing fields:
{"key1": 10}(without key2) - Invalid types:
{"key1": "abc", "key2": "def"} - Large values:
{"key1": 999999, "key2": 888888}
Performance Testing
✅ Check execution time in logs:
- Typical: 50-200ms
- Slow: >500ms (optimize code)
✅ Test with large payloads:
  {
  "data": [
    {"id": 1, "value": "..."},
    {"id": 2, "value": "..."},
    ... // 100 items
  ]
}
Limitations
Playground restrictions:
- ⚠️ No deployment - Code runs in test mode only
- ⚠️ No persistence - Code is lost on page refresh (unless saved)
- ⚠️ No custom packages - Only built-in libraries available
- ⚠️ Single execution - Not for load testing
To deploy: Use “Save to Functions” to create an actual function.
Best Practices
✅ Experiment freely:
- Try different approaches
- Break things and learn
- Test unusual inputs
- Don’t worry about mistakes
✅ Test thoroughly before saving:
- Test happy path
- Test error cases
- Test edge cases
- Verify all scenarios work
✅ Use Playground for learning:
- Try runtime-specific features
- Learn async patterns
- Practice error handling
- Explore APIs
✅ Save when ready:
- Only save working code
- Verify tests pass
- Add comments for clarity
- Then deploy as function
Troubleshooting
Issue: Code doesn’t run
Symptoms:
- Click Run but nothing happens
- Or immediate error
Solutions:
- Check syntax errors (red squiggly lines)
- Ensure
handlerfunction exists - Check function signature is correct
- Verify JSON test event is valid
Issue: Unexpected results
Symptoms:
- Output doesn’t match expectations
- Logic seems wrong
Solutions:
- Add
console.log/printstatements - Check logs panel for output
- Verify test event has correct data
- Step through logic mentally
Issue: Cannot save to Functions
Symptoms:
- Button doesn’t work
- Or error occurs
Solutions:
- Ensure code is syntactically valid
- Check browser console for errors
- Try refreshing page and rewriting code
- Contact administrator if persists
Quick Reference
Playground Workflow
- Select runtime → Choose language
- Write code → Create handler function
- Enter test event → JSON payload
- Click Run → Execute function
- View results → Check output and logs
- Iterate → Modify and retest
- Save → Deploy as function
Function Template
Minimum viable function:
  export async function handler(event) {
  return {
    statusCode: 200,
    body: JSON.stringify({ message: "Hello" }),
  };
}
Next Steps
- Create a Function - Deploy your Playground code
- Manage Functions - Learn function operations
- View Logs - Debug function executions