Manage Users
This guide provides step-by-step instructions for managing user accounts through the web interface. Learn how to create new users, edit existing accounts, change roles, and delete users.
Accessing User Management
Navigate to Users Page
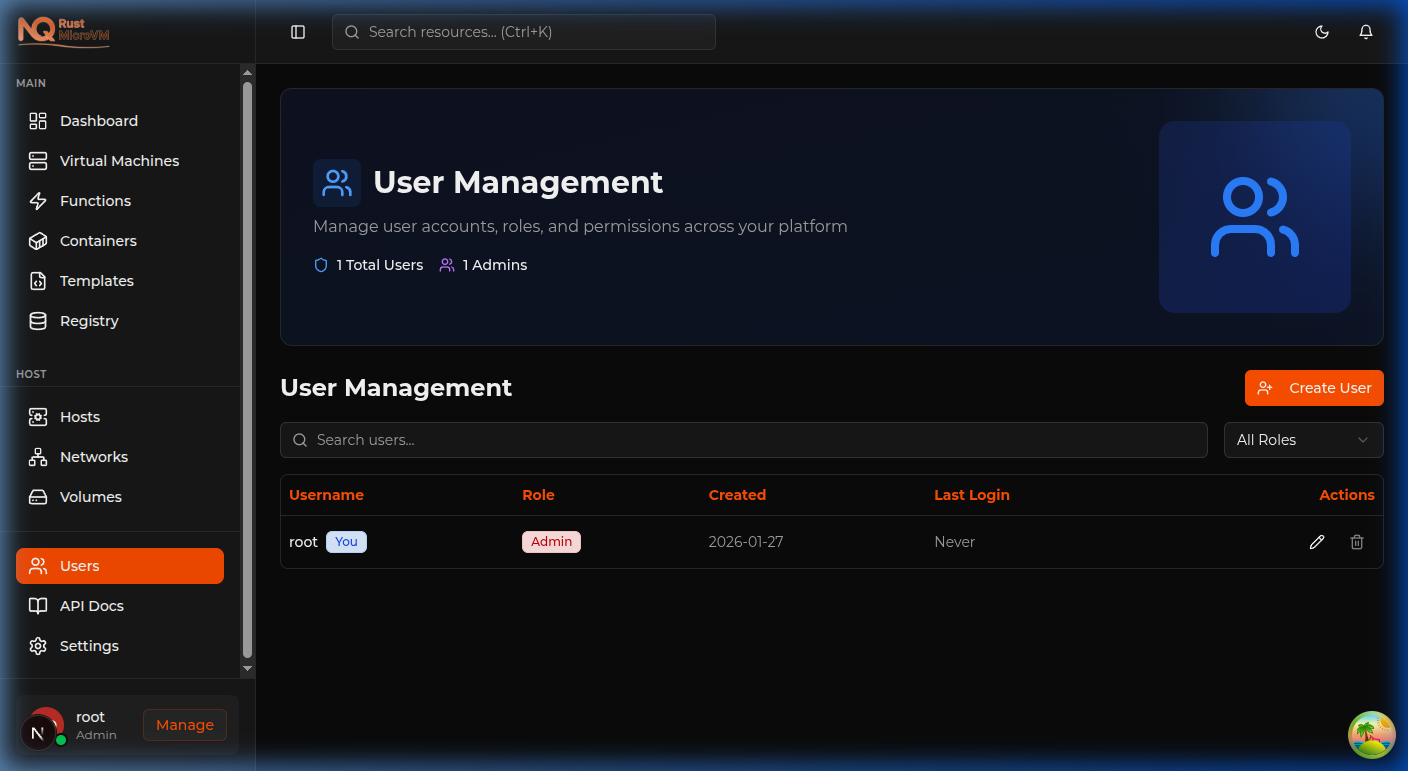
Click “Users” in the sidebar to access the User Management page.
Note: Only administrators can access the Users page. If you don’t see “Users” in the sidebar, you don’t have admin privileges.
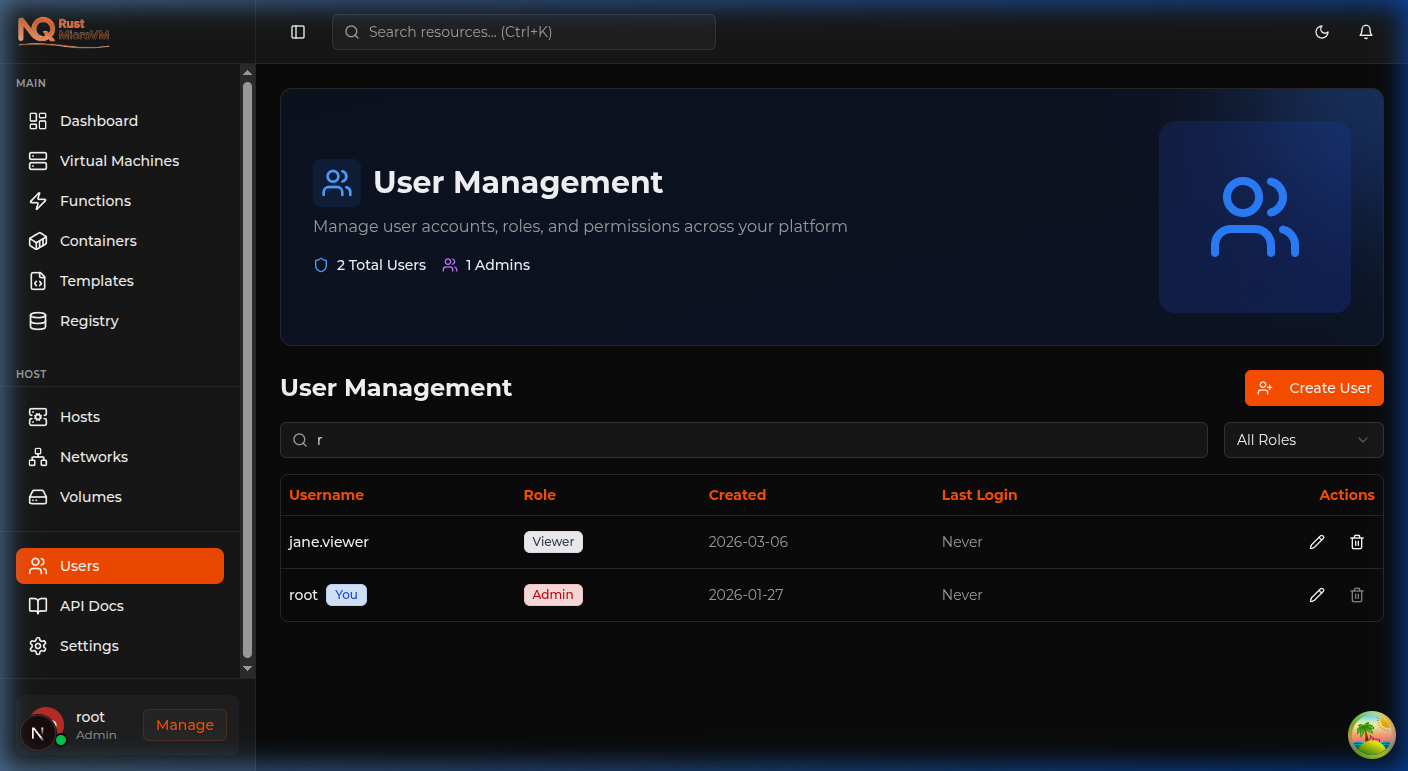
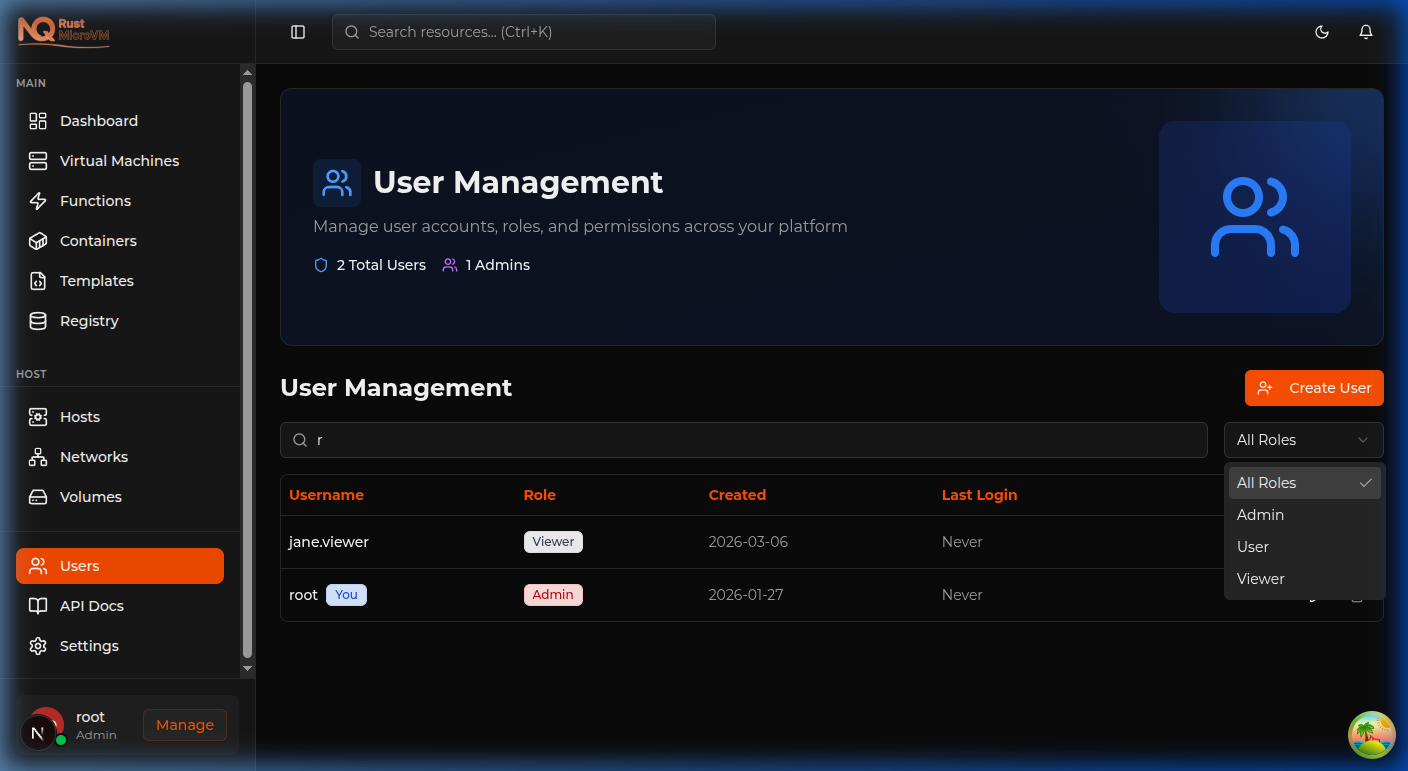
Users Page Layout
The page displays:
Header Section:
- User Management title
- Total Users count
- Number of Admins
Table Section:
- Search box for finding users
- Role filter dropdown
- User table with all accounts
- Pagination (if many users)
Creating Users
Step 1: Open Create Dialog
Click the “Create User” button at the top of the page.
The Create User dialog opens:
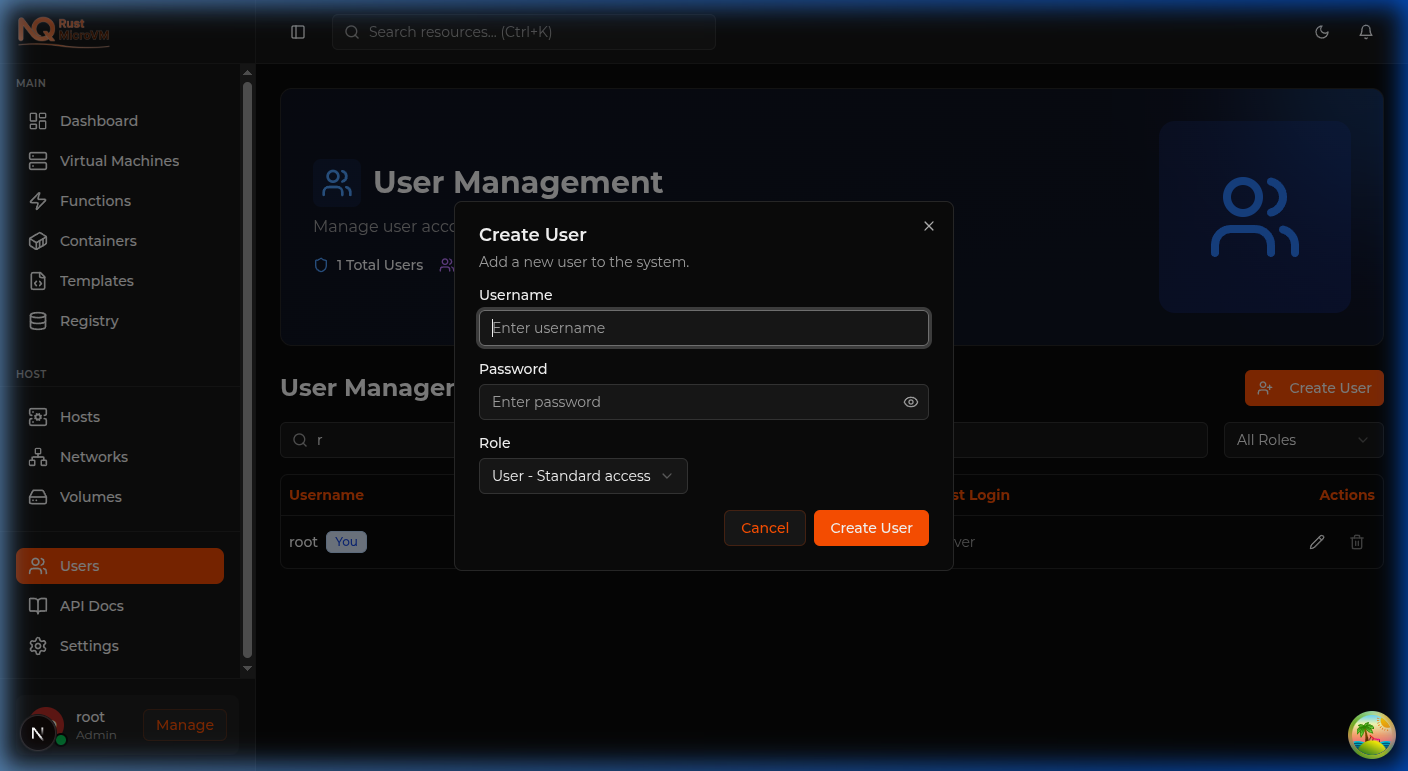
Step 2: Enter User Details
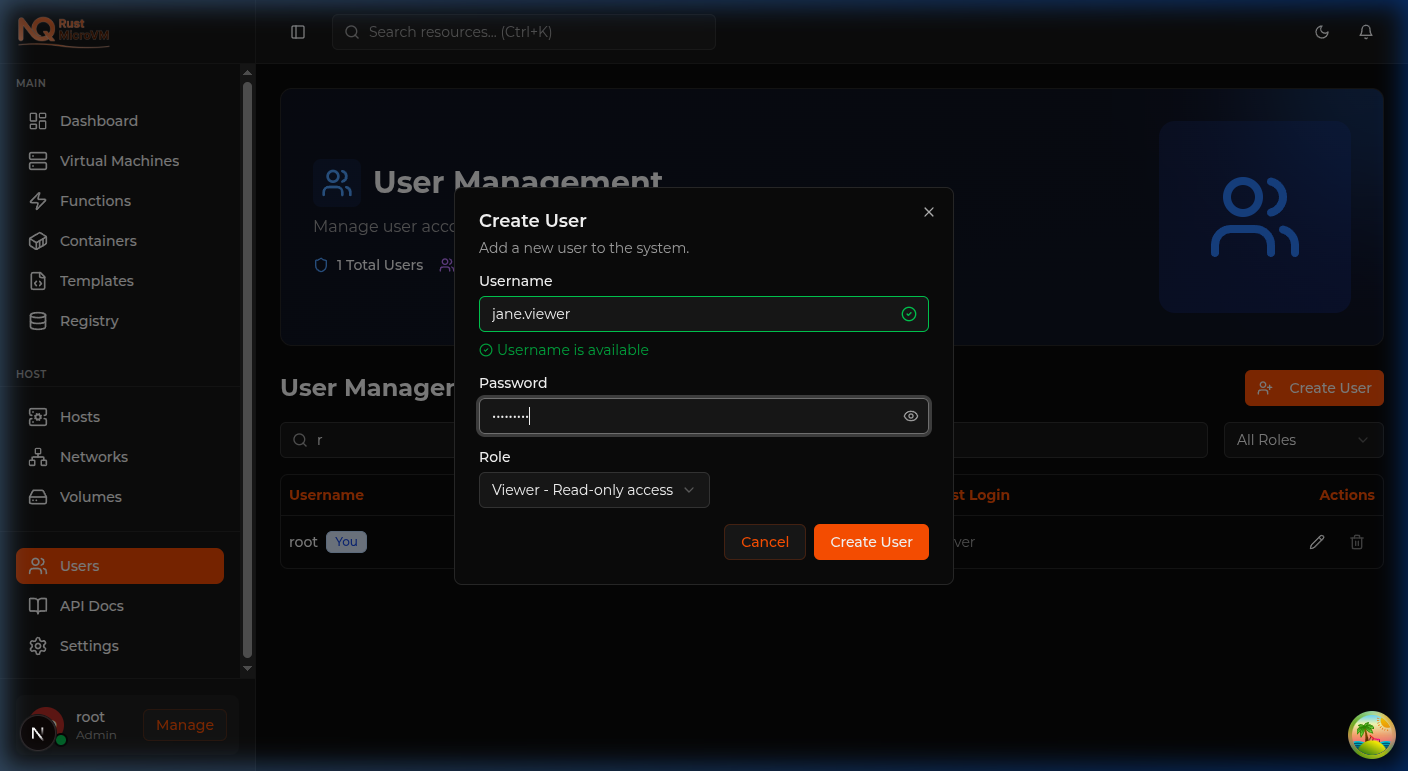
Fill in the required fields:
Username (Required):
- Must be unique
- Use lowercase letters, numbers, periods
- Example:
john.smith,admin.ops
Password (Required):
- Minimum 8 characters recommended
- Use strong password with mix of characters
- Will be hidden after creation
Role (Required):
- Admin - Full platform access
- User - Standard operational access
- Viewer - Read-only access
Step 3: Create the User
Click “Create” button to create the user.
What happens:
- Form validates the input
- Username uniqueness is checked
- User account is created
- Success notification appears
- Dialog closes automatically
- New user appears in table
Success notification:
  User Created
User john.smith has been created successfully
Step 4: Share Credentials
After creating the user:
- Note down the username
- Securely share the password with the user
- Recommend password change on first login
Security tip: Don’t send credentials via unencrypted email. Use a secure messaging channel or in-person communication.
Example: Create Developer Account
Scenario: Add a new developer to the team
Configuration:
- Username:
alice.developer - Password:
SecurePass123! - Role:
User
Steps:
- Click “Create User”
- Enter username:
alice.developer - Enter password:
SecurePass123! - Select role: “User”
- Click “Create”
Result: Alice can now log in and create/manage her own VMs.
Example: Create Admin Account
Scenario: Add a new system administrator
Configuration:
- Username:
bob.admin - Password:
AdminPass456! - Role:
Admin
Steps:
- Click “Create User”
- Enter username:
bob.admin - Enter password:
AdminPass456! - Select role: “Admin”
- Click “Create”
Result: Bob has full administrative access to the platform.
Example: Create Viewer Account
Scenario: Add a stakeholder who needs monitoring access
Configuration:
- Username:
carol.viewer - Password:
ViewerPass789! - Role:
Viewer
Steps:
- Click “Create User”
- Enter username:
carol.viewer - Enter password:
ViewerPass789! - Select role: “Viewer”
- Click “Create”
Result: Carol can view resources but cannot modify anything.
Editing Users
Step 1: Find the User

Use the search box or scroll through the table to find the user you want to edit.
Search tips:
- Type part of username to filter
- Use role filter to narrow results
- Current user shows “You” badge
Step 2: Open Edit Dialog
Click the pencil icon in the Actions column for the user.
The Edit User dialog opens:
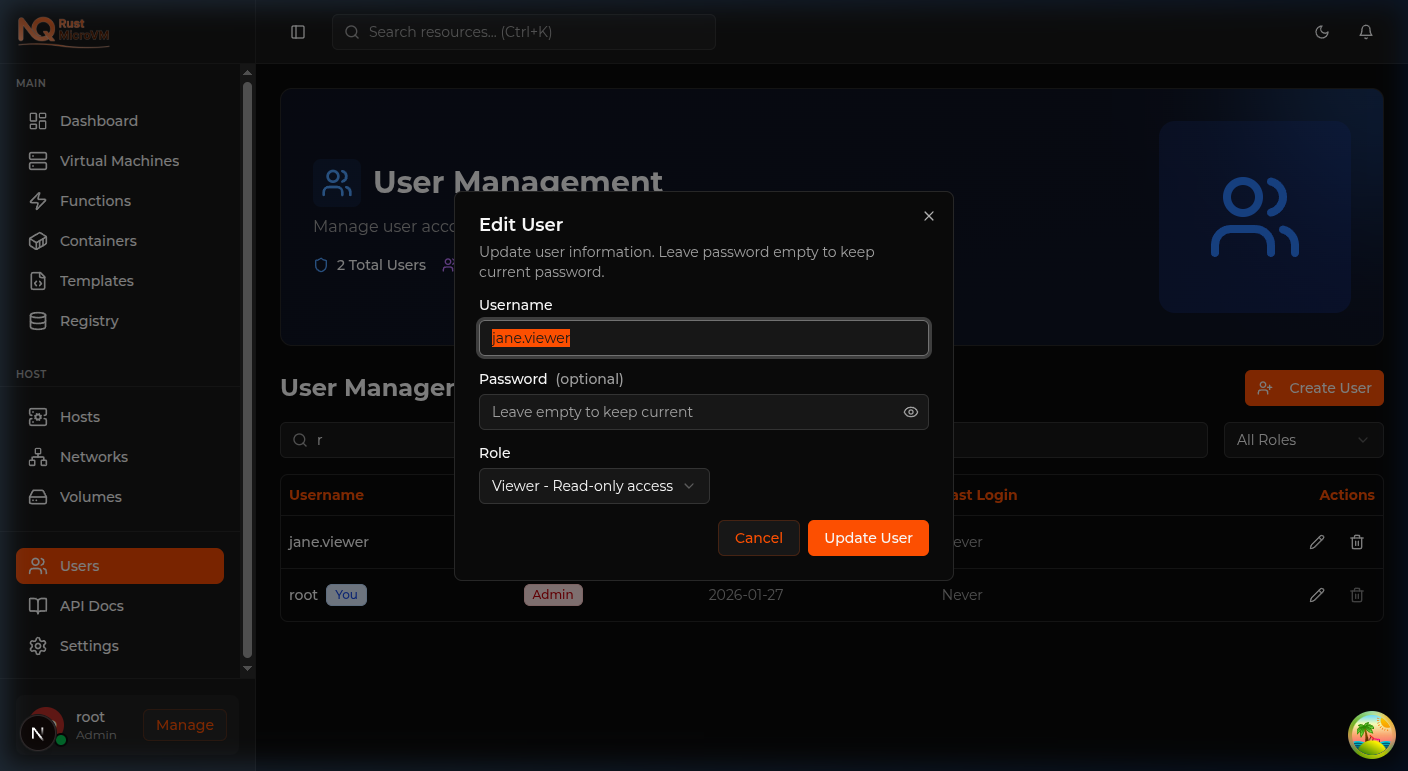
Step 3: Update User Details
You can update:
Username:
- Change the user’s login name
- Must still be unique
Password:
- Leave blank to keep current password
- Enter new password to change it
Role:
- Change access level
- Takes effect immediately after save
Step 4: Save Changes
Click “Save” to apply the changes.
Success notification:
  User Updated
User has been updated successfully
Example: Change User Role
Scenario: Promote a user to admin
Steps:
- Find user in table
- Click Edit (pencil icon)
- Change Role from “User” to “Admin”
- Click Save
Result: User now has admin privileges.
Example: Reset Password
Scenario: User forgot their password
Steps:
- Find user in table
- Click Edit (pencil icon)
- Enter new password in Password field
- Click Save
- Communicate new password to user
Result: User can log in with new password.
Example: Change Username
Scenario: User changed their name
Steps:
- Find user in table
- Click Edit (pencil icon)
- Update Username field
- Click Save
- Inform user of their new username
Result: User must log in with new username.
Deleting Users
Step 1: Find the User
Locate the user you want to delete in the table.
Important checks:
- Cannot delete yourself (delete button disabled)
- Ensure user is no longer needed
- Consider transferring resources first
Step 2: Click Delete Button

Click the trash icon in the Actions column.
A confirmation dialog appears:
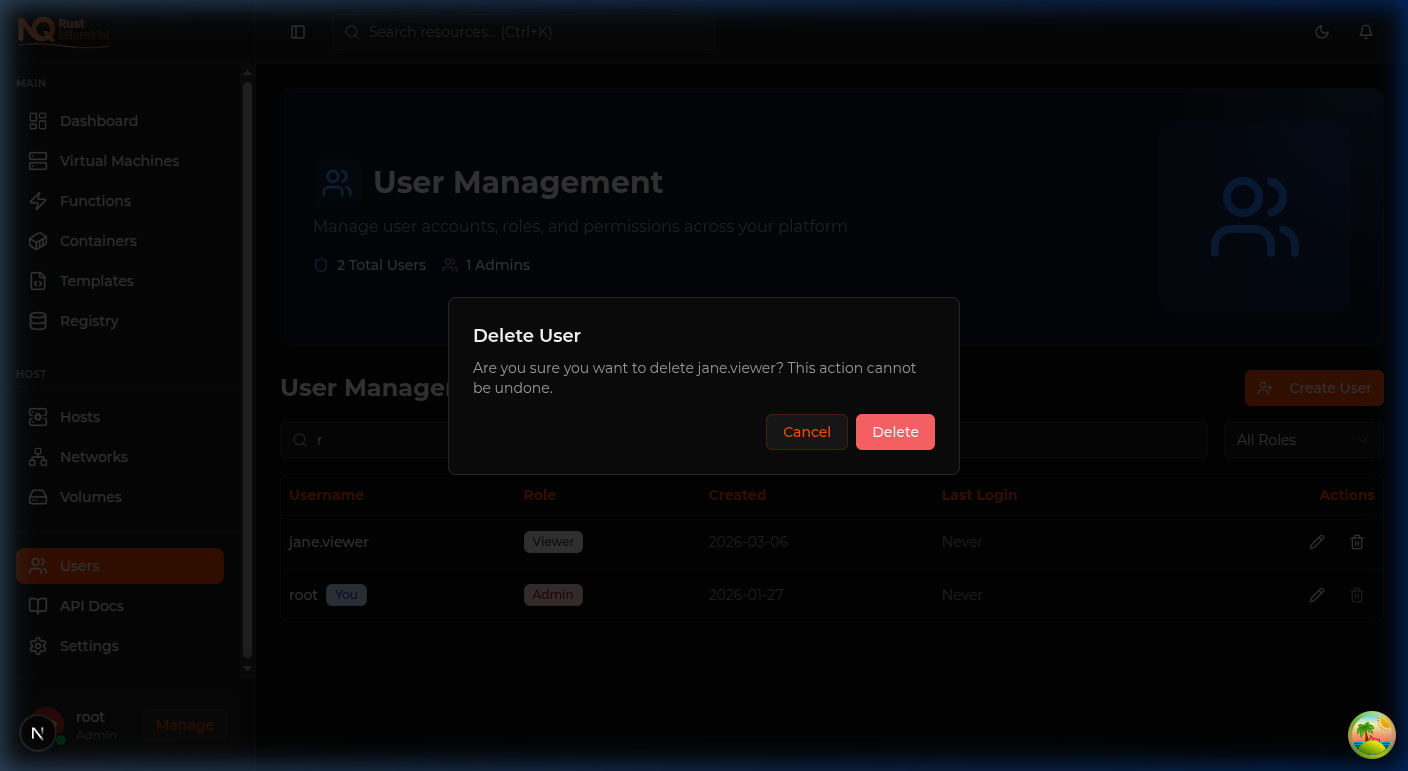
Step 3: Confirm Deletion
Review the confirmation message:
  Delete User?

Are you sure you want to delete john.smith?
This action cannot be undone.

[Cancel]  [Delete]
Click “Delete” to confirm.
Step 4: User Removed
Success notification:
  User Deleted
User has been deleted successfully
The user disappears from the table and can no longer log in.
Cannot Delete Yourself
The delete button is disabled for your own account.
Why: For security, you cannot delete your own admin account. This prevents accidental lockout.
Solution: Ask another admin to delete your account if needed.
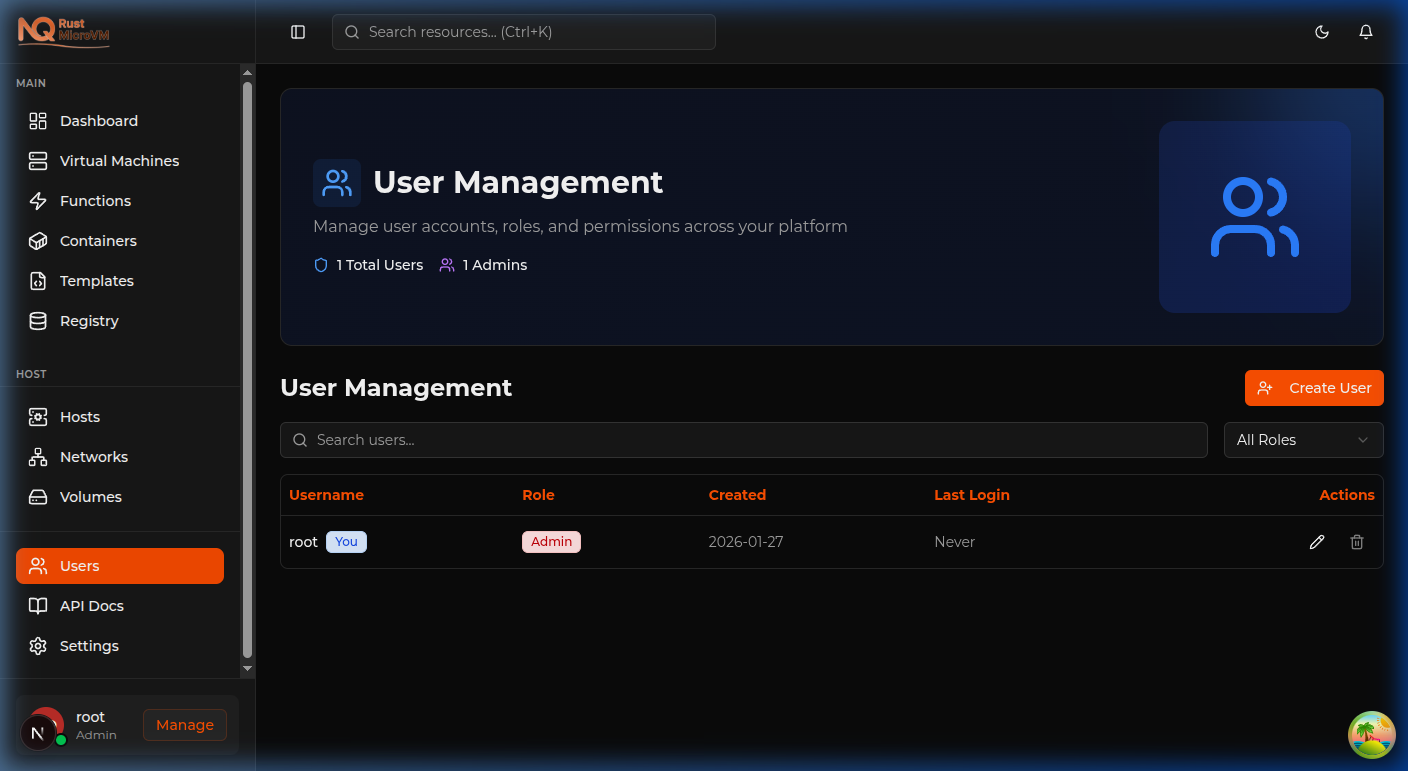
Searching and Filtering
Search by Username
Type in the search box to filter users:
Examples:
- Type
johnto findjohn.smith,john.doe - Type
adminto find users with “admin” in username - Search is case-insensitive
Tip: Search updates instantly as you type.
Filter by Role
Use the role dropdown to filter:
Options:
- All Roles - Show all users
- Admin - Show only admins
- User - Show only standard users
- Viewer - Show only viewers
Use cases:
- Review all admin accounts
- Find users who need role adjustment
- Audit specific role access
Combined Filtering
You can combine search and role filter:
Example: Find all admin accounts with “john”
- Select “Admin” in role filter
- Type “john” in search box
- Results show matching admin accounts
User Table Information
Understanding the Table
Columns:
| Column | Description |
|---|---|
| Username | User’s login name |
| Role | Access level badge |
| Created | Account creation date |
| Last Login | Most recent login time |
| Actions | Edit and Delete buttons |
Role Badges
Role badges are color-coded for quick identification:
| Role | Color | Meaning |
|---|---|---|
| Admin | Red | Full access |
| User | Blue | Standard access |
| Viewer | Gray | Read-only |
“You” Badge
Your own account shows a “You” badge next to the username.
Purpose:
- Easily identify your account
- Reminder that you can’t delete yourself
- Quick reference for current login
Last Login Column
Shows when the user last logged in:
Formats:
- “Never” - User has never logged in
- “2 hours ago” - Recent login (relative time)
- “Jan 8, 2025” - Older login (date format)
Use cases:
- Identify inactive accounts
- Verify new users have logged in
- Security auditing
Pagination
Navigating Multiple Pages
When you have many users, pagination appears:
Controls:
- Previous - Go to previous page
- Page numbers - Jump to specific page
- Next - Go to next page
Behavior:
- 10 users per page by default
- Filtering resets to page 1
- Current page highlighted
Bulk Operations
Currently Available
Individual operations only:
- Create one user at a time
- Edit one user at a time
- Delete one user at a time
Tips for Multiple Users
For adding many users:
- Prepare user list in advance
- Create users one by one
- Use consistent naming convention
- Document new accounts externally
Common Tasks
Task: Onboard New Team
Scenario: Add 3 new developers
Steps:
- Go to Users page
- Create first user:
- Username:
dev1.name - Role: User
- Username:
- Create second user:
- Username:
dev2.name - Role: User
- Username:
- Create third user:
- Username:
dev3.name - Role: User
- Username:
- Share credentials securely
Task: Audit Admin Access
Scenario: Review who has admin privileges
Steps:
- Go to Users page
- Select “Admin” in role filter
- Review the list of admins
- Check last login dates
- Remove unnecessary admin access
Task: Offboard Employee
Scenario: Employee leaving the company
Steps:
- Go to Users page
- Search for the user
- Note any resources they own
- Transfer/delete their resources if needed
- Click Delete button
- Confirm deletion
Task: Password Reset
Scenario: User locked out of account
Steps:
- Go to Users page
- Find the user
- Click Edit button
- Enter new password
- Save changes
- Send new password to user securely
Task: Role Change
Scenario: Promote user after training period
Steps:
- Go to Users page
- Find the user (currently Viewer)
- Click Edit button
- Change role to “User”
- Save changes
- Inform user of new capabilities
Troubleshooting
Username Already Exists
Symptoms:
- Create user fails
- Error: “Username already exists”
Solution:
- Search for existing user with that name
- Choose a different username
- Consider adding numbers:
john.smith2
Cannot Edit User
Symptoms:
- Edit doesn’t save
- Error notification appears
Possible causes:
- Username conflict with existing user
- Server connection issue
- Invalid data entered
Solution:
- Try a unique username
- Refresh page and try again
- Check all fields are valid
Delete Button Disabled
Symptoms:
- Cannot click delete button
- Button appears grayed out
Possible causes:
- Trying to delete yourself
Solution:
- Ask another admin to delete the account
- This is a security feature, not a bug
User Not Appearing
Symptoms:
- Created user not in table
- Search returns no results
Possible causes:
- Page not refreshed
- Role filter hiding user
- Creation actually failed
Solution:
- Refresh the page
- Set role filter to “All Roles”
- Clear search box
- Check for success notification
Changes Not Reflected
Symptoms:
- Edit saved but old values shown
- Role appears unchanged
Possible causes:
- Browser cache
- Page not refreshed
Solution:
- Refresh the page (F5)
- Clear browser cache
- Log out and log back in
Best Practices
1. Consistent Naming
Use a standard format:
  firstname.lastname
Examples:
- john.smith
- alice.johnson
- bob.admin
Benefits:
- Professional appearance
- Easy to identify users
- Simple to remember
2. Role Discipline
Follow least privilege principle:
- Start new users as Viewer
- Promote to User after verification
- Admin only for administrators
- Regular role reviews
3. Password Management
Secure password practices:
- Generate strong passwords
- Don’t reuse passwords
- Communicate securely
- Encourage password changes
4. Documentation
Keep records:
- Who was added and when
- Role assignments and reasons
- Departure dates for offboarded users
- Access reviews completed
5. Regular Audits
Periodic reviews:
- Monthly: Check for inactive users
- Quarterly: Review role assignments
- Annually: Full access audit
Quick Reference
User Management Actions
| Action | Steps | Notes |
|---|---|---|
| Create User | Create User button → Fill form → Create | Admin only |
| Edit User | Edit button → Update fields → Save | Admin only |
| Delete User | Delete button → Confirm | Cannot delete self |
| Search | Type in search box | Instant filtering |
| Filter Role | Use role dropdown | Combine with search |
Keyboard Shortcuts
| Action | Shortcut |
|---|---|
| Focus search | Click search box |
| Submit form | Enter |
| Cancel dialog | Esc |
| Refresh page | F5 |
Next Steps
- Users Overview - Learn about user roles and access control
- VMs - Create and manage virtual machines
- Networks - Configure network settings
- Volumes - Manage storage volumes