Create a VM
This guide walks you through creating a virtual machine using the web interface.
Prerequisites
Before creating a VM, ensure:
- ✅ You have access to the NQRust-MicroVM dashboard
- ✅ At least one kernel image exists in the Image Registry
- ✅ At least one rootfs image exists in the Image Registry
- ✅ Sufficient resources are available on the host
Step 1: Open VM Creation Wizard
- Click Virtual Machines in the left sidebar
- Click the Create VM button in the top-right corner
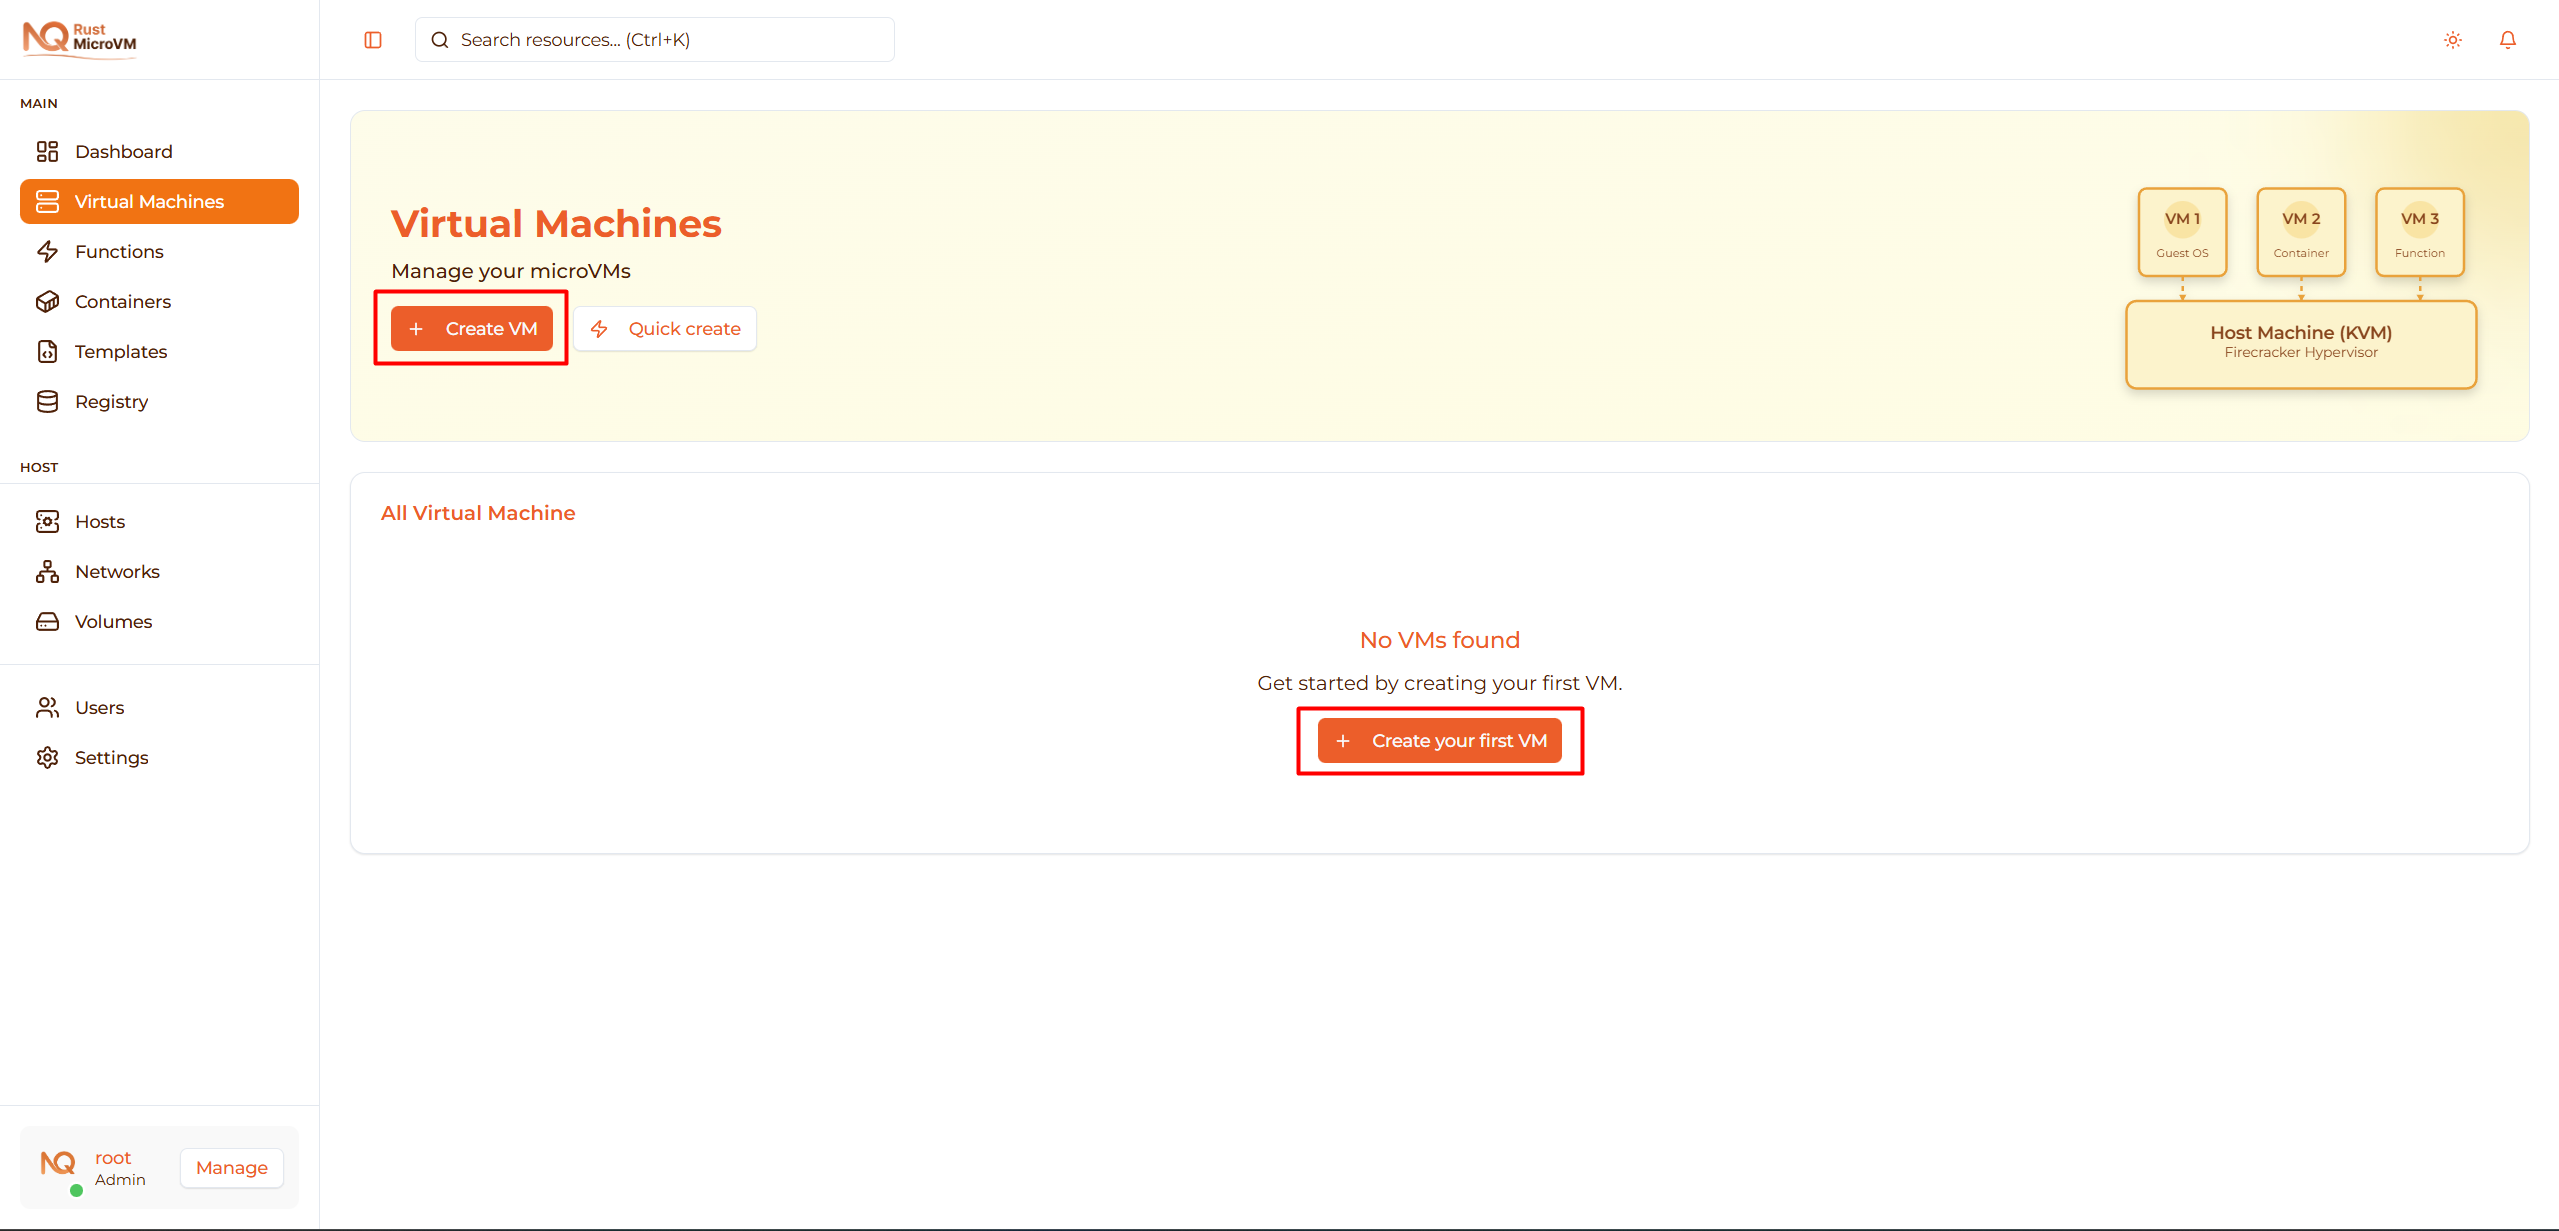
The VM creation wizard will open with 6 steps.
Step 2: Basic Information
Enter basic details about your VM:
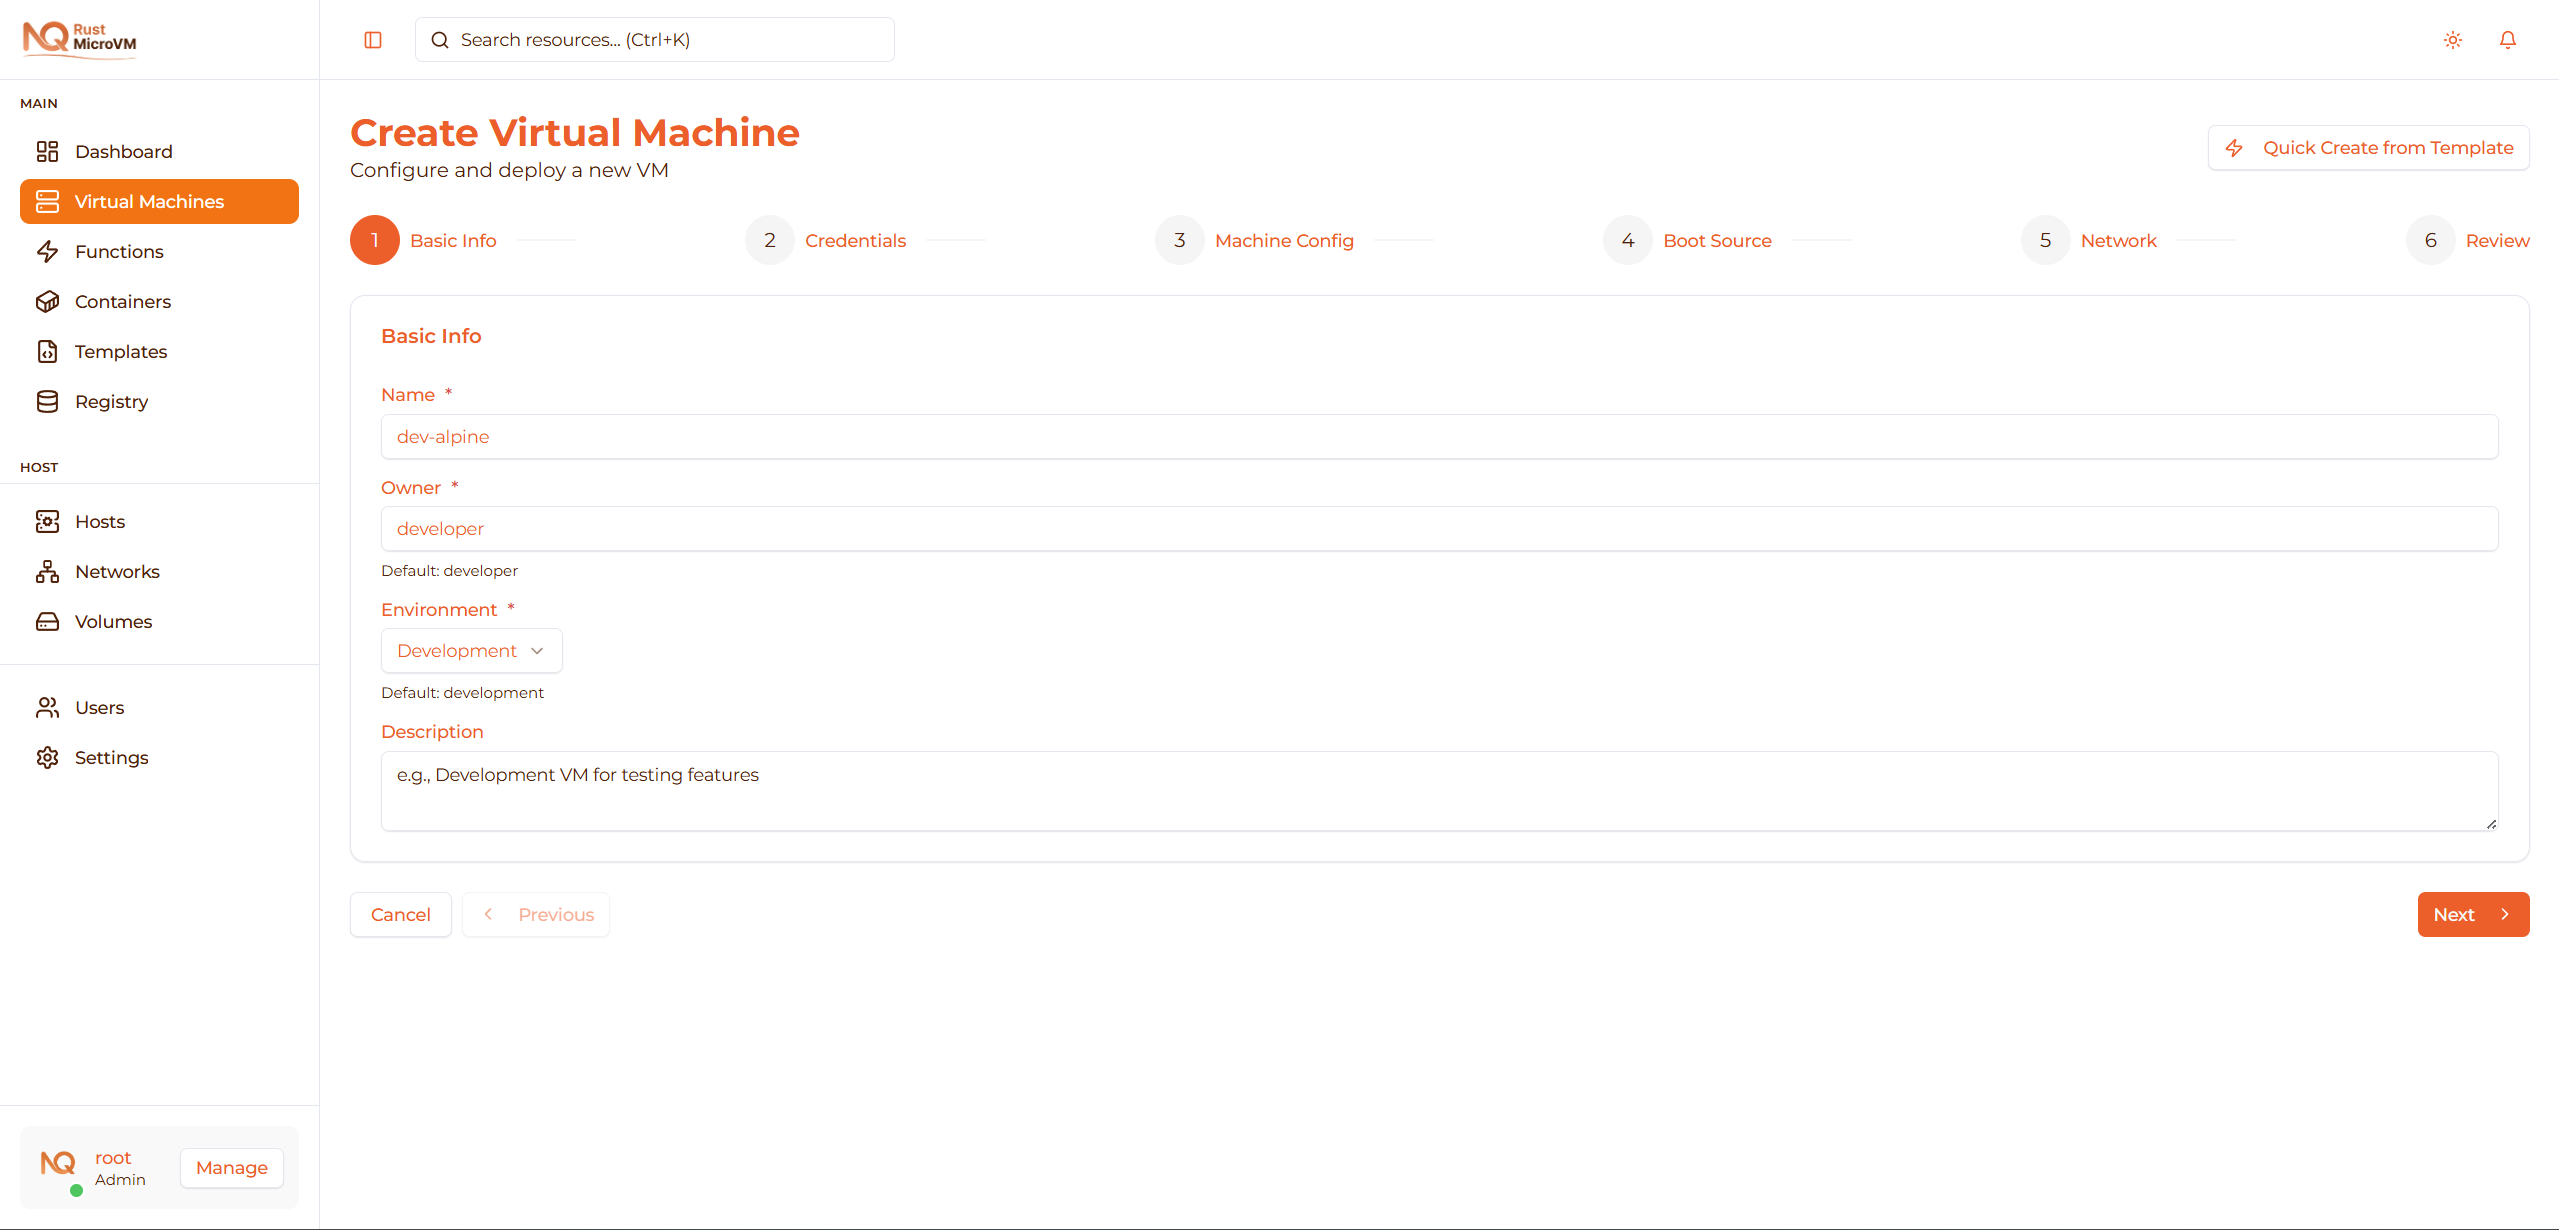
Name (Required)
Choose a unique, descriptive name:
- Must be between 1-50 characters
- Examples:
web-server-01,dev-ubuntu,test-environment
Tip: Use meaningful names that indicate the VM’s purpose.
Owner (Required)
Enter the owner name:
- Default:
developer - Maximum 32 characters
- Example:
developer,alice,backend-team
This field identifies who owns or manages this VM.
Environment (Required)
Select the environment type from dropdown:
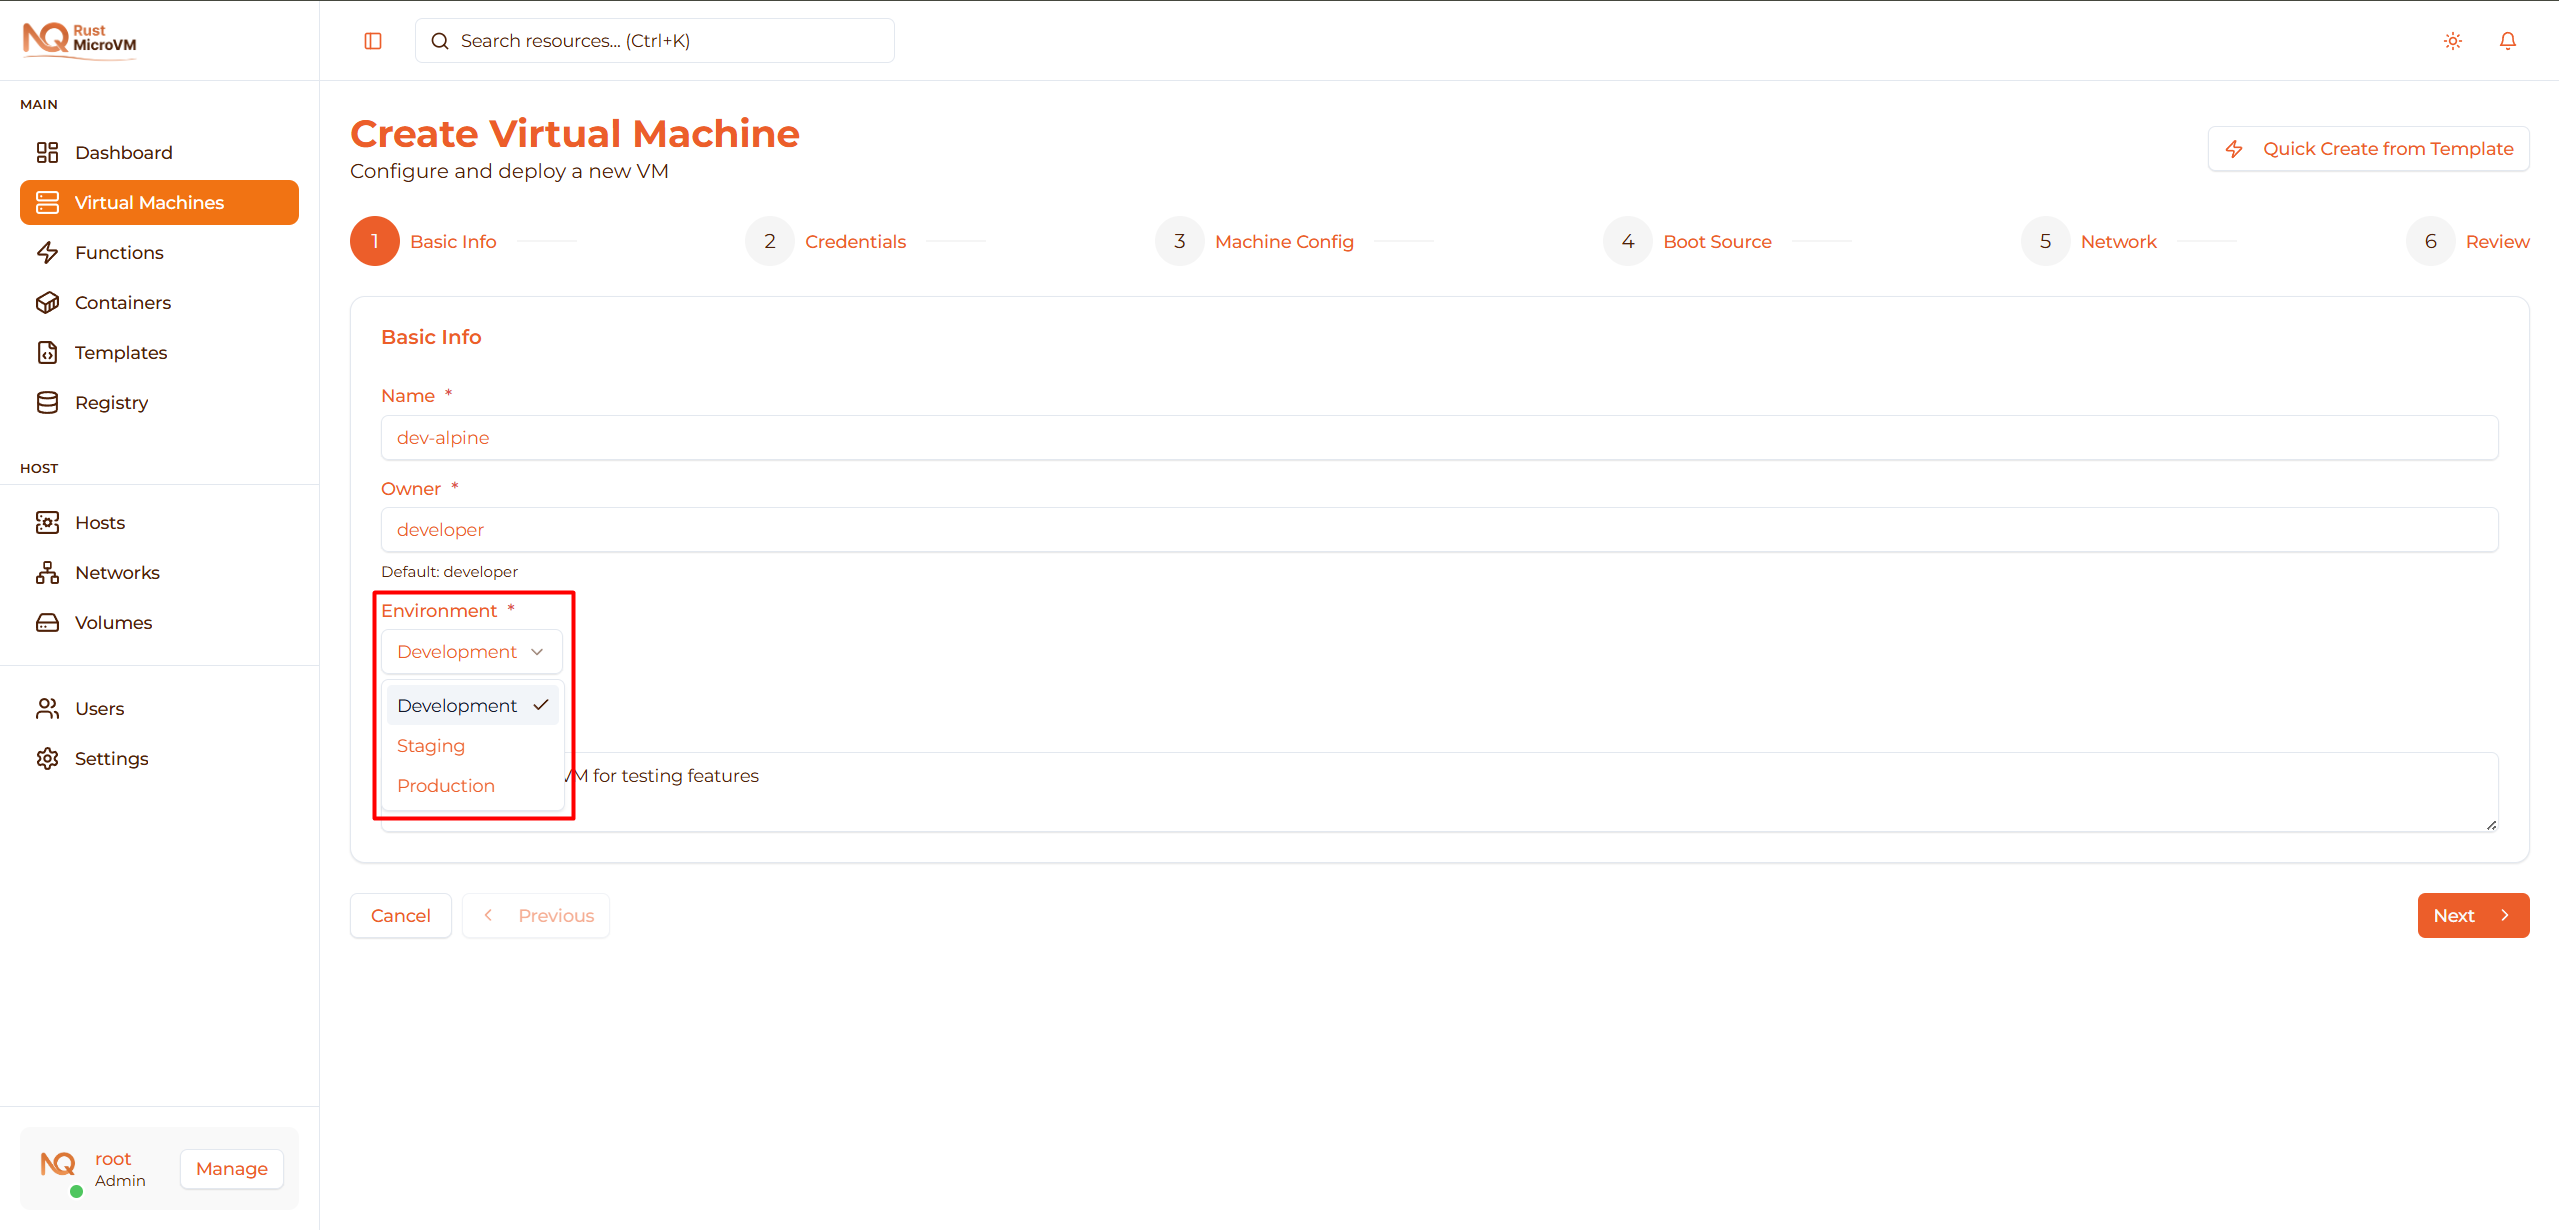
- Development - For testing and development work
- Staging - Pre-production testing environment
- Production - Live production workloads
Default: Development
Description (Optional)
Add notes about this VM (maximum 200 characters):
Ubuntu 22.04 development environment for backend API testing
Tip: Include project name, team, or special configuration notes.
Click Next to proceed.
Step 3: Credentials
Set login credentials for your VM:
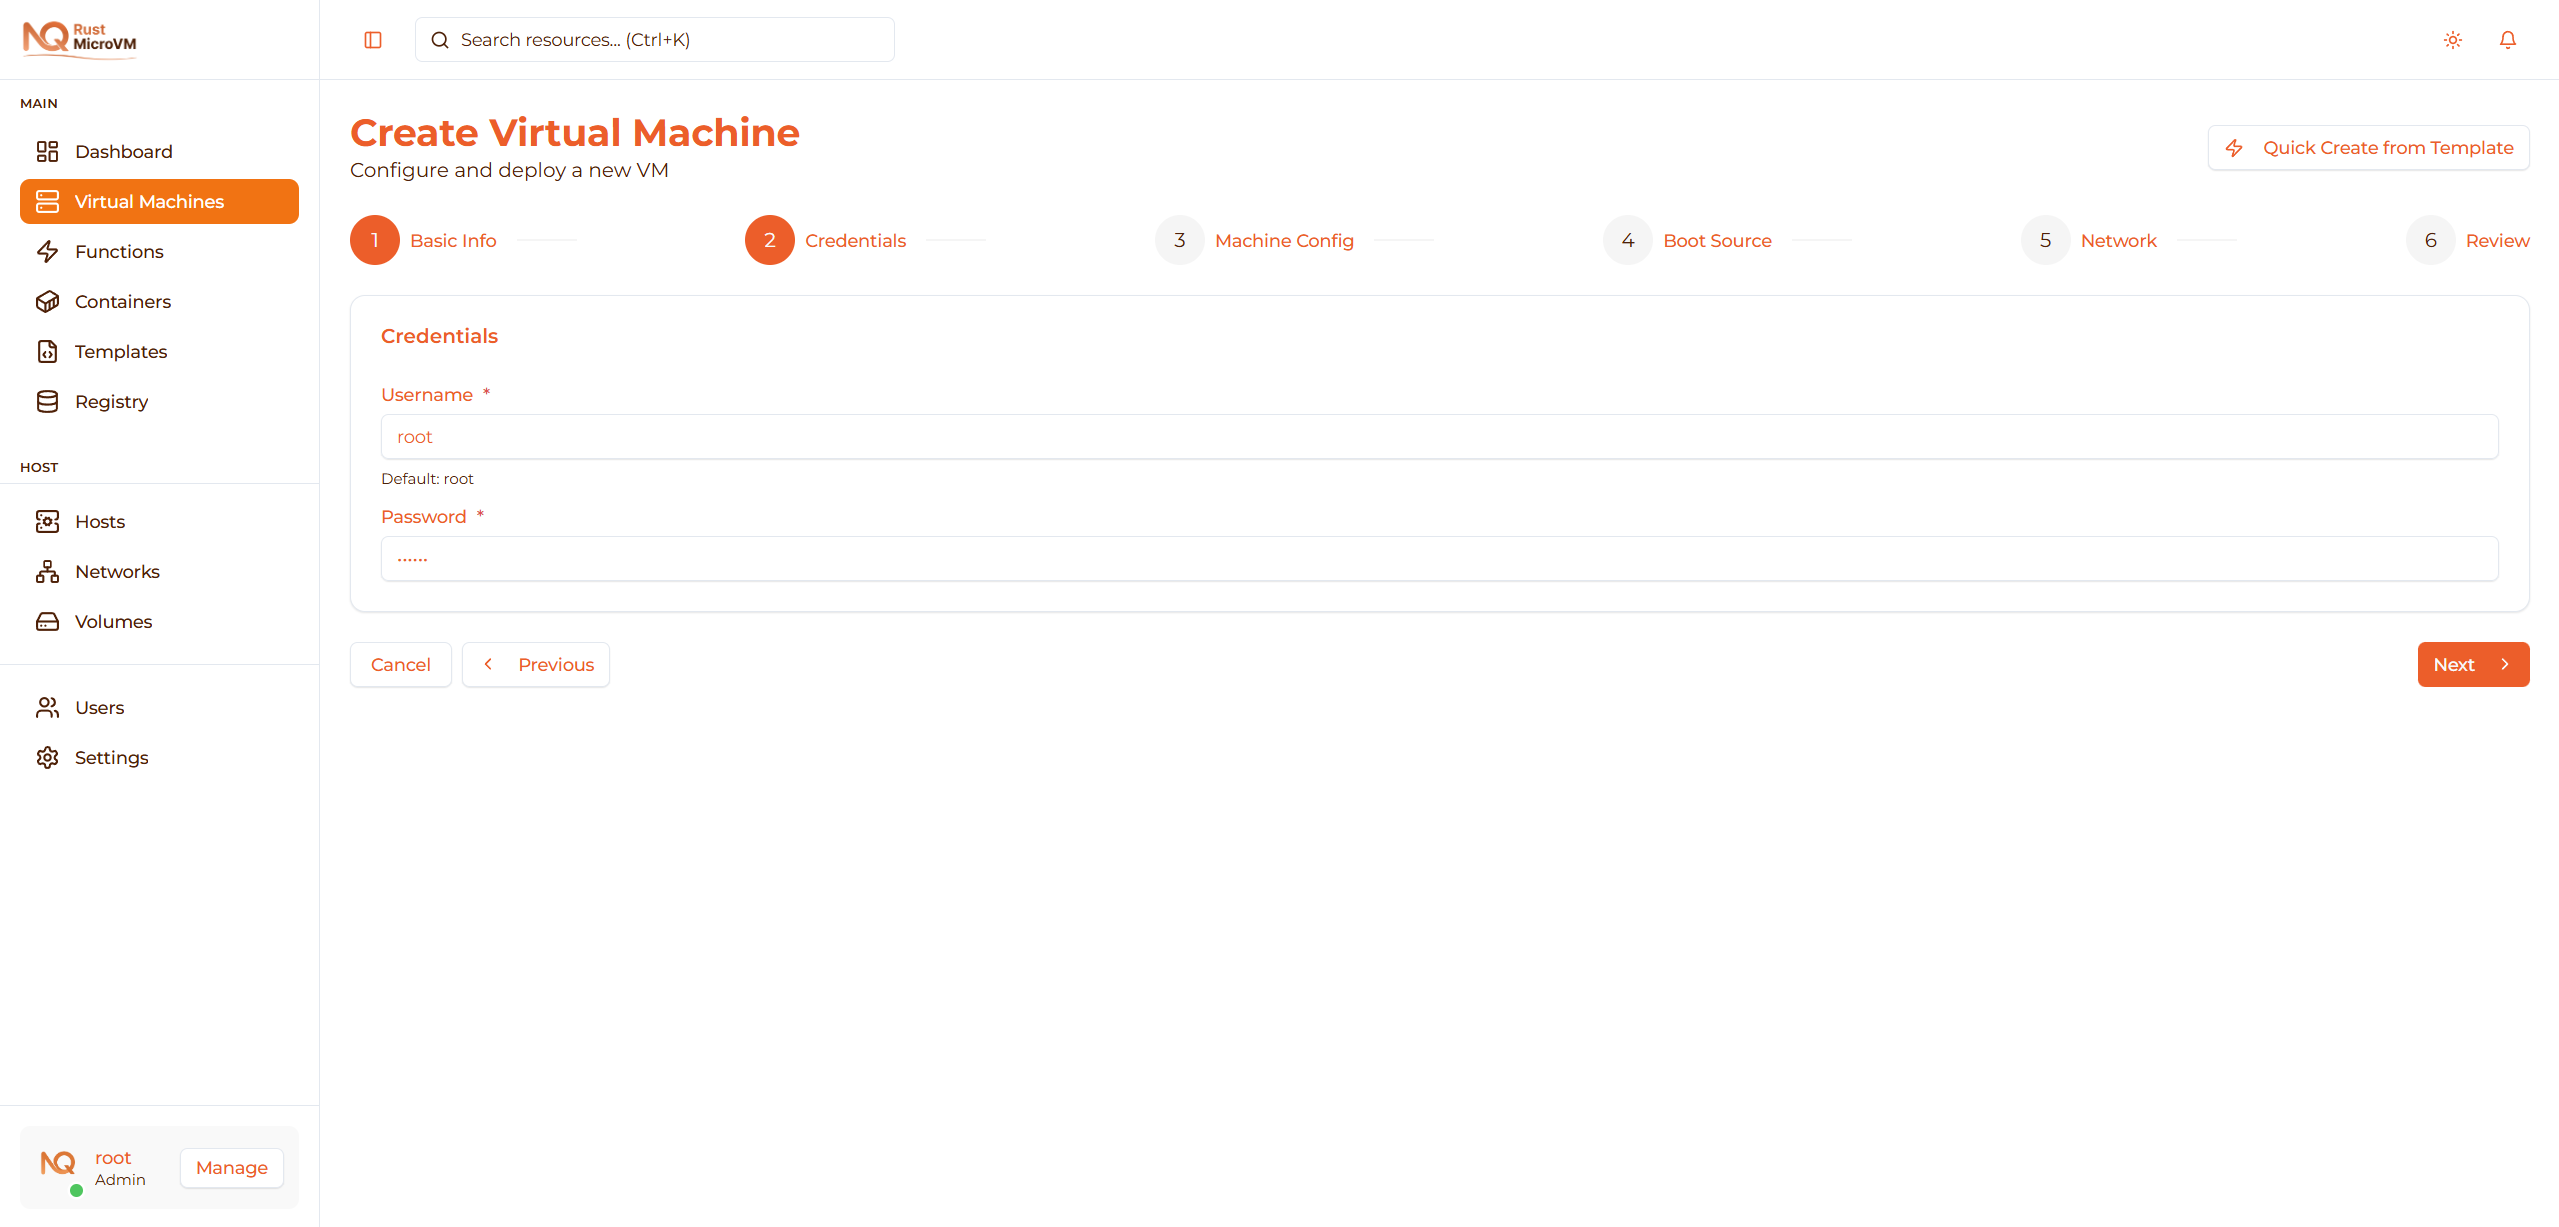
Username (Required)
Enter the username for VM access:
- Default:
root - Maximum 32 characters
- Common choices:
root,admin,ubuntu
Note: This will be your login username for console and SSH access.
Password (Required)
Set a secure password:
- Minimum 1 character (128 characters maximum)
- Recommendation: Use strong password with:
- Mix of uppercase and lowercase letters
- Numbers and special characters
- At least 12 characters for production VMs
Important: You’ll use these credentials to login via web console or SSH.
Security Tip: For production environments, disable password authentication and use SSH keys after initial setup.
Click Next to continue.
Step 4: Machine Configuration
Configure CPU and memory resources for your VM:
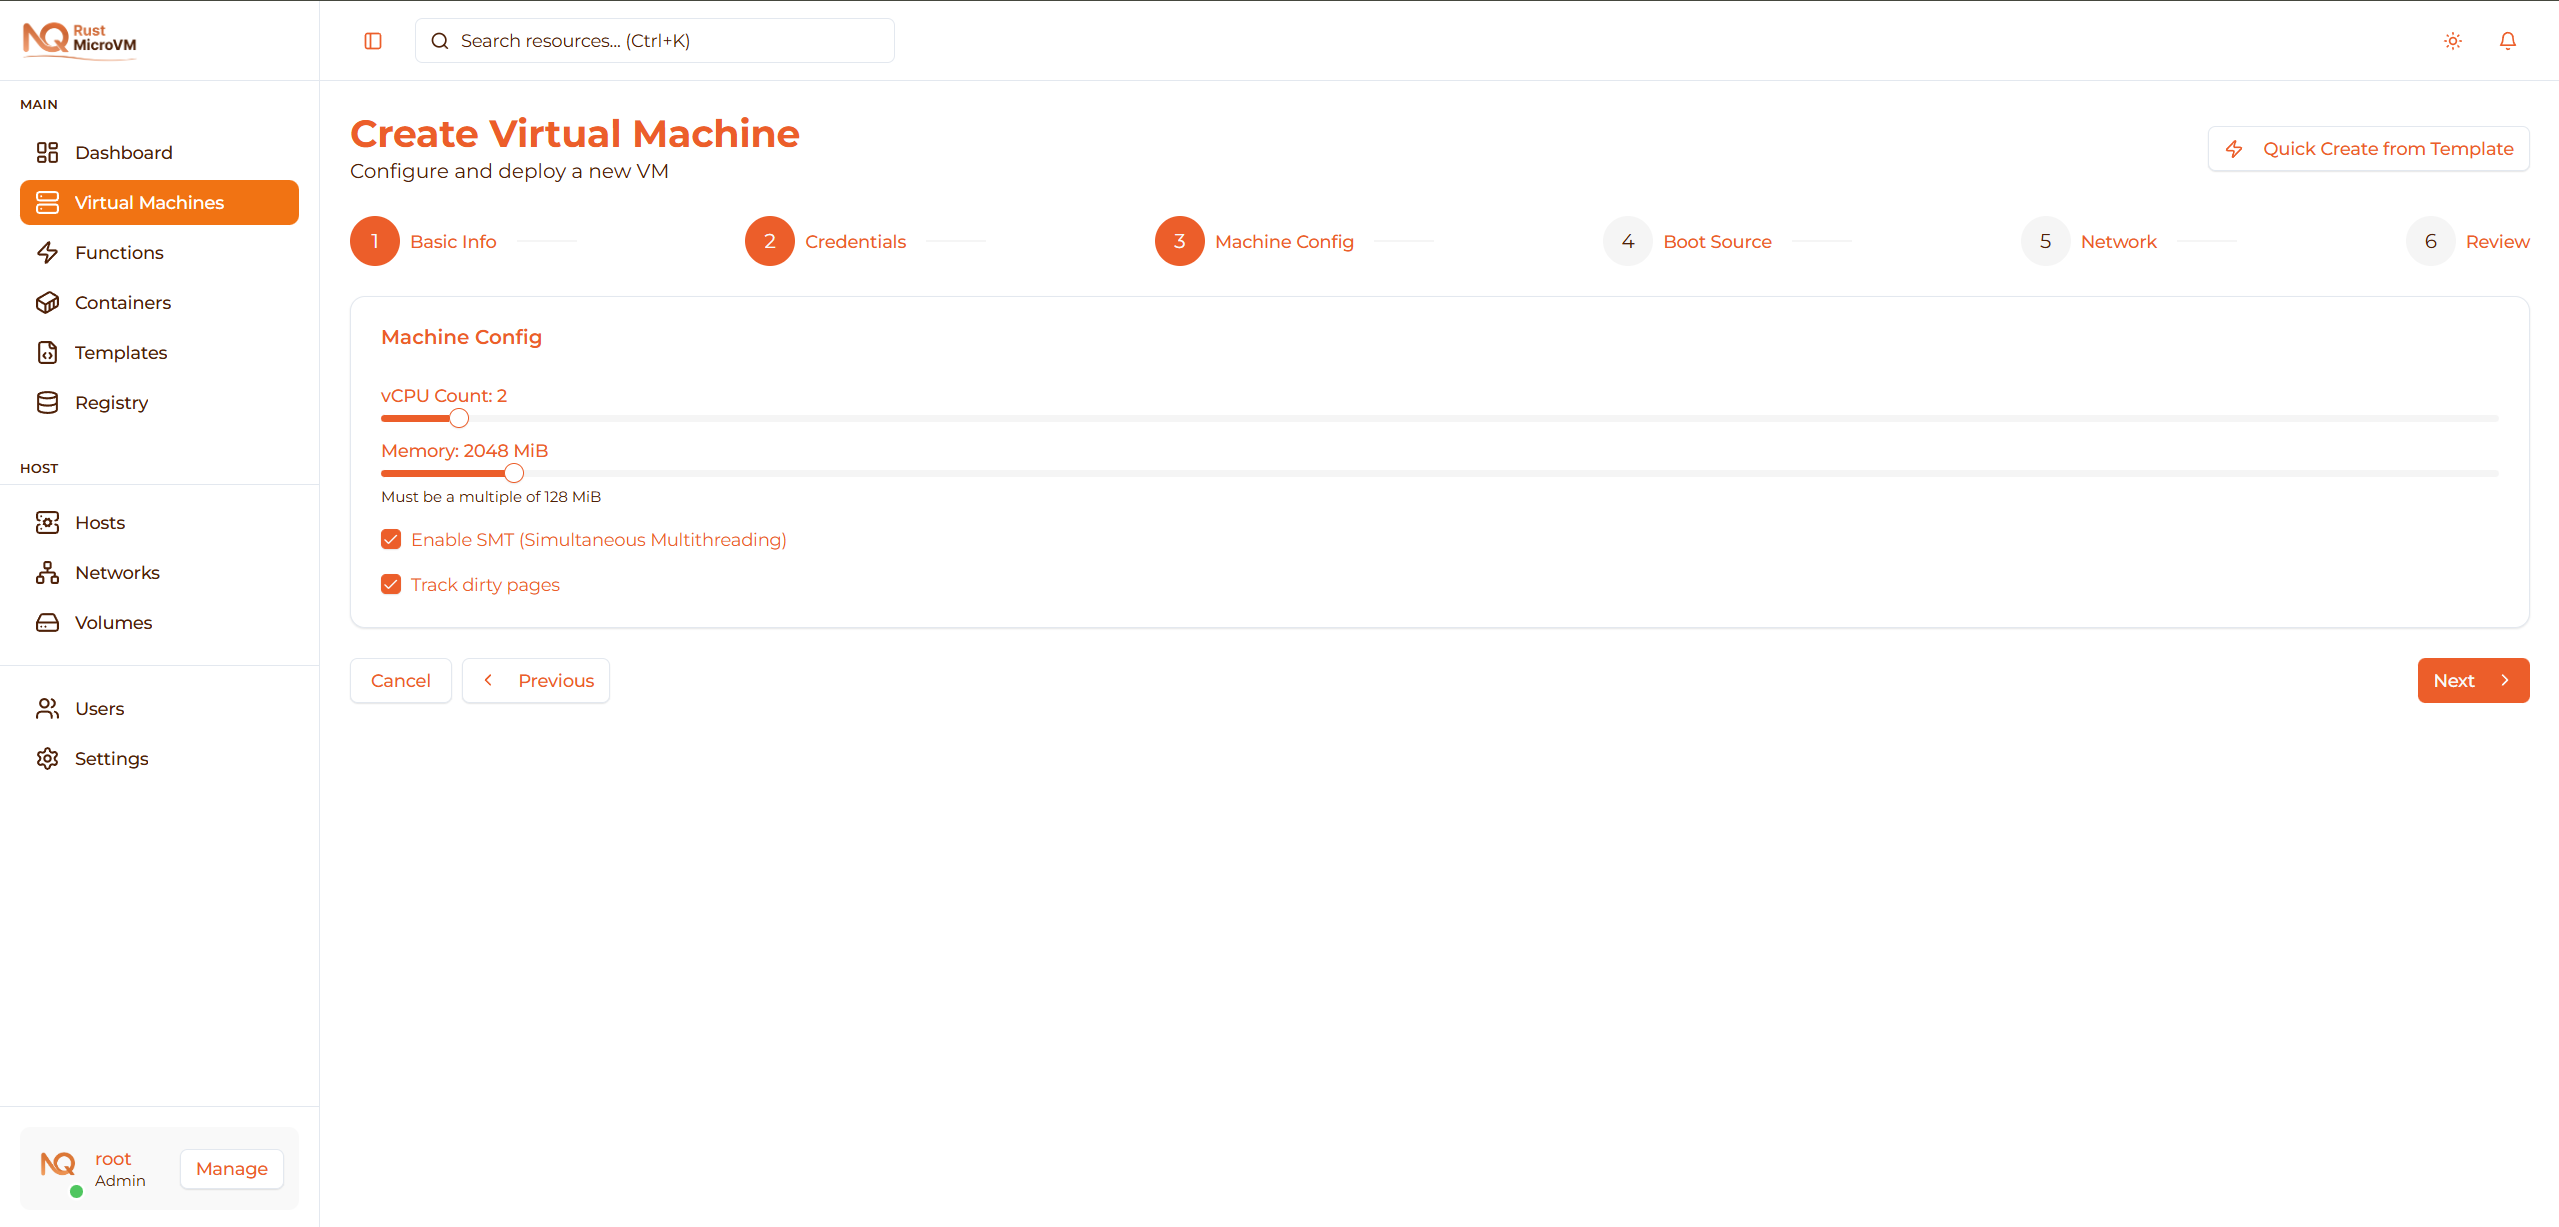
vCPU Count
Use the slider to select virtual CPU count (1-32):
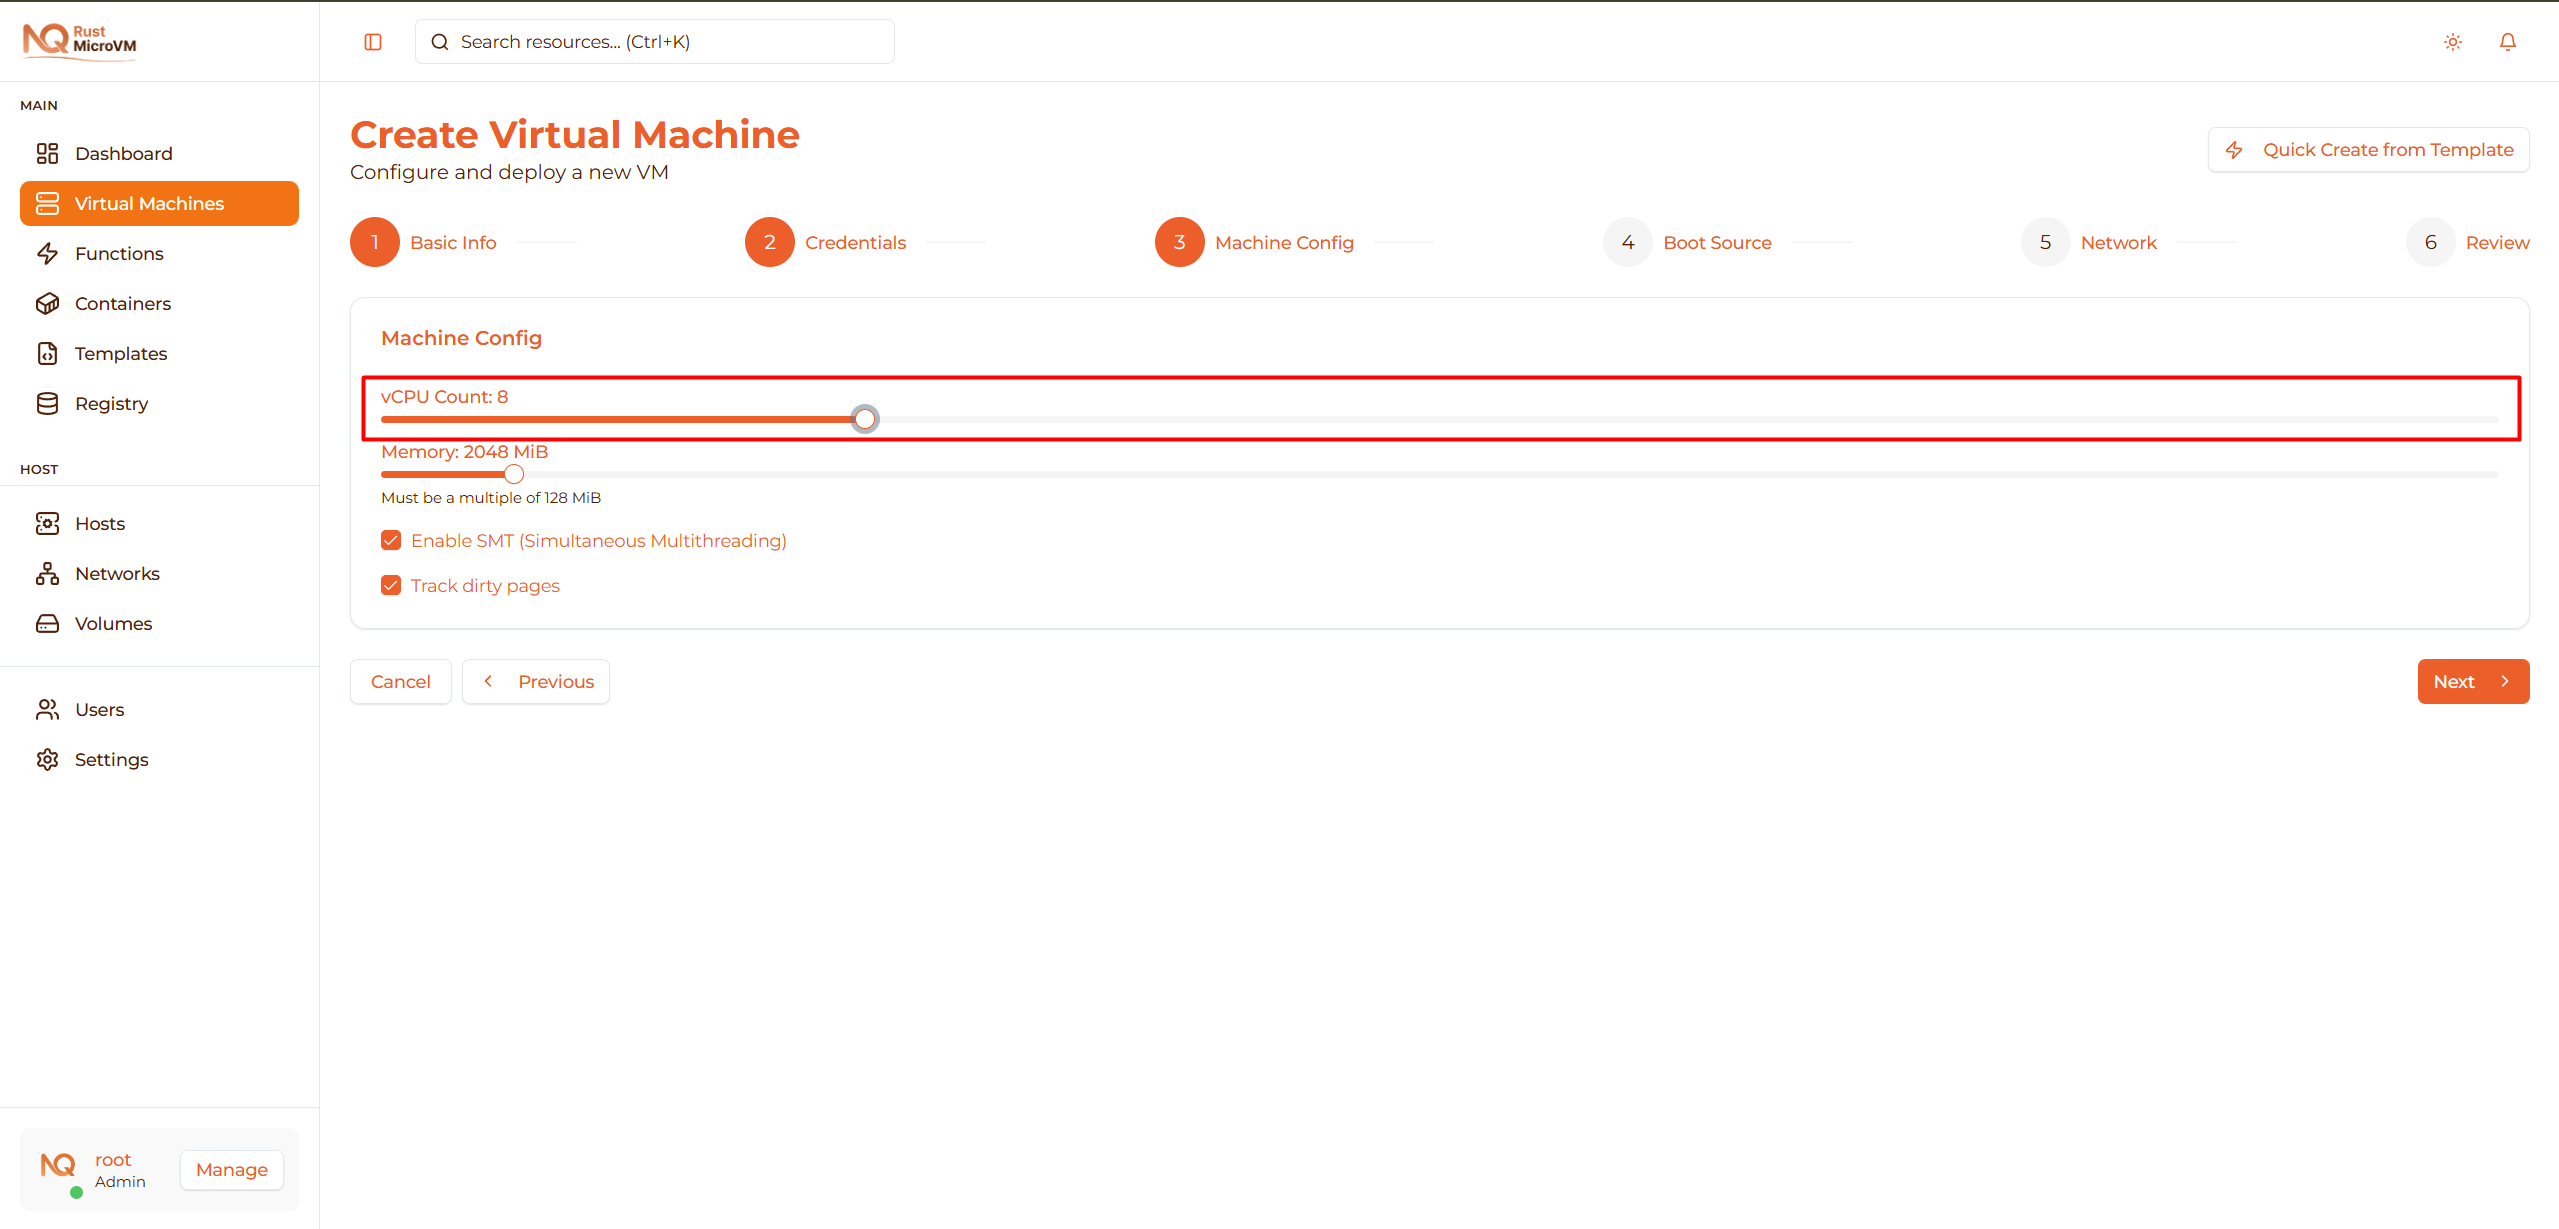
| vCPU | Best For | Typical RAM |
|---|---|---|
| 1 | Testing, lightweight services | 512 MiB - 1 GiB |
| 2 | Development, small apps | 1 - 2 GiB |
| 4 | Web servers, medium workloads | 2 - 8 GiB |
| 8+ | Databases, heavy processing | 8+ GiB |
Default: 2 vCPU (or from your preferences)
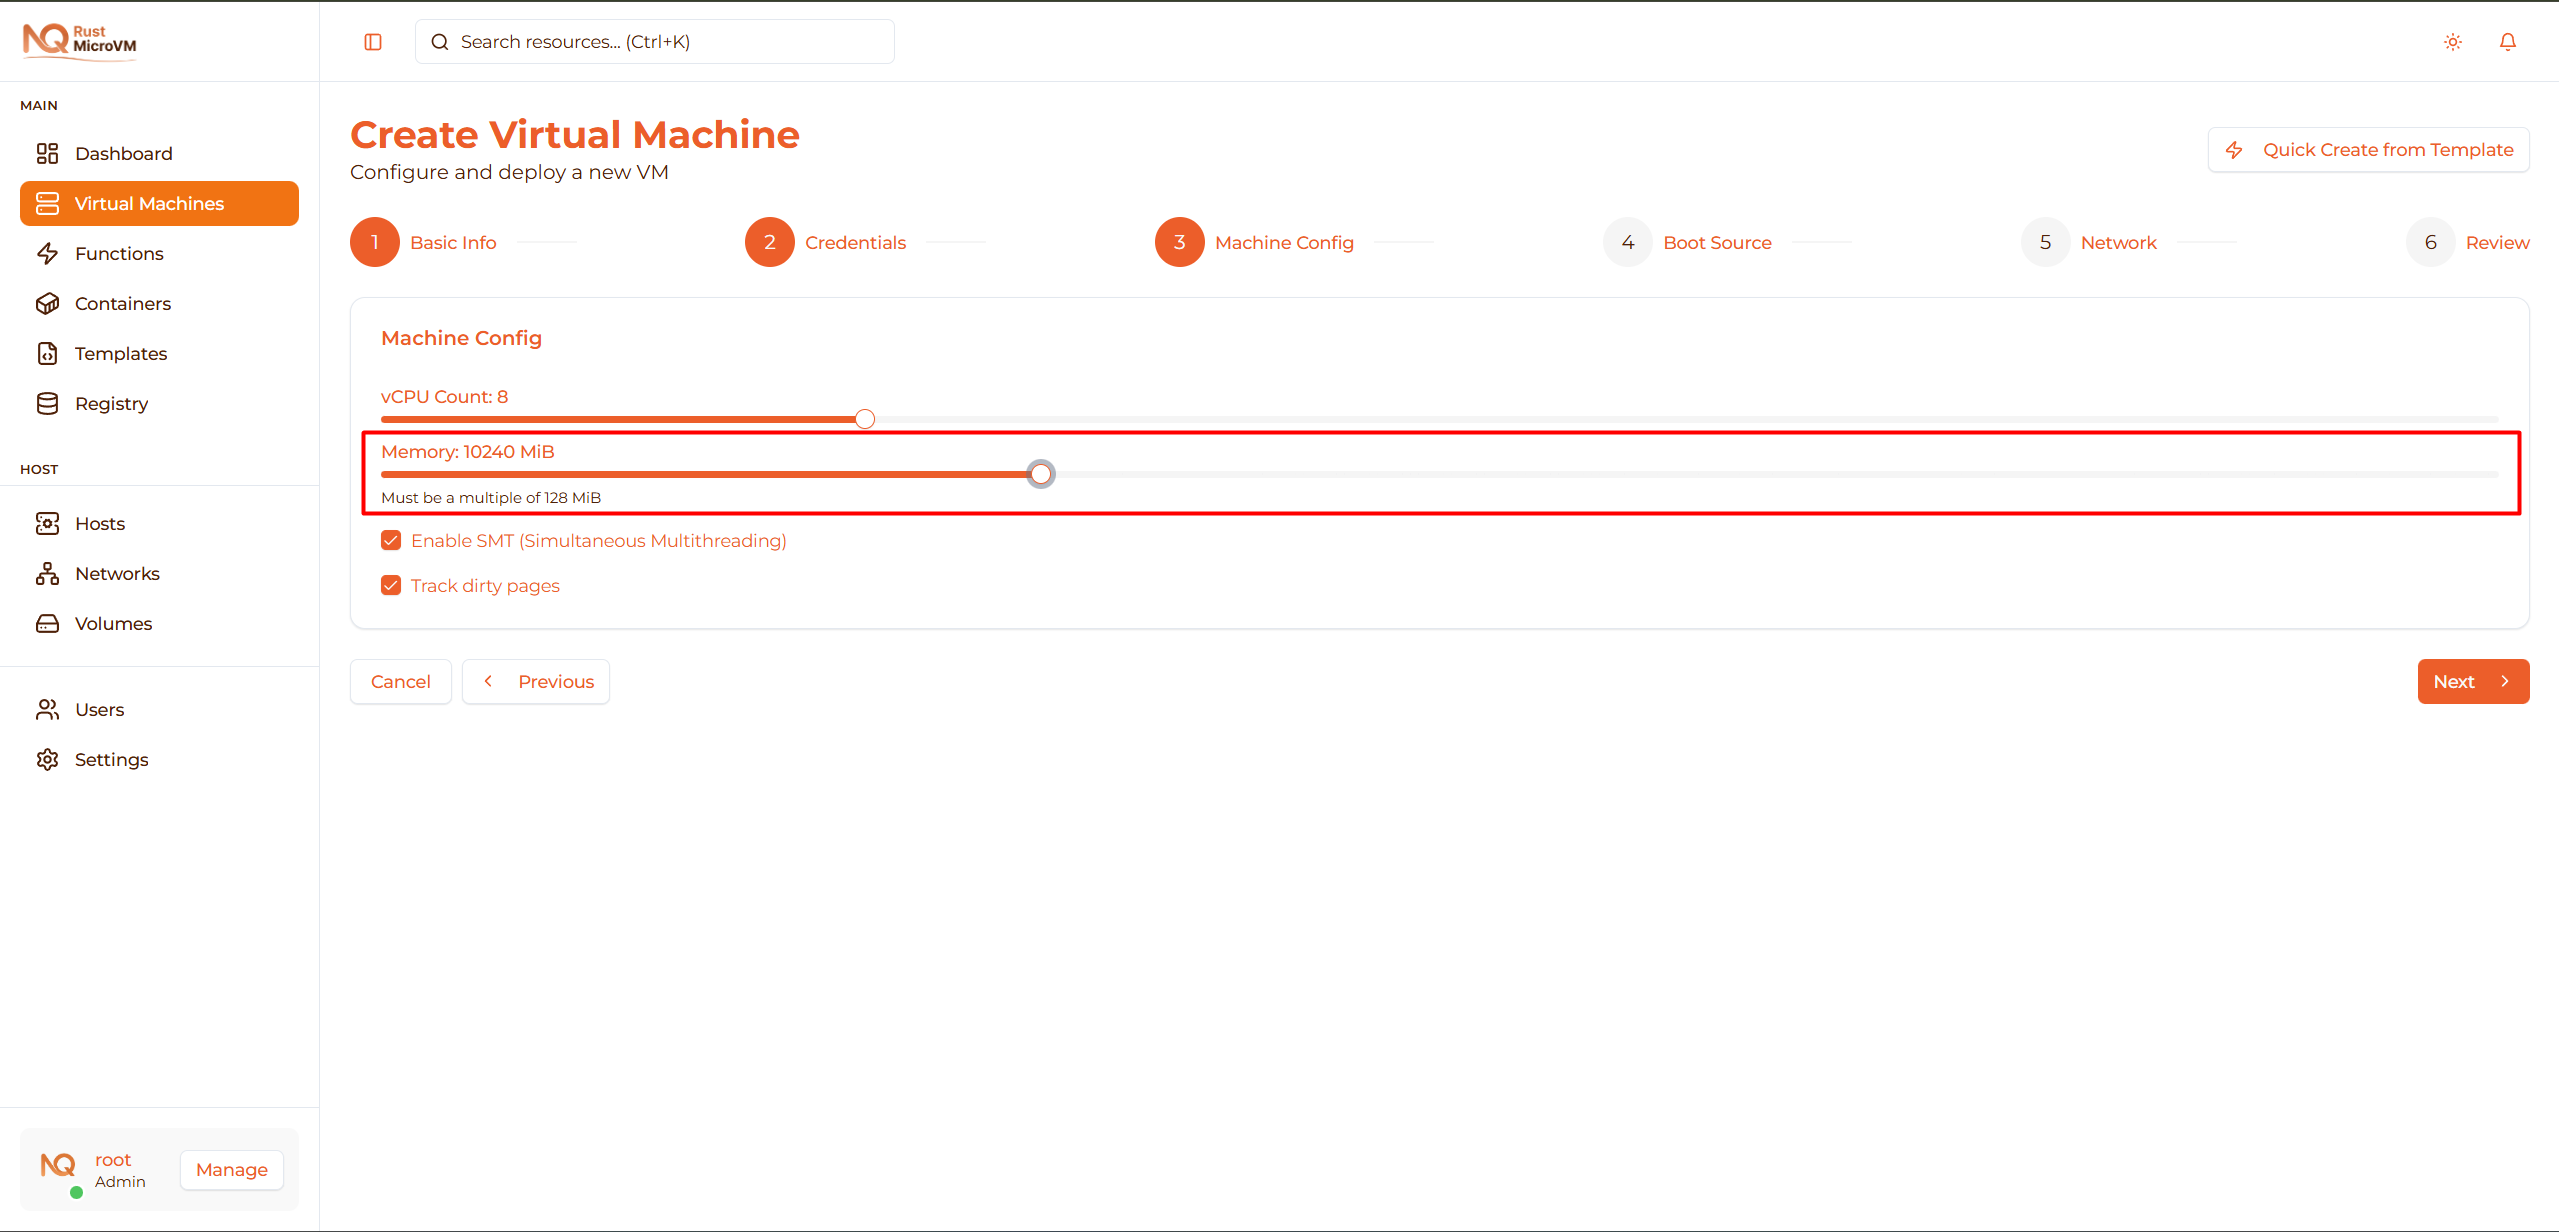
Memory (MiB)
Use the slider to allocate memory (128-32768 MiB):
| Memory | Use Case | Example |
|---|---|---|
| 512 MiB | Alpine Linux, minimal services | Log forwarder, metrics agent |
| 1024 MiB (1 GiB) | Ubuntu minimal, small apps | API service, small database |
| 2048 MiB (2 GiB) | Standard dev environment | Full-stack development |
| 4096 MiB (4 GiB) | Web server with caching | Nginx + Redis + App |
| 8192 MiB (8 GiB) | Database, build server | PostgreSQL, CI runner |
Default: 2048 MiB (or from your preferences)
Important: Memory must be a multiple of 128 MiB.
Advanced Options
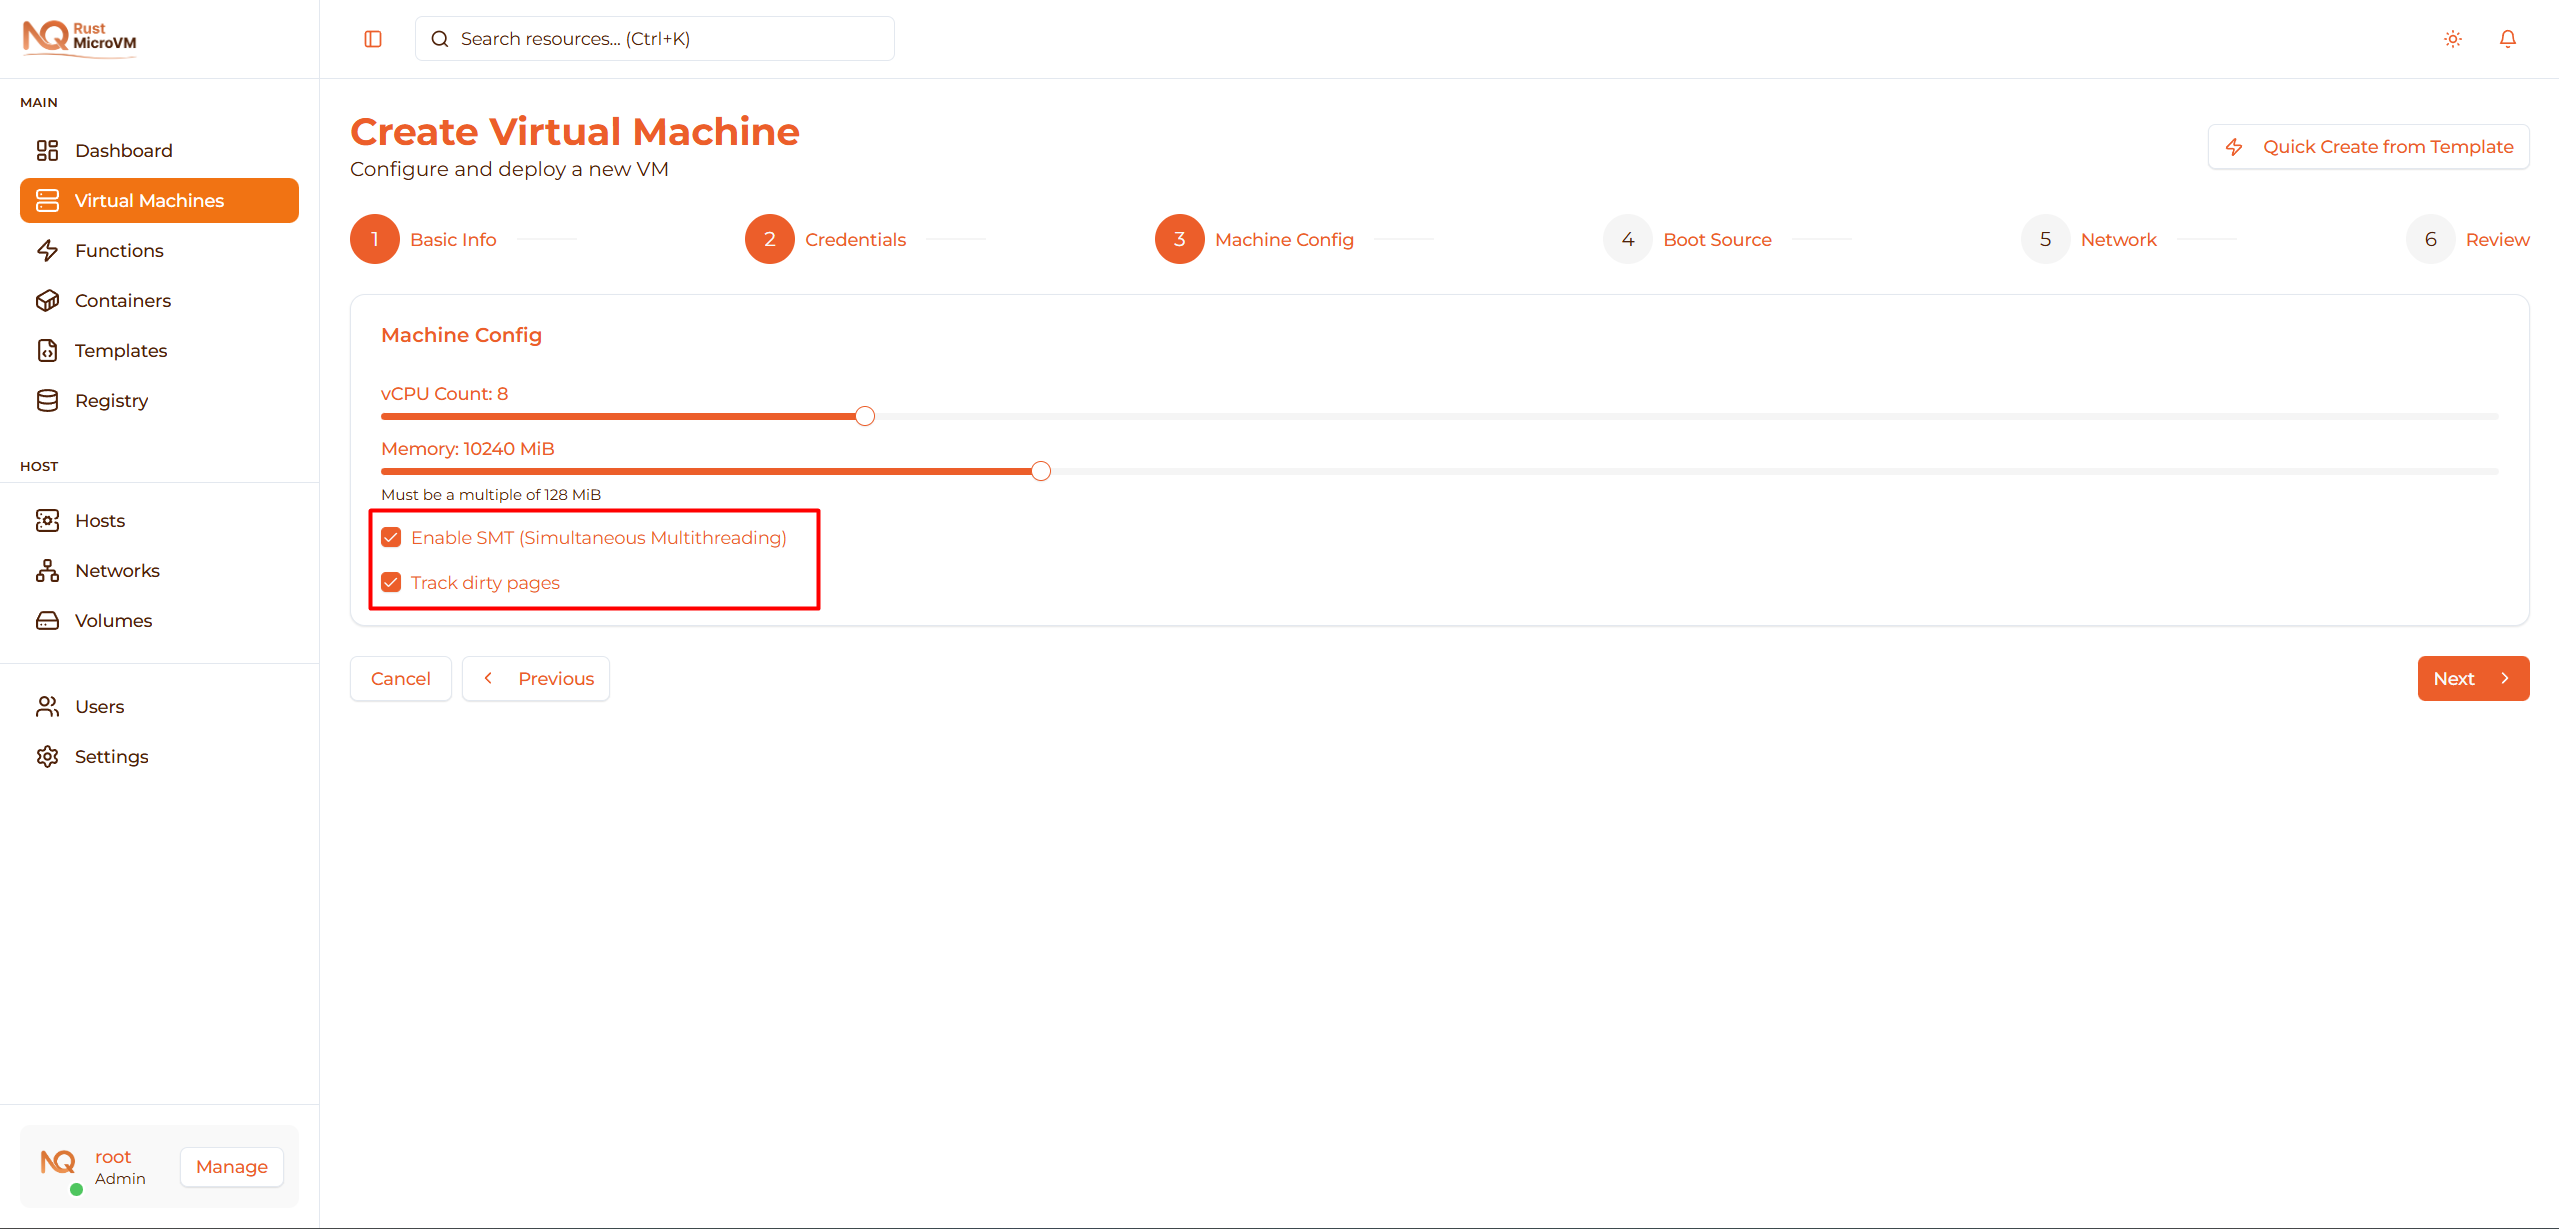
Enable SMT (Simultaneous Multithreading)
- ☐ Enable SMT
- Default: Disabled
- When enabled: Allows multiple threads per CPU core
- Use when: High-performance computing workloads
Track Dirty Pages
- ☐ Track dirty pages
- Default: Disabled
- When enabled: Tracks memory pages modified by VM
- Use when: Planning to use live migration or snapshots
Recommendation:
- First-time users: Leave both options disabled, use 1 vCPU and 1 GiB RAM
- Development: 2 vCPU and 2 GiB RAM, options disabled
- Production: Based on application requirements
Tip: Start small. Monitor actual usage and scale up if needed.
Click Next to select boot source.
Step 5: Boot Source
Select kernel and rootfs images for your VM:
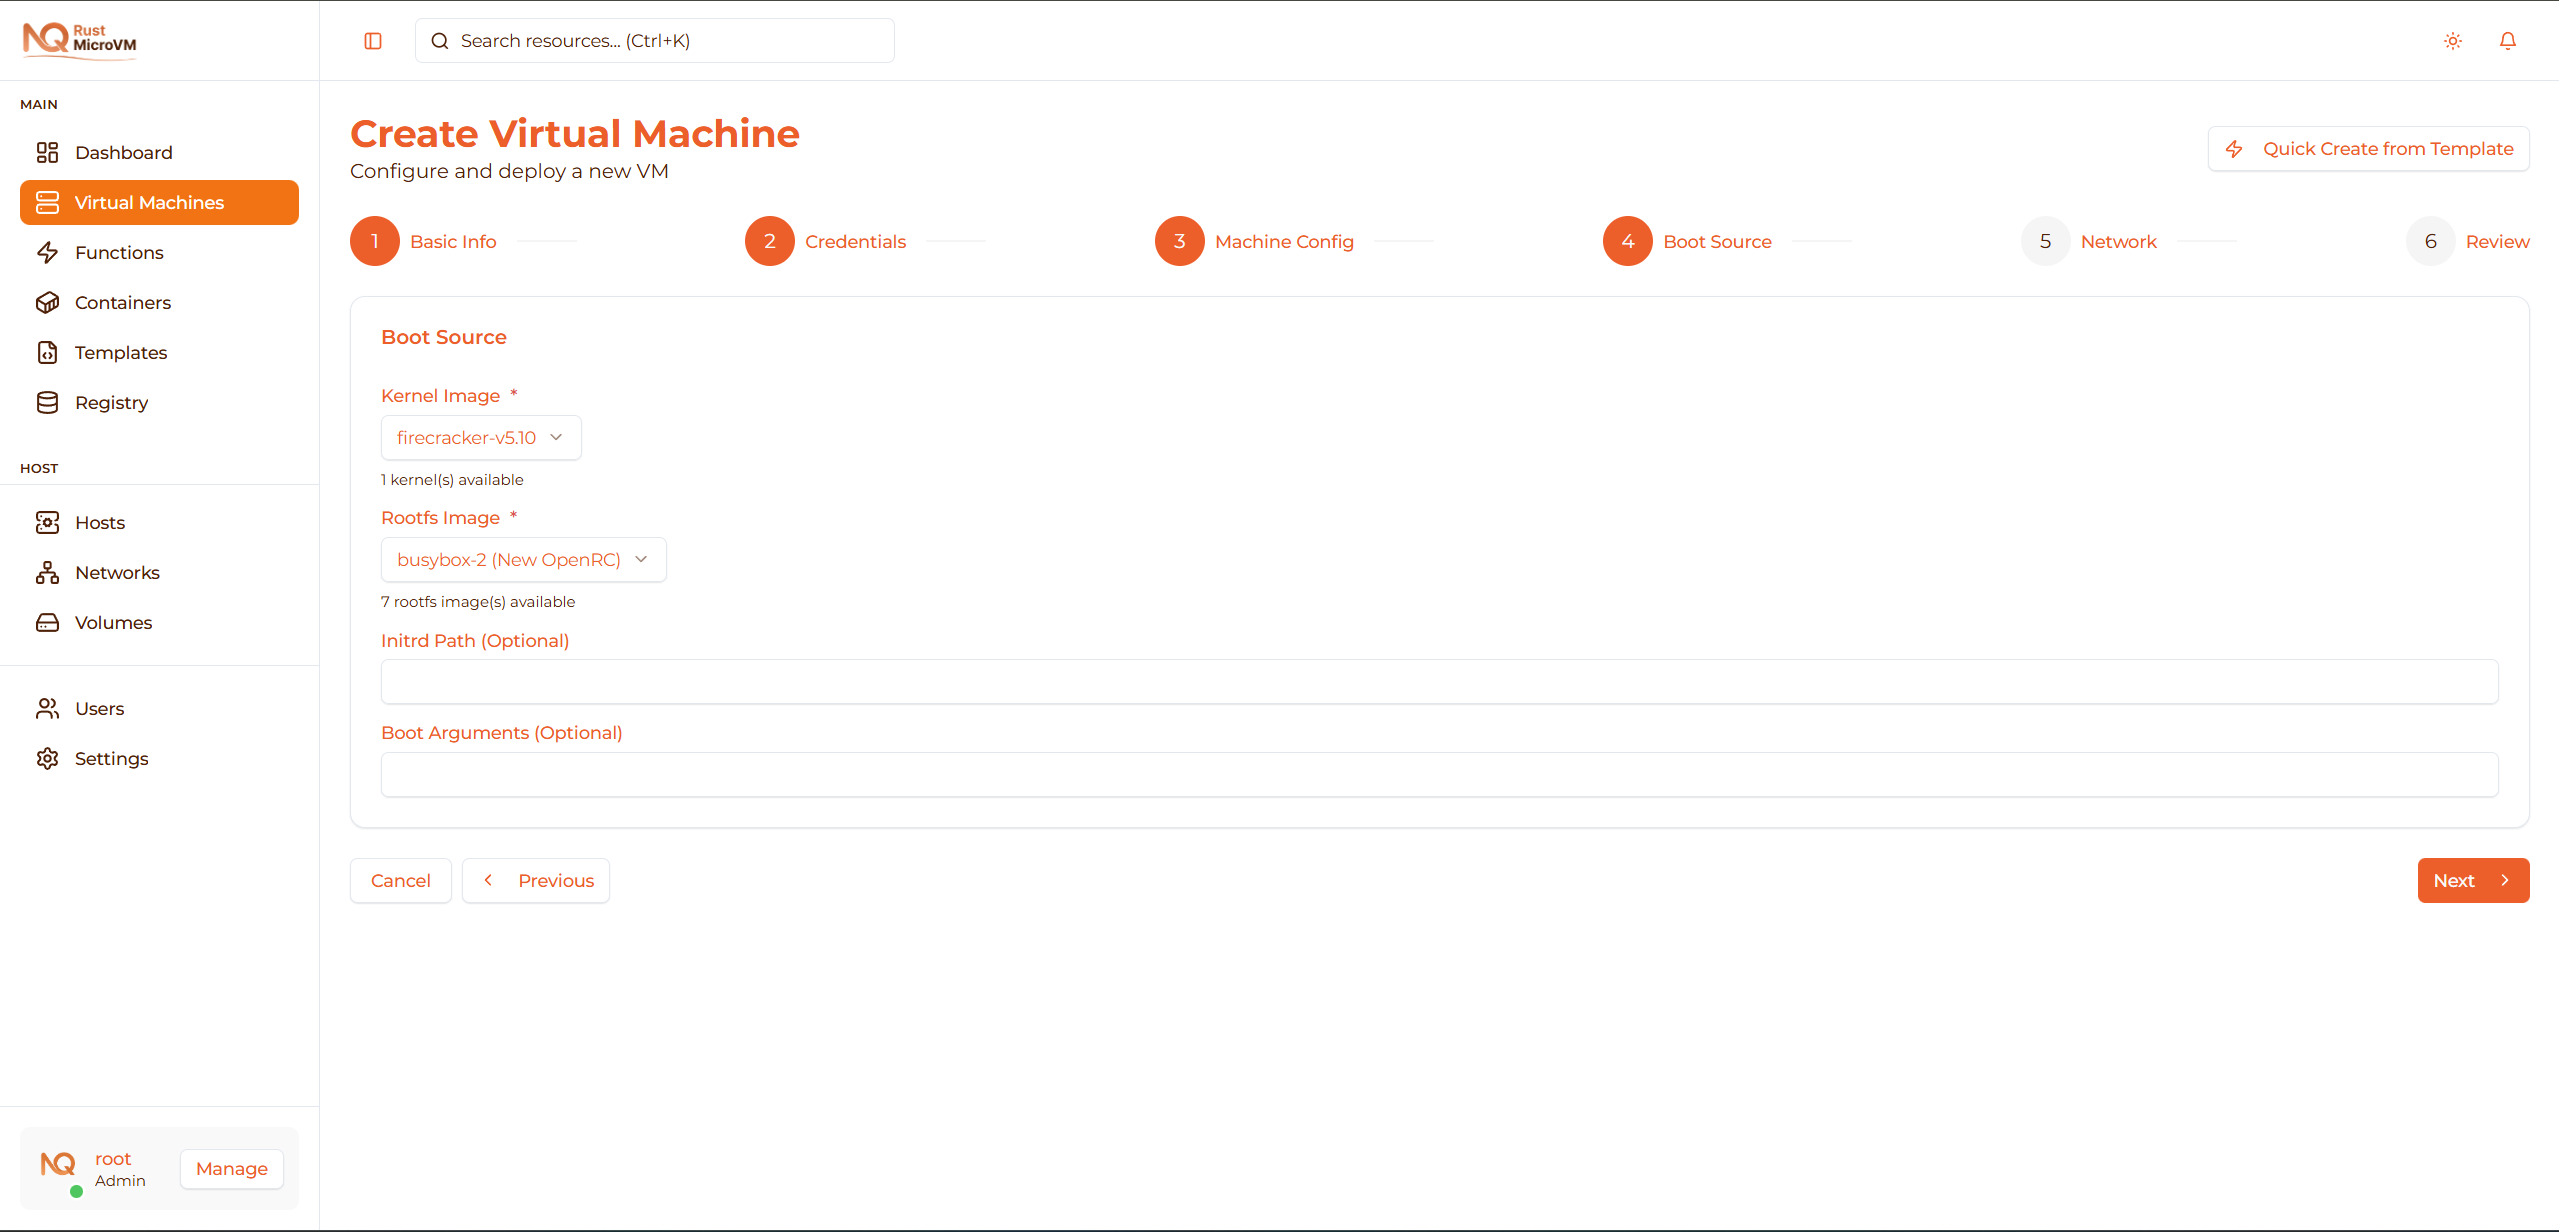
Kernel Image (Required)
Select a Linux kernel from the dropdown:
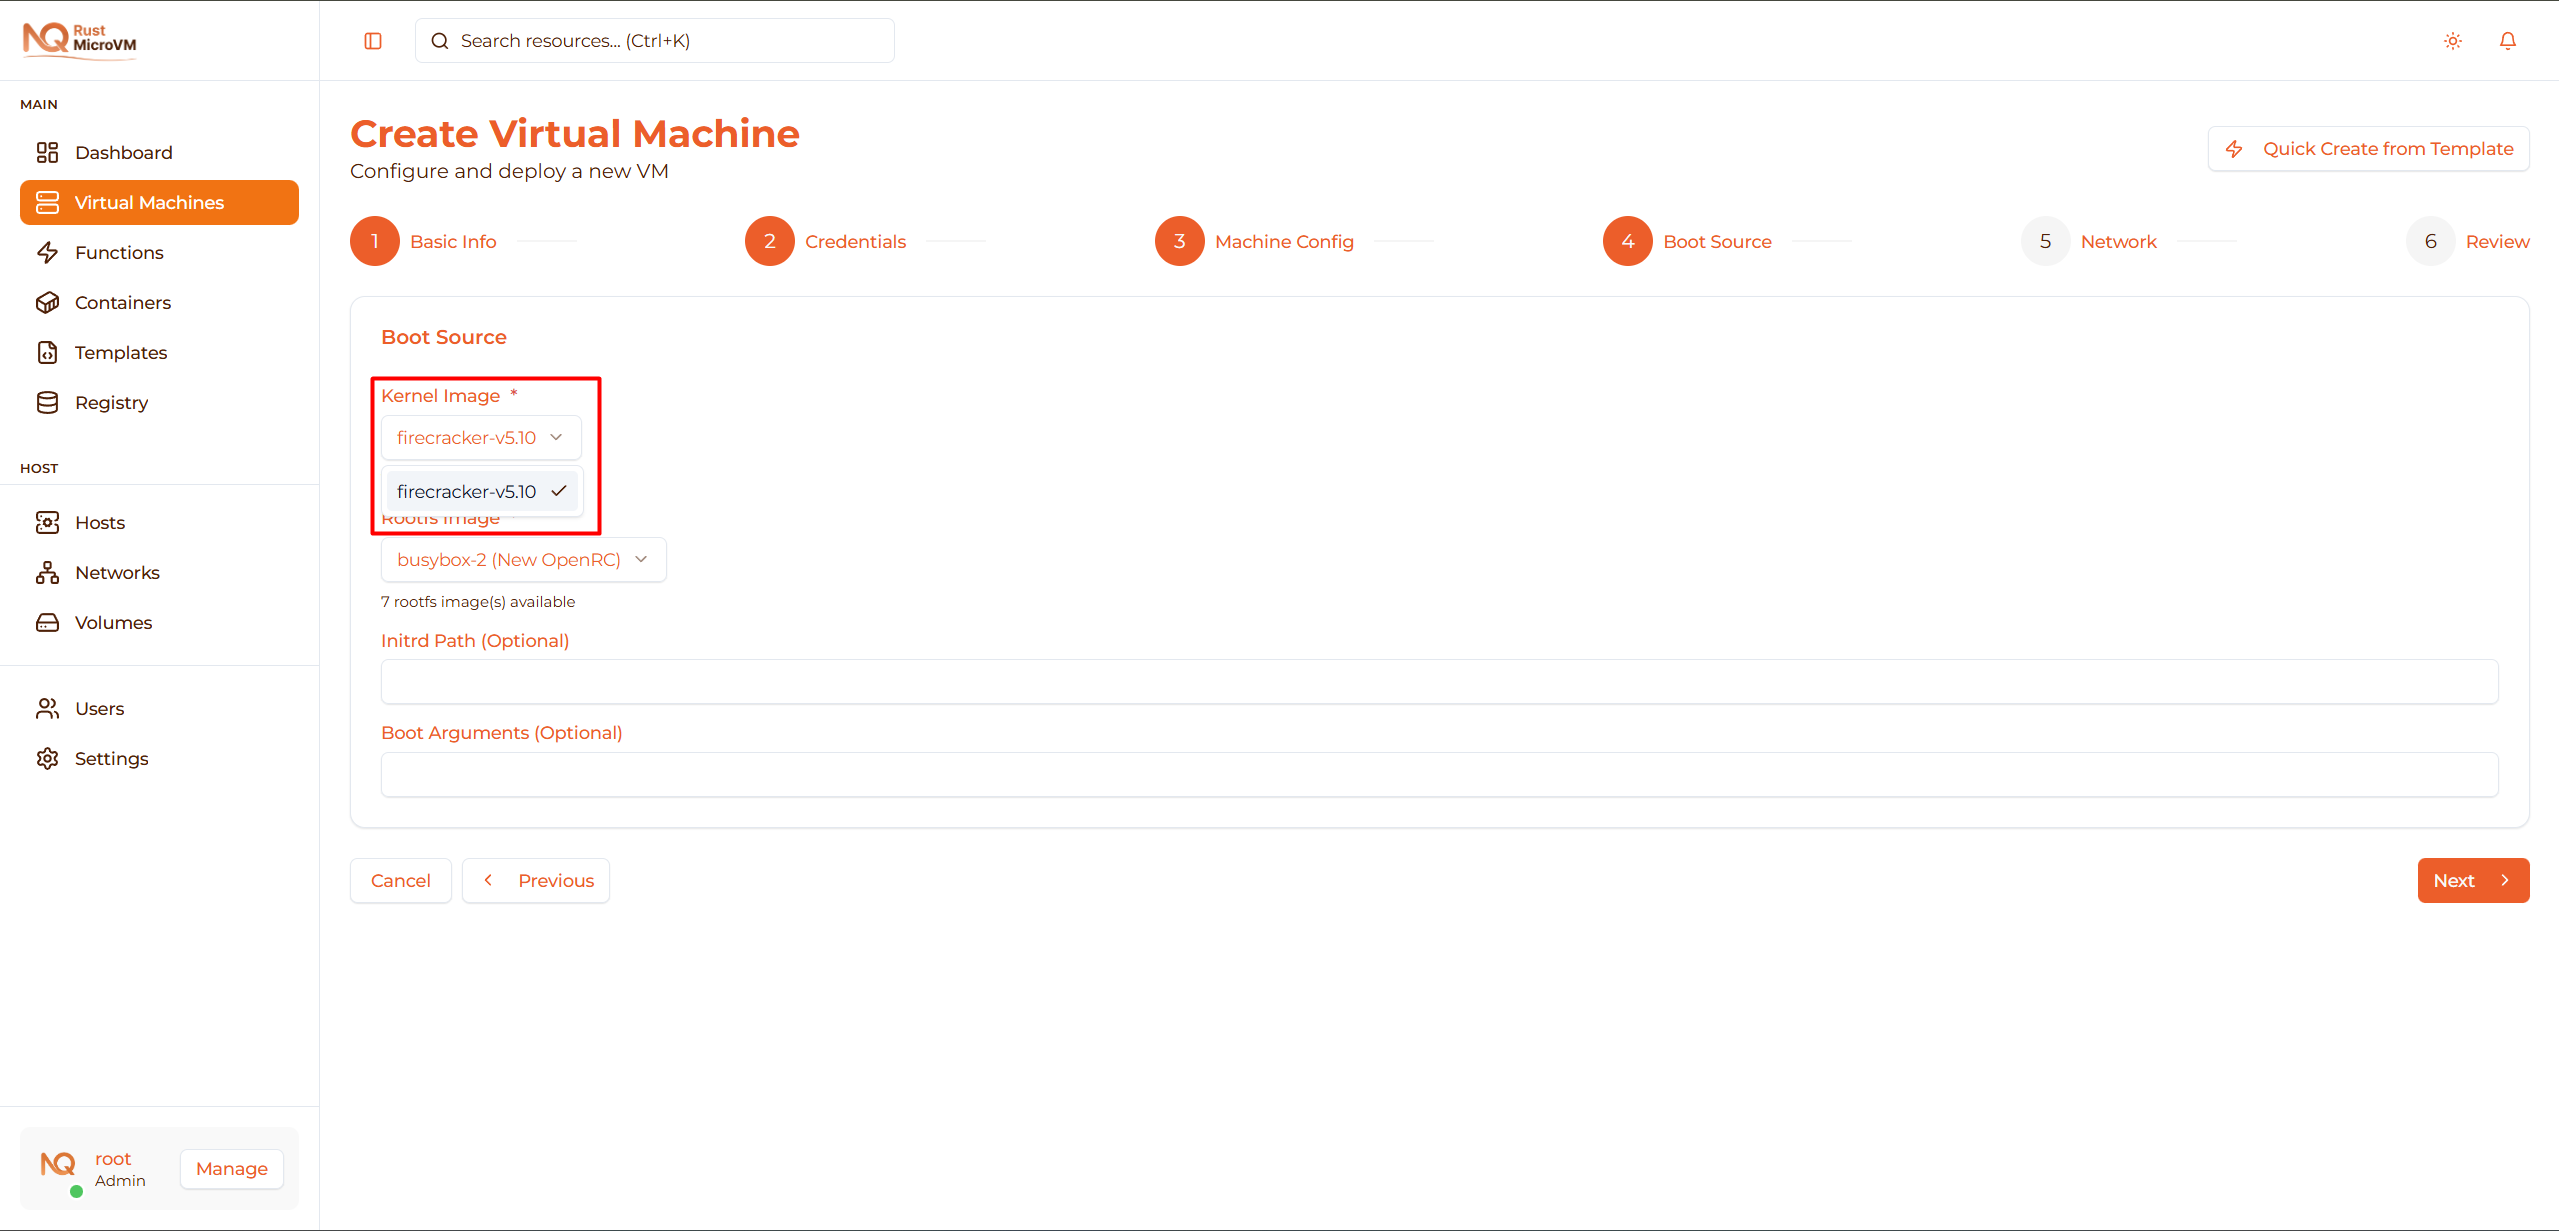
- vmlinux-5.10.fc.bin - Standard Firecracker-optimized kernel
- Compatible with most distributions (Ubuntu, Alpine, Debian)
If dropdown is empty: You need to upload a kernel first. See Image Registry.
The first available kernel will be selected automatically.
Rootfs Image (Required)
Choose your operating system from the dropdown:
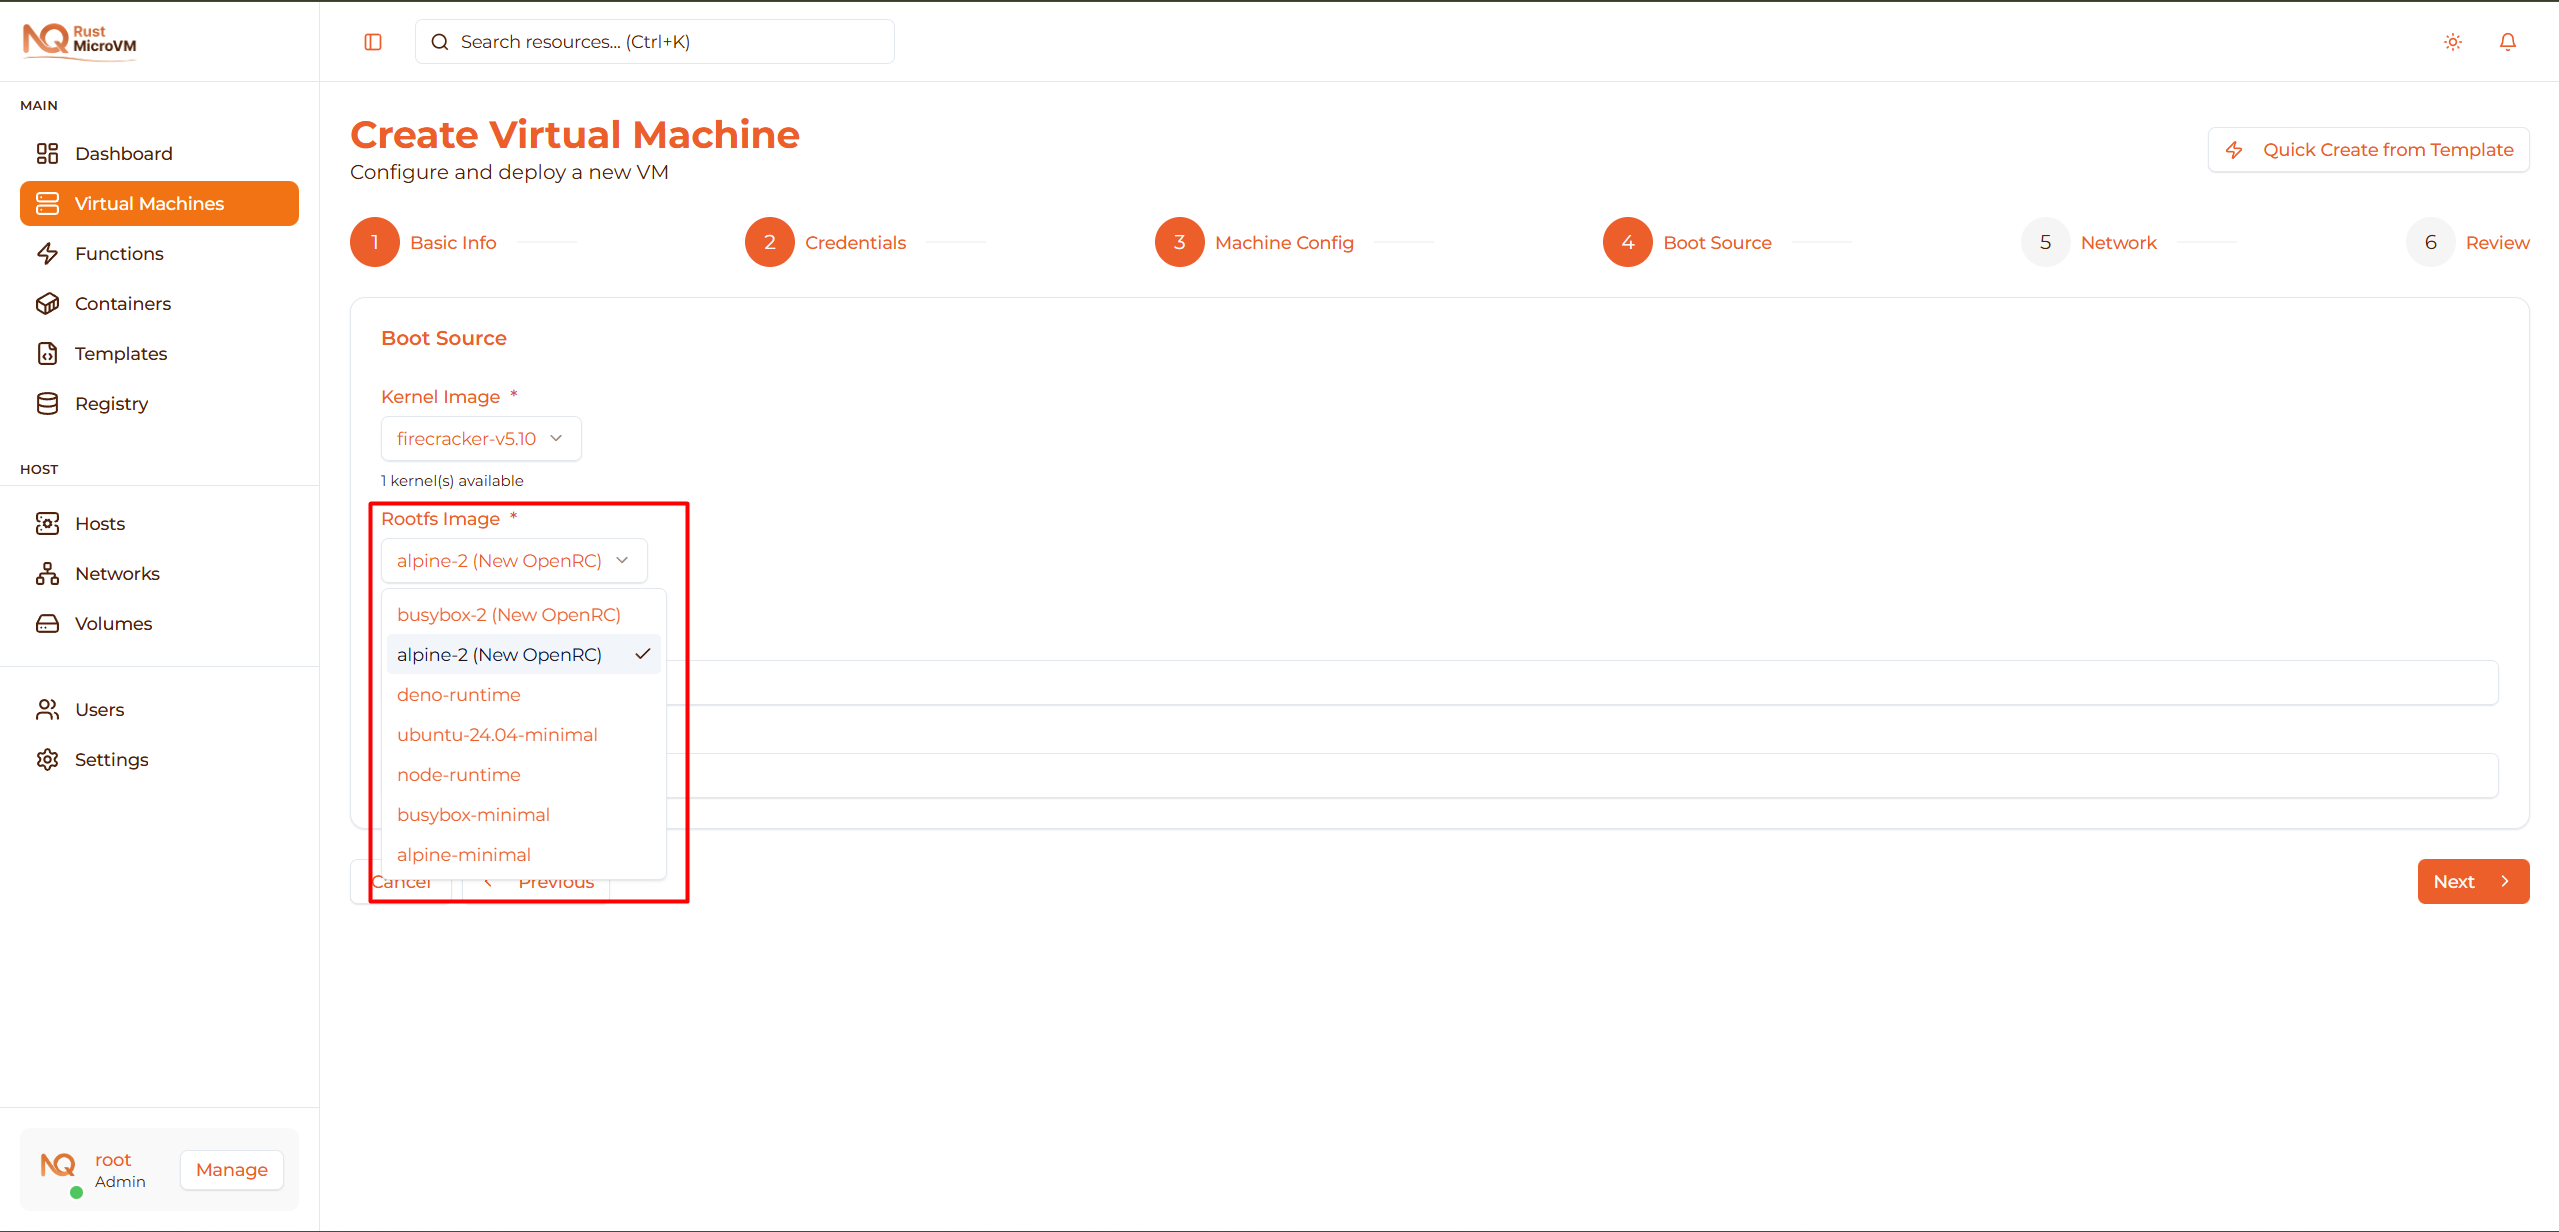
Popular choices:
Alpine Linux 3.18 (Recommended for beginners)
- Size: ~100-200 MB
- Boot time: <1 second
- Best for: Testing, containers, lightweight services
- Package manager: apk
Ubuntu 22.04
- Size: ~2-5 GB
- Boot time: ~2 seconds
- Best for: Development, production apps
- Package manager: apt
Debian 12
- Size: ~1-3 GB
- Stability focused
- Best for: Servers, long-term projects
Tip: If you’re not sure which to choose, start with Alpine Linux for faster downloads and boot times.
The first available rootfs will be selected automatically.
Initrd Path (Optional)
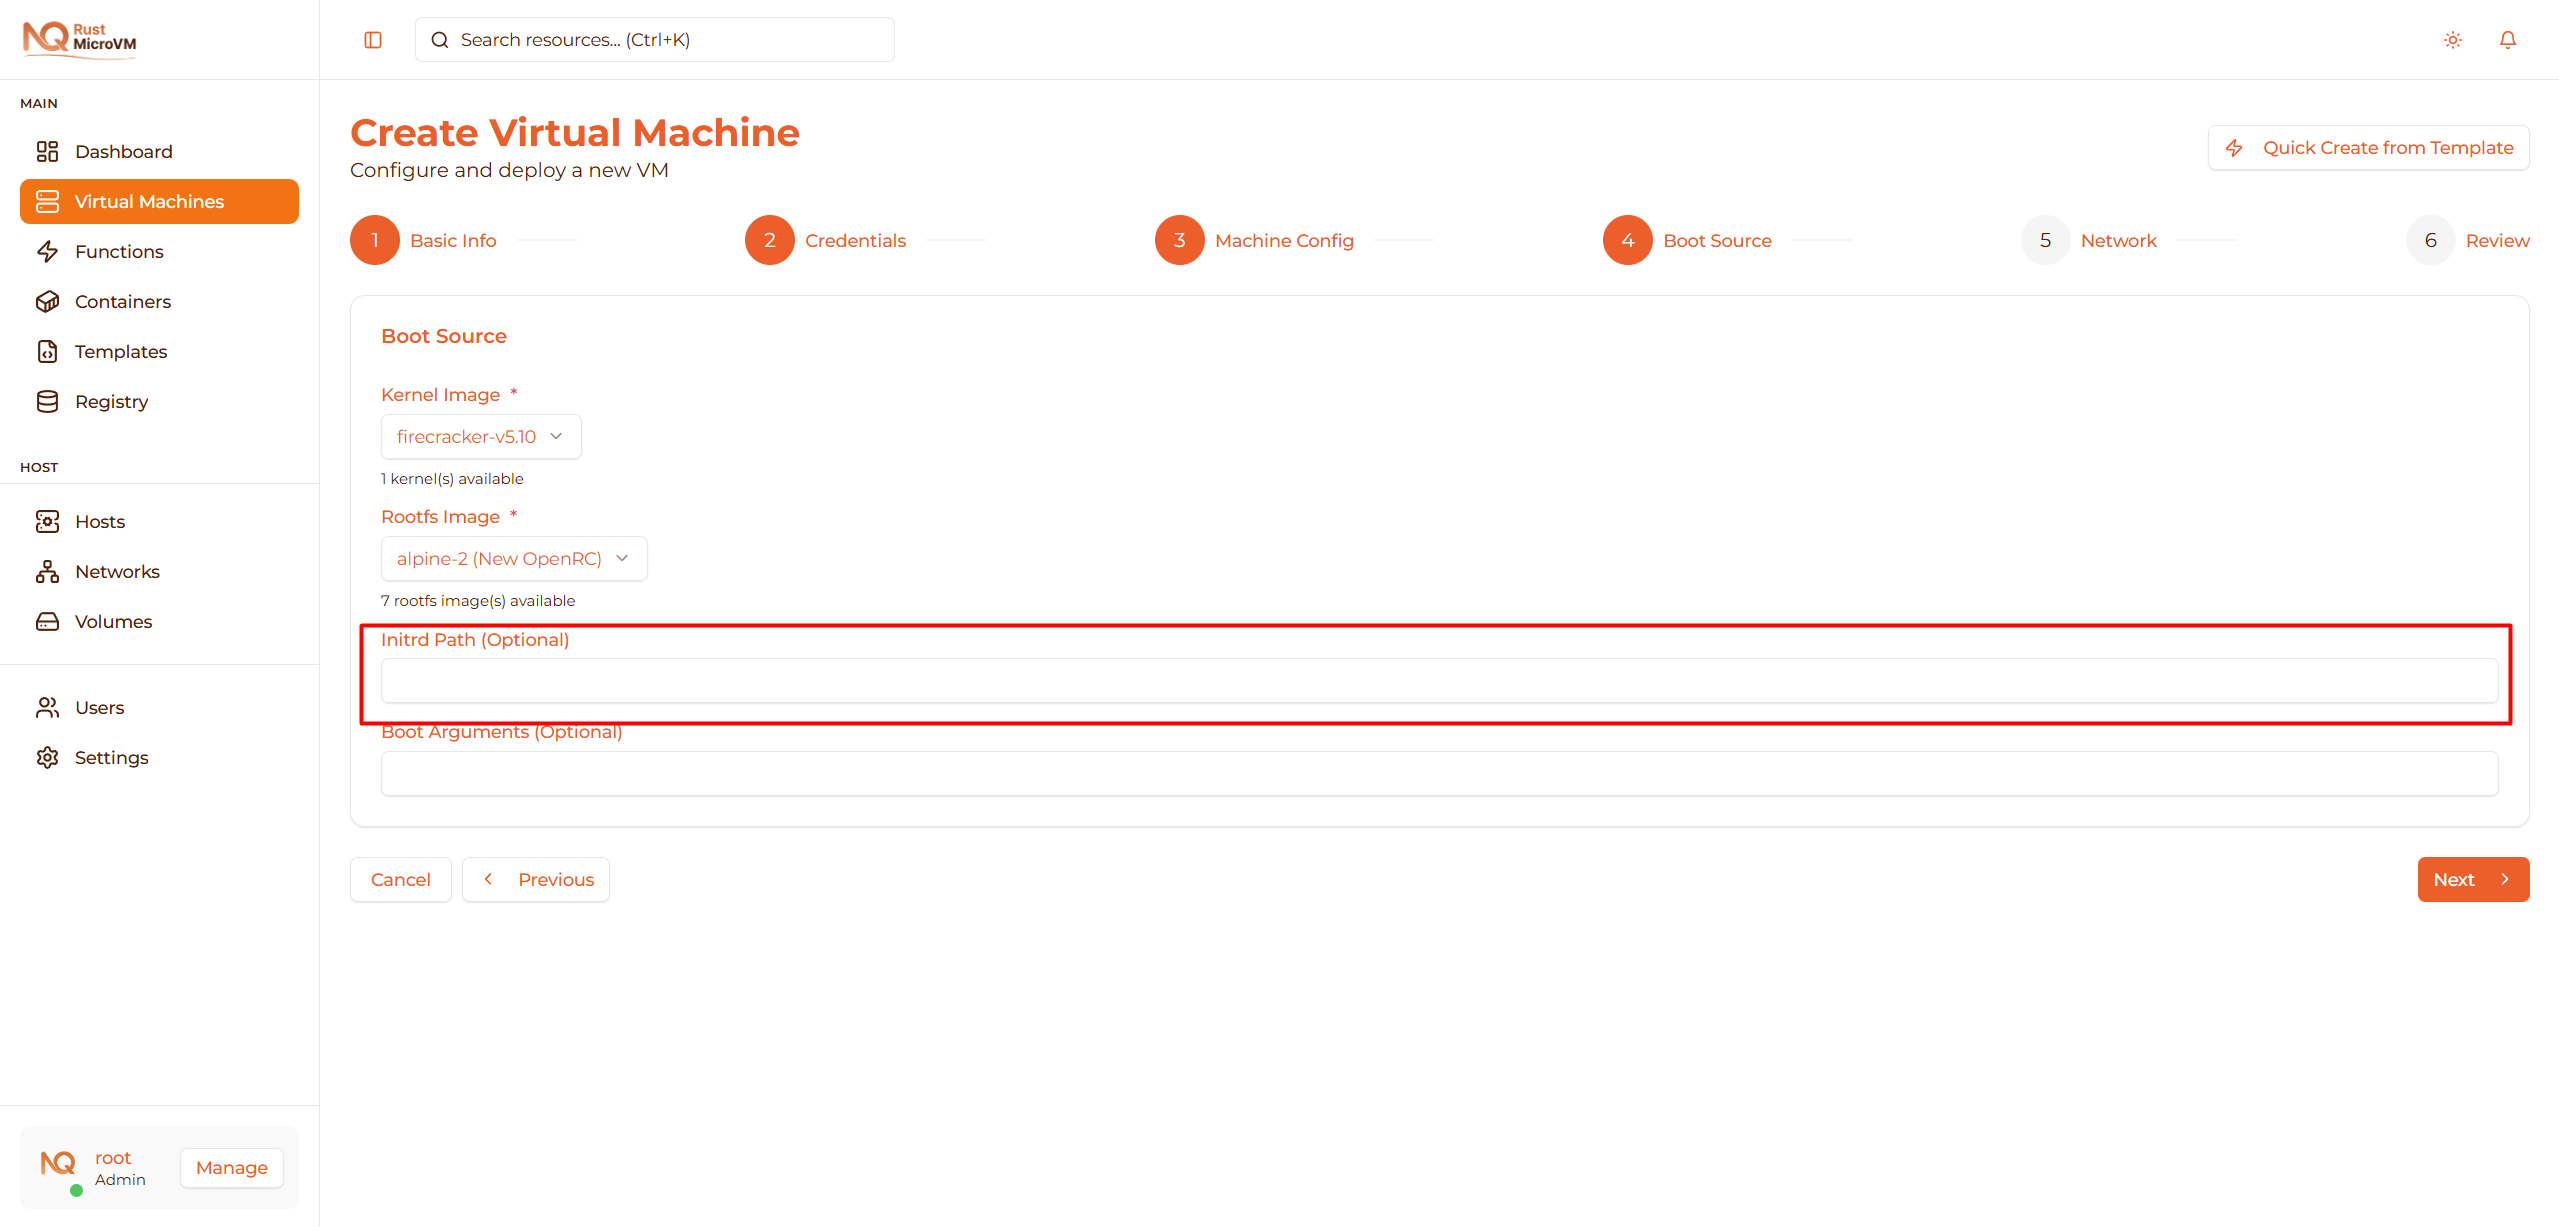
Leave empty unless you need custom initial ramdisk.
- Used for advanced boot configurations
- Most users can skip this field
Boot Arguments (Optional)
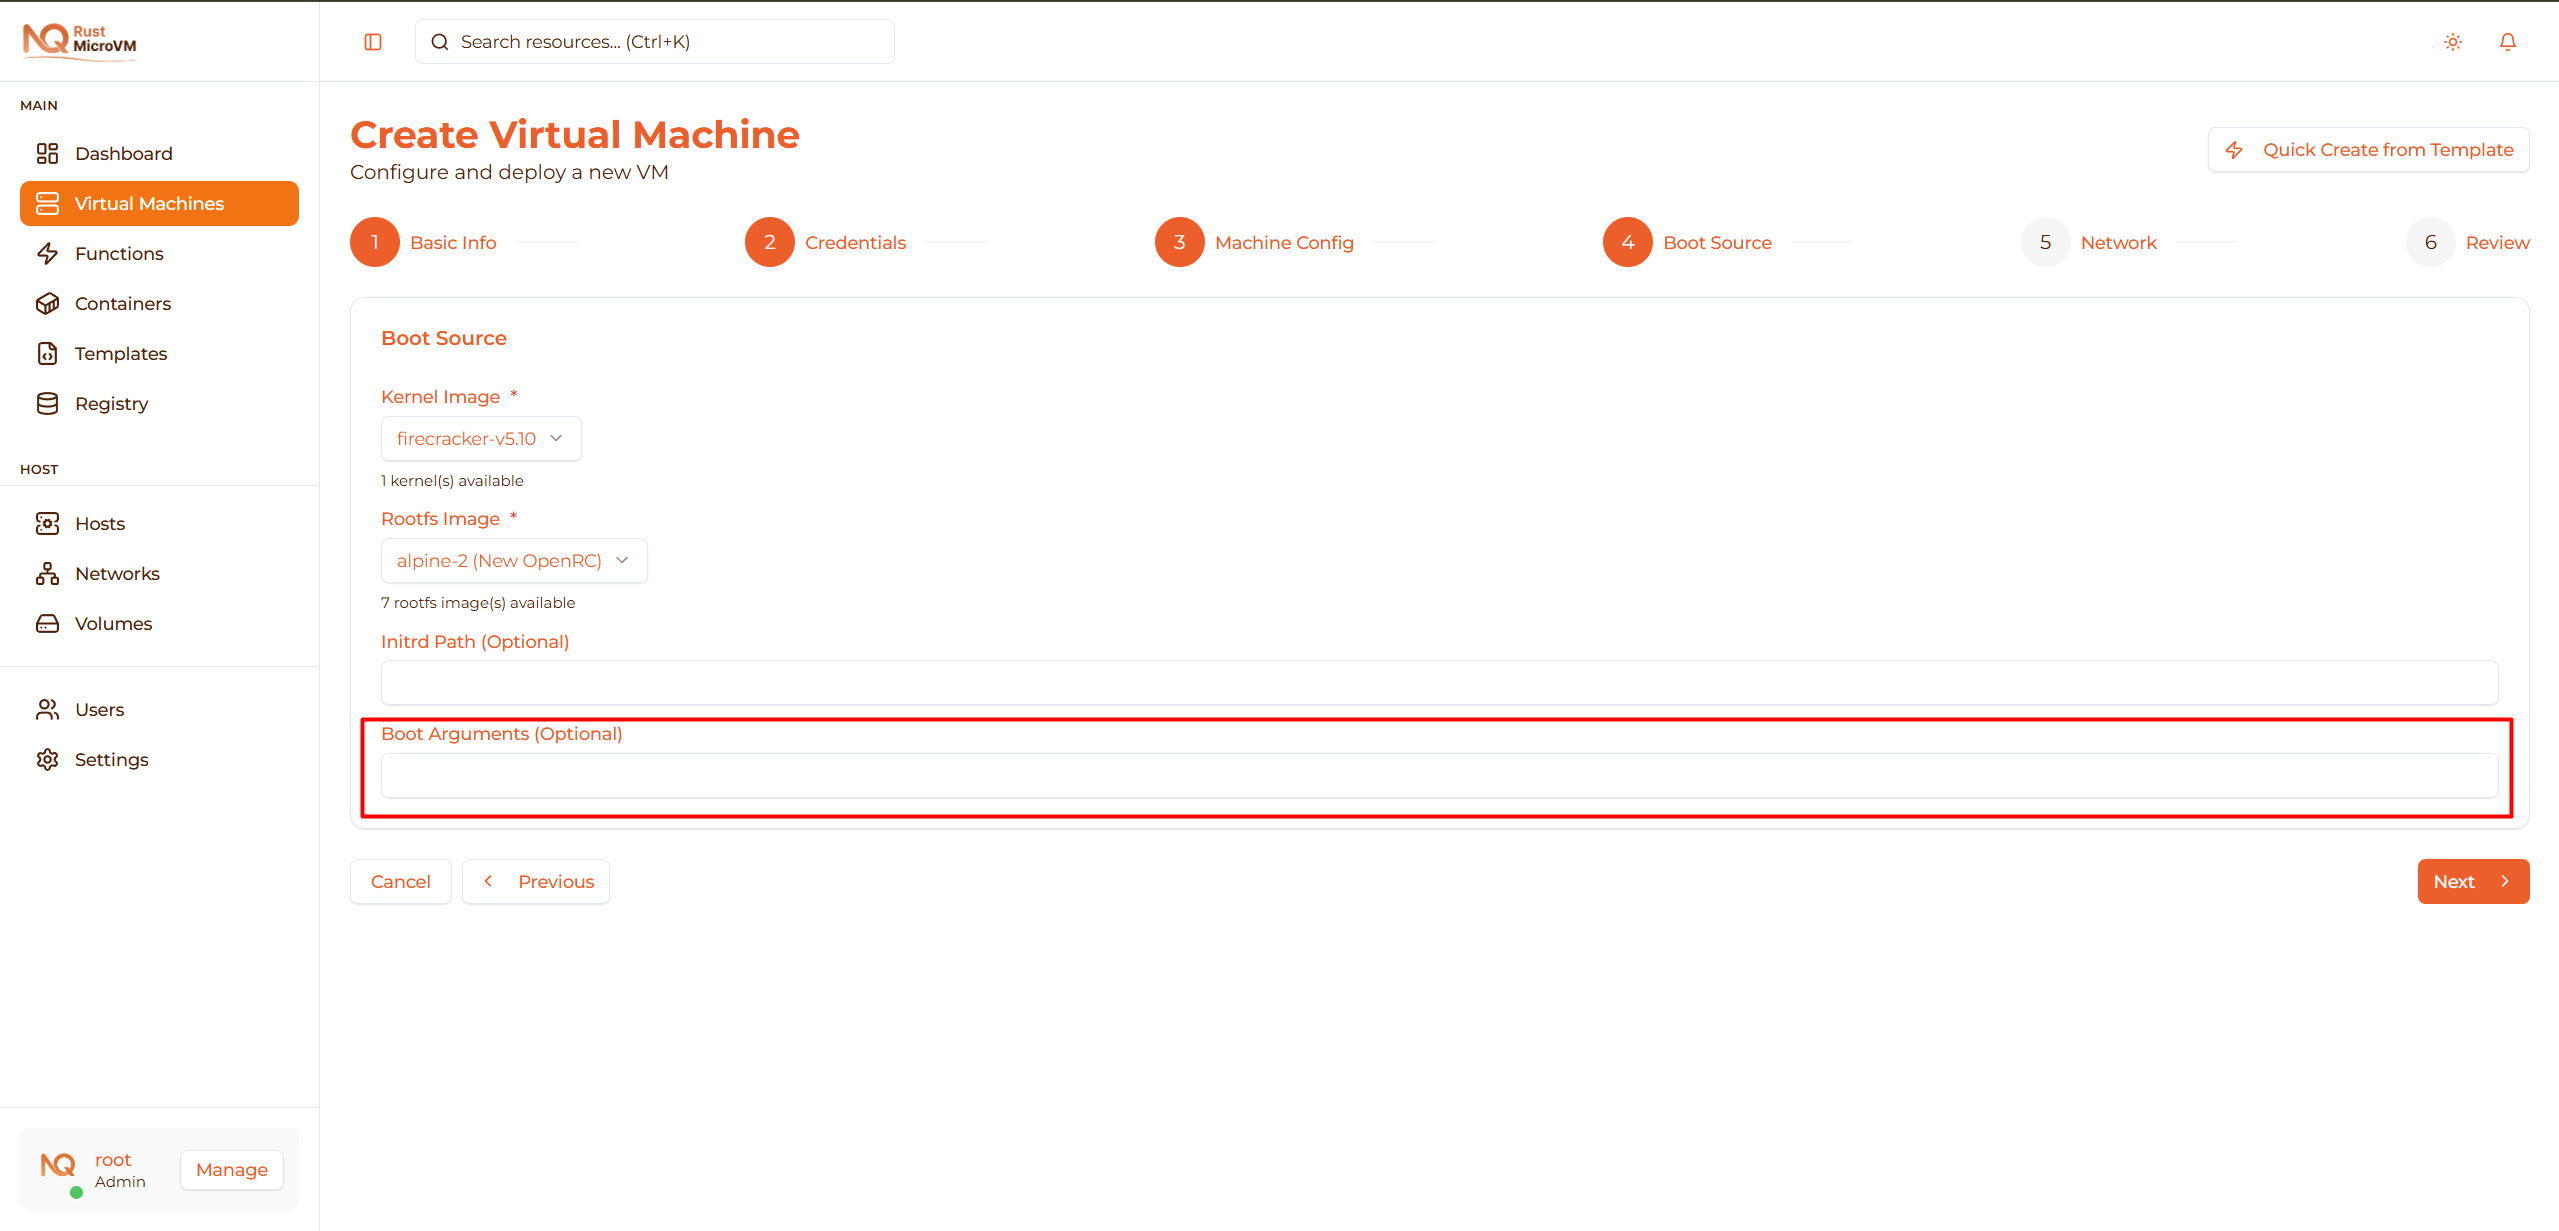
Leave empty to use default kernel boot parameters.
- Advanced users can add custom kernel parameters
- Example:
console=ttyS0 reboot=k panic=1
Click Next for network configuration.
Step 6: Network
Configure network settings for your VM:
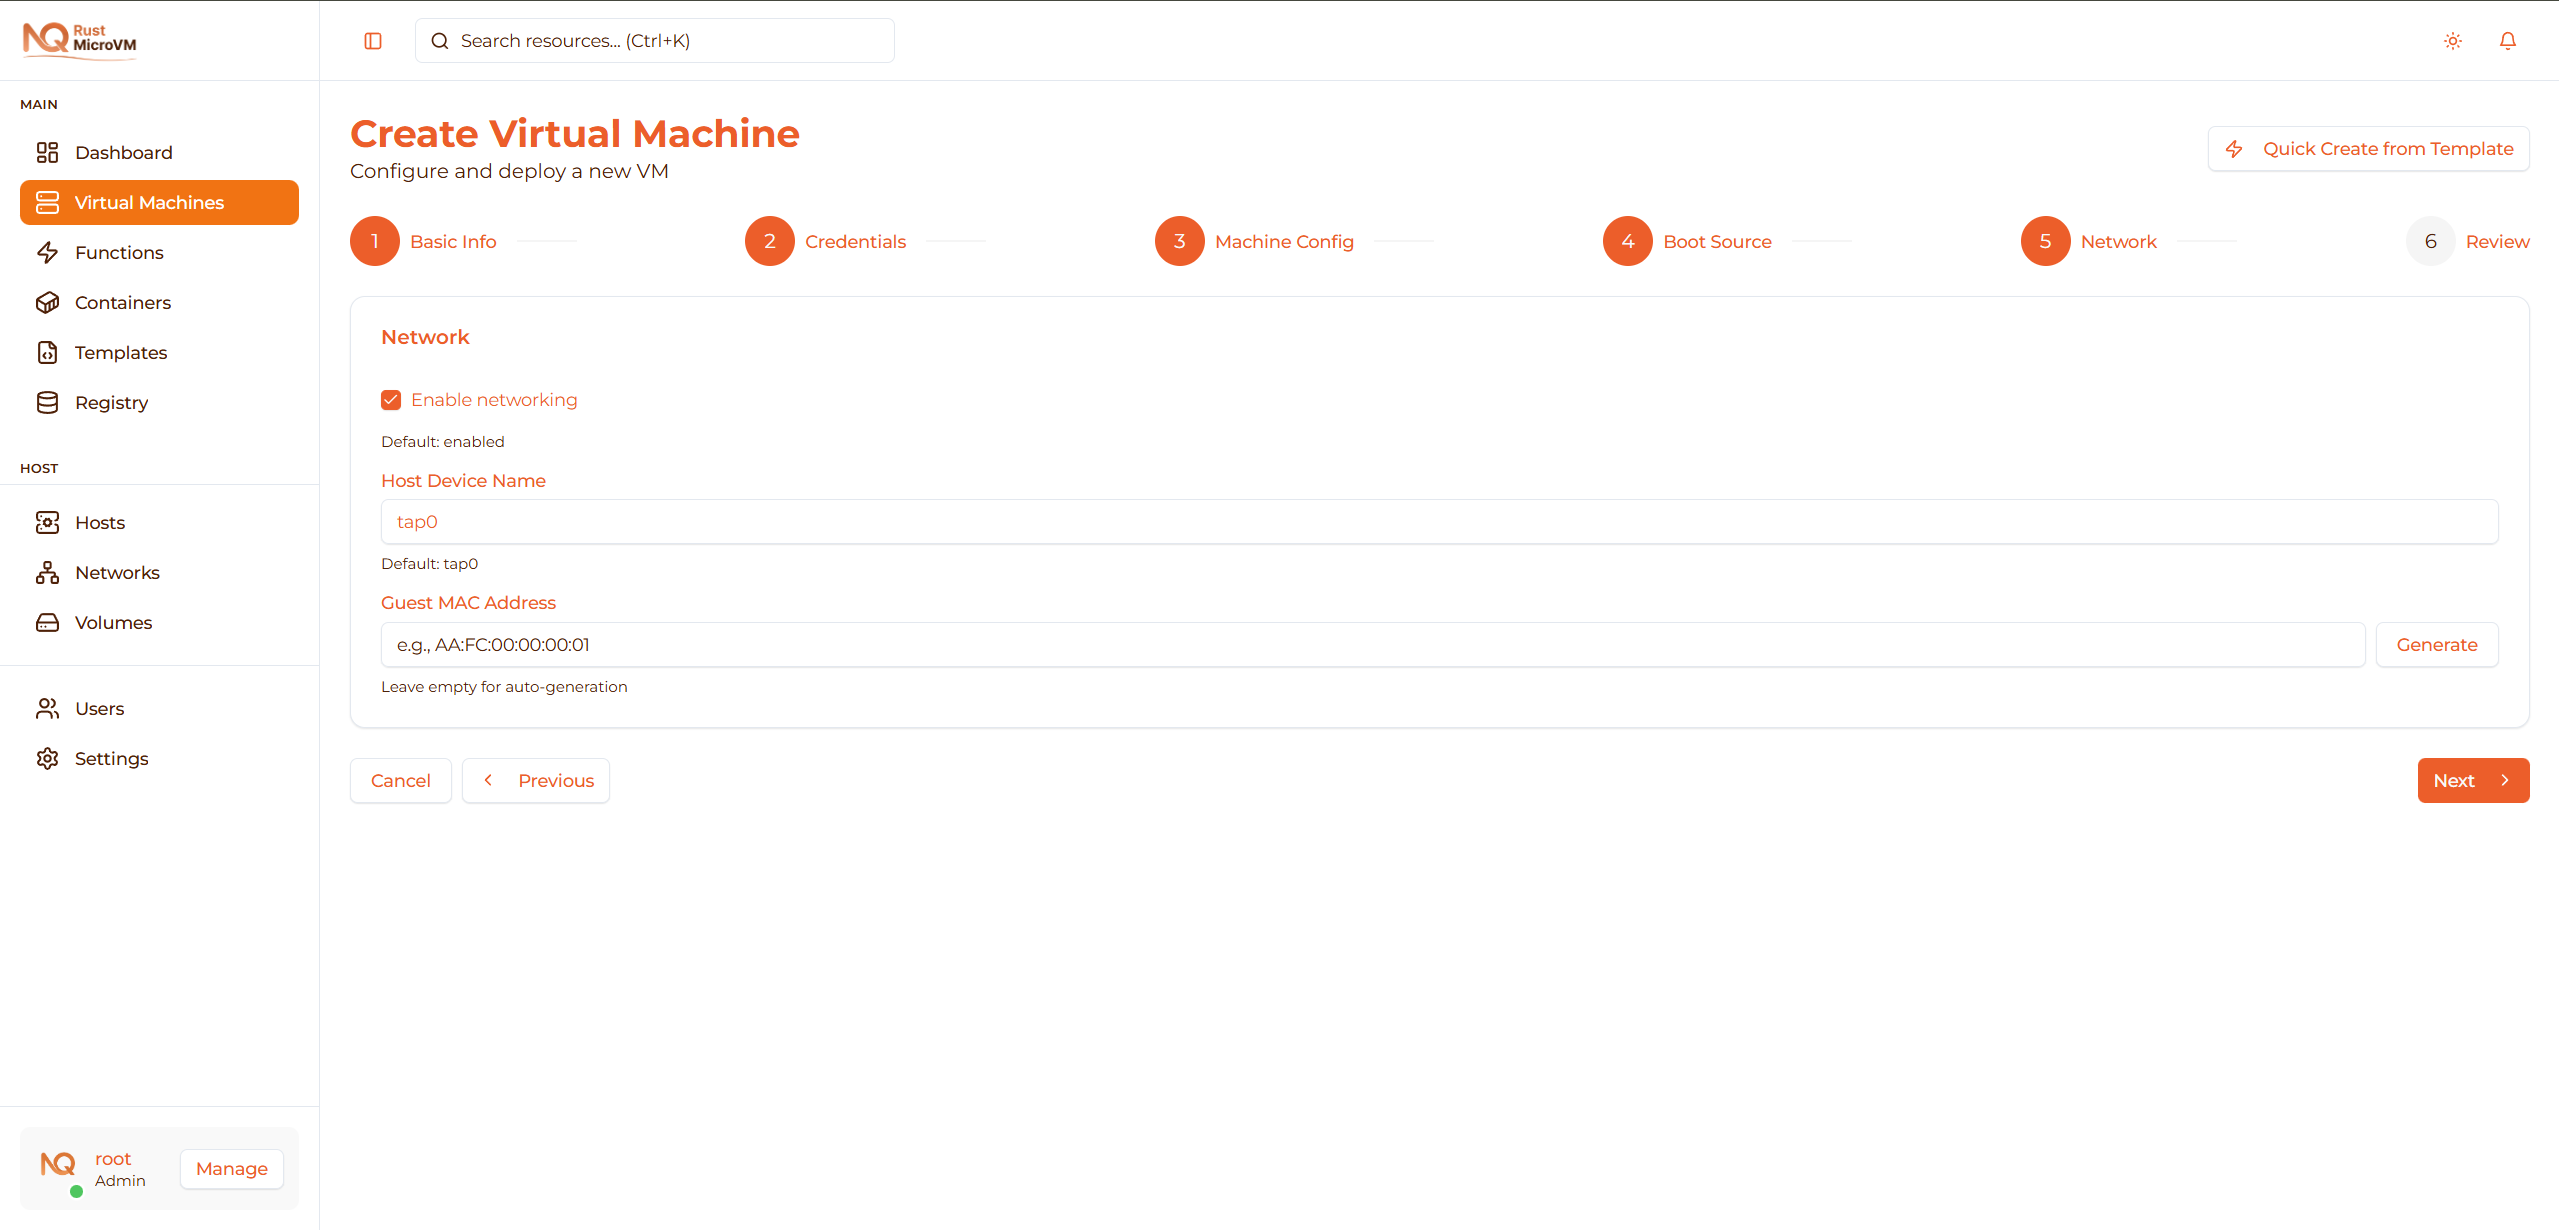
Enable Networking
First, decide whether to enable networking:

- ☑ Enable networking
- Default: Enabled (checked)
When to disable:
- Completely isolated VM for security testing
- No network access needed
Most users should keep this enabled.
Host Device Name
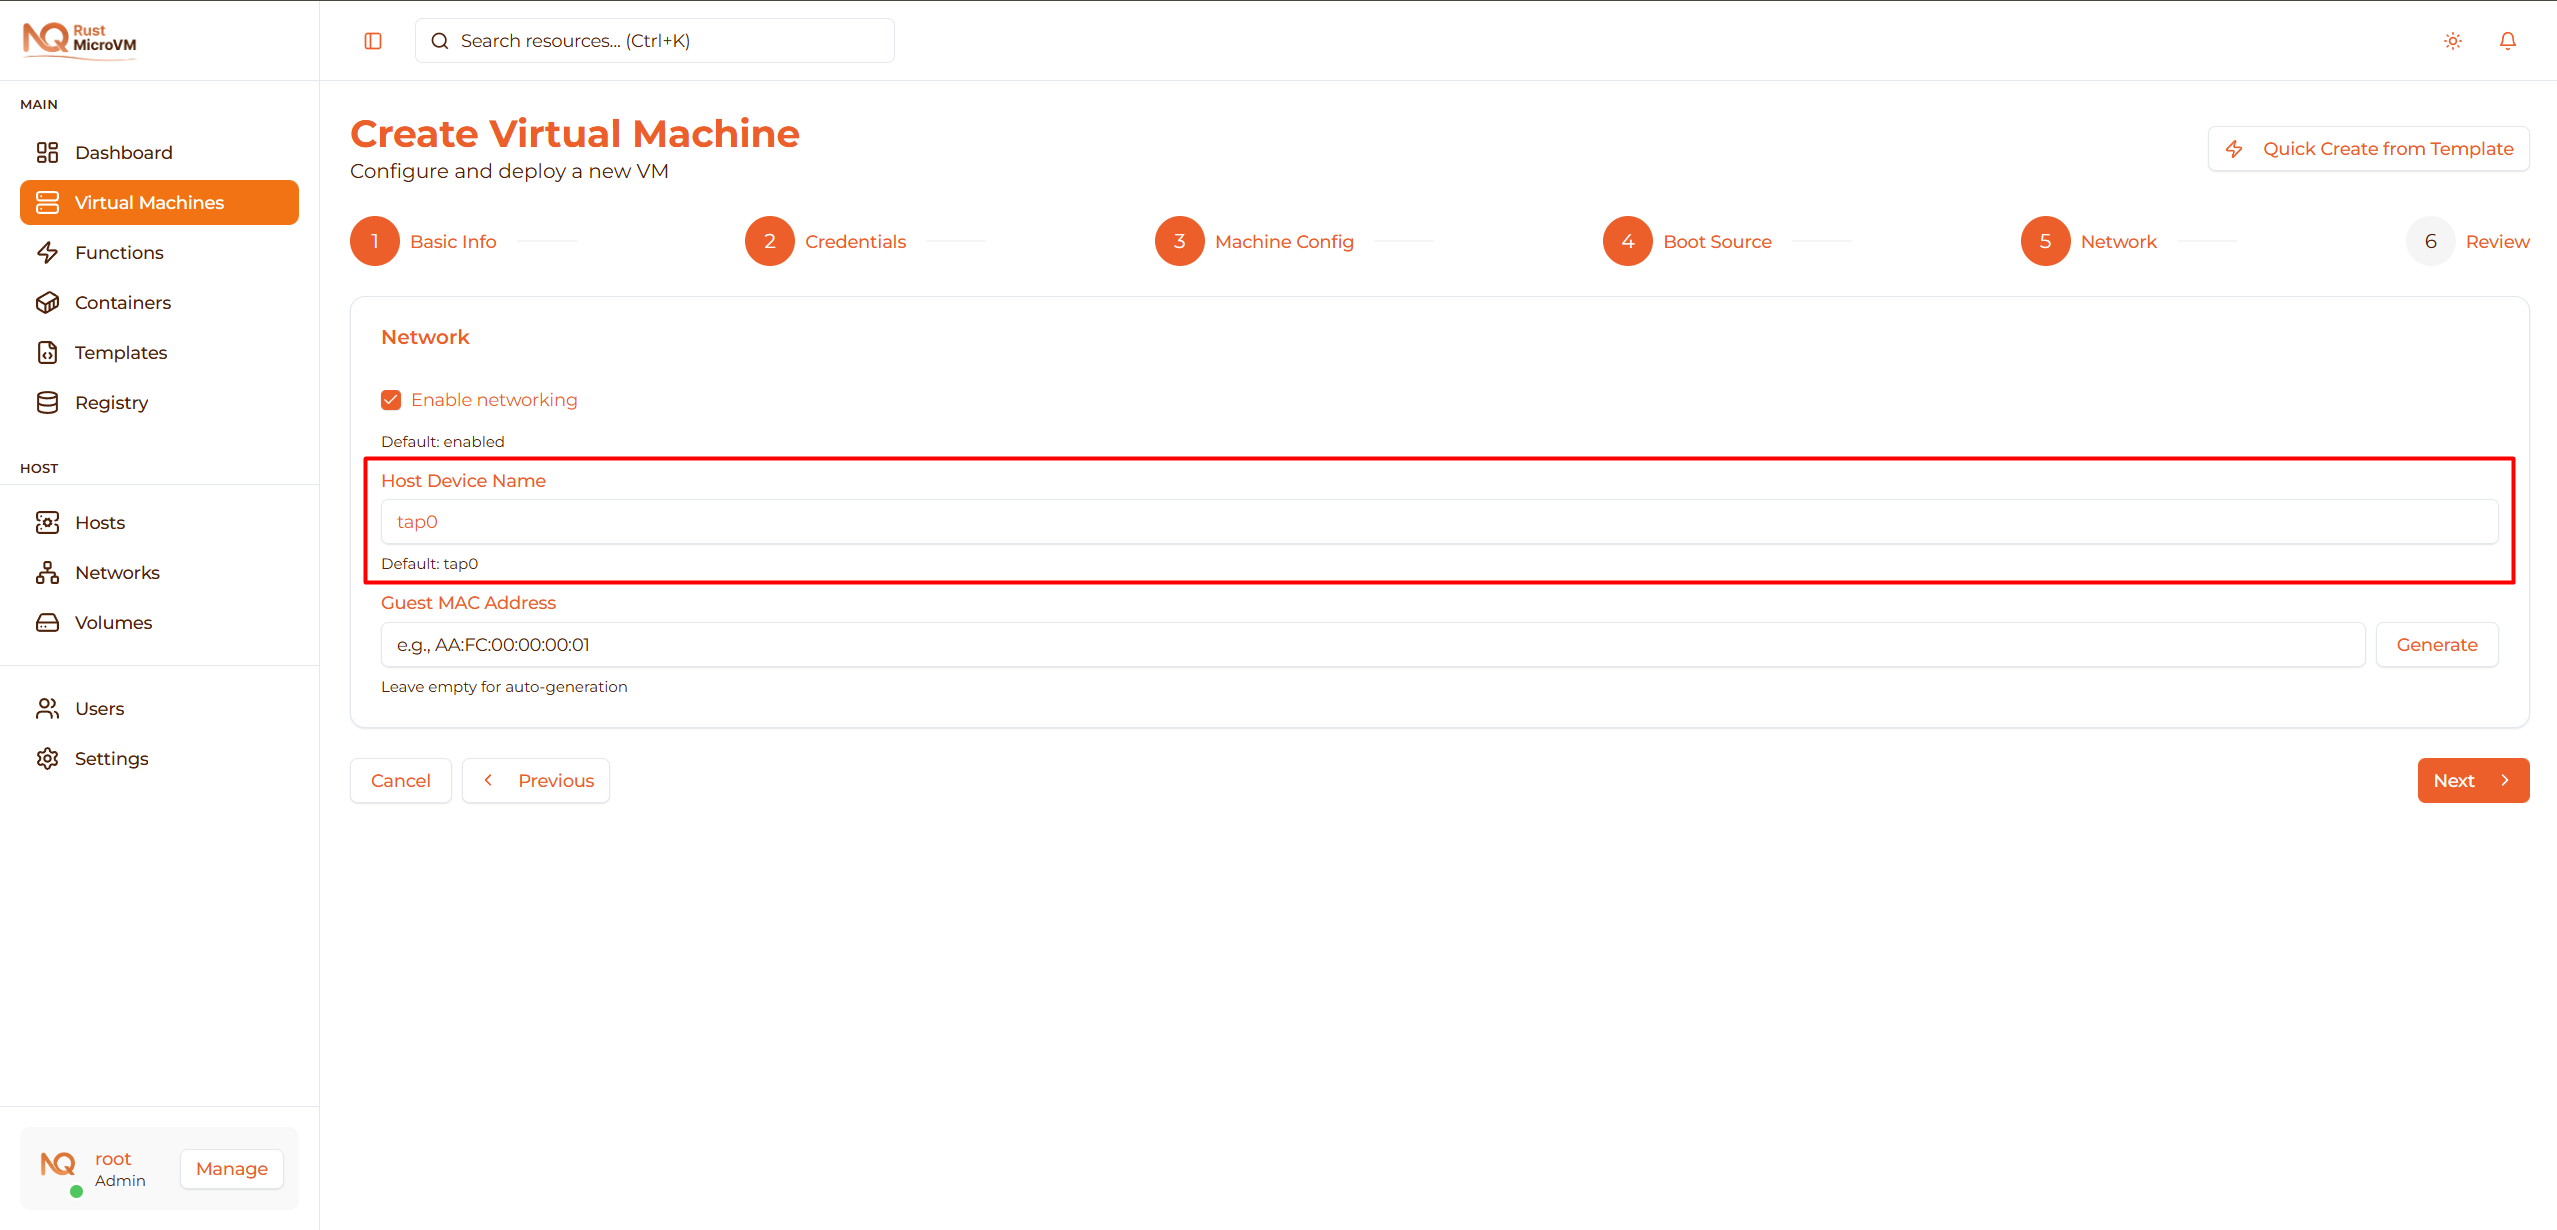
Specify the TAP device name on the host:
- Default:
tap0 - The system will create this TAP device
- Multiple VMs can share the same bridge but need unique IPs
Tip: For most cases, use the default tap0.
Guest MAC Address
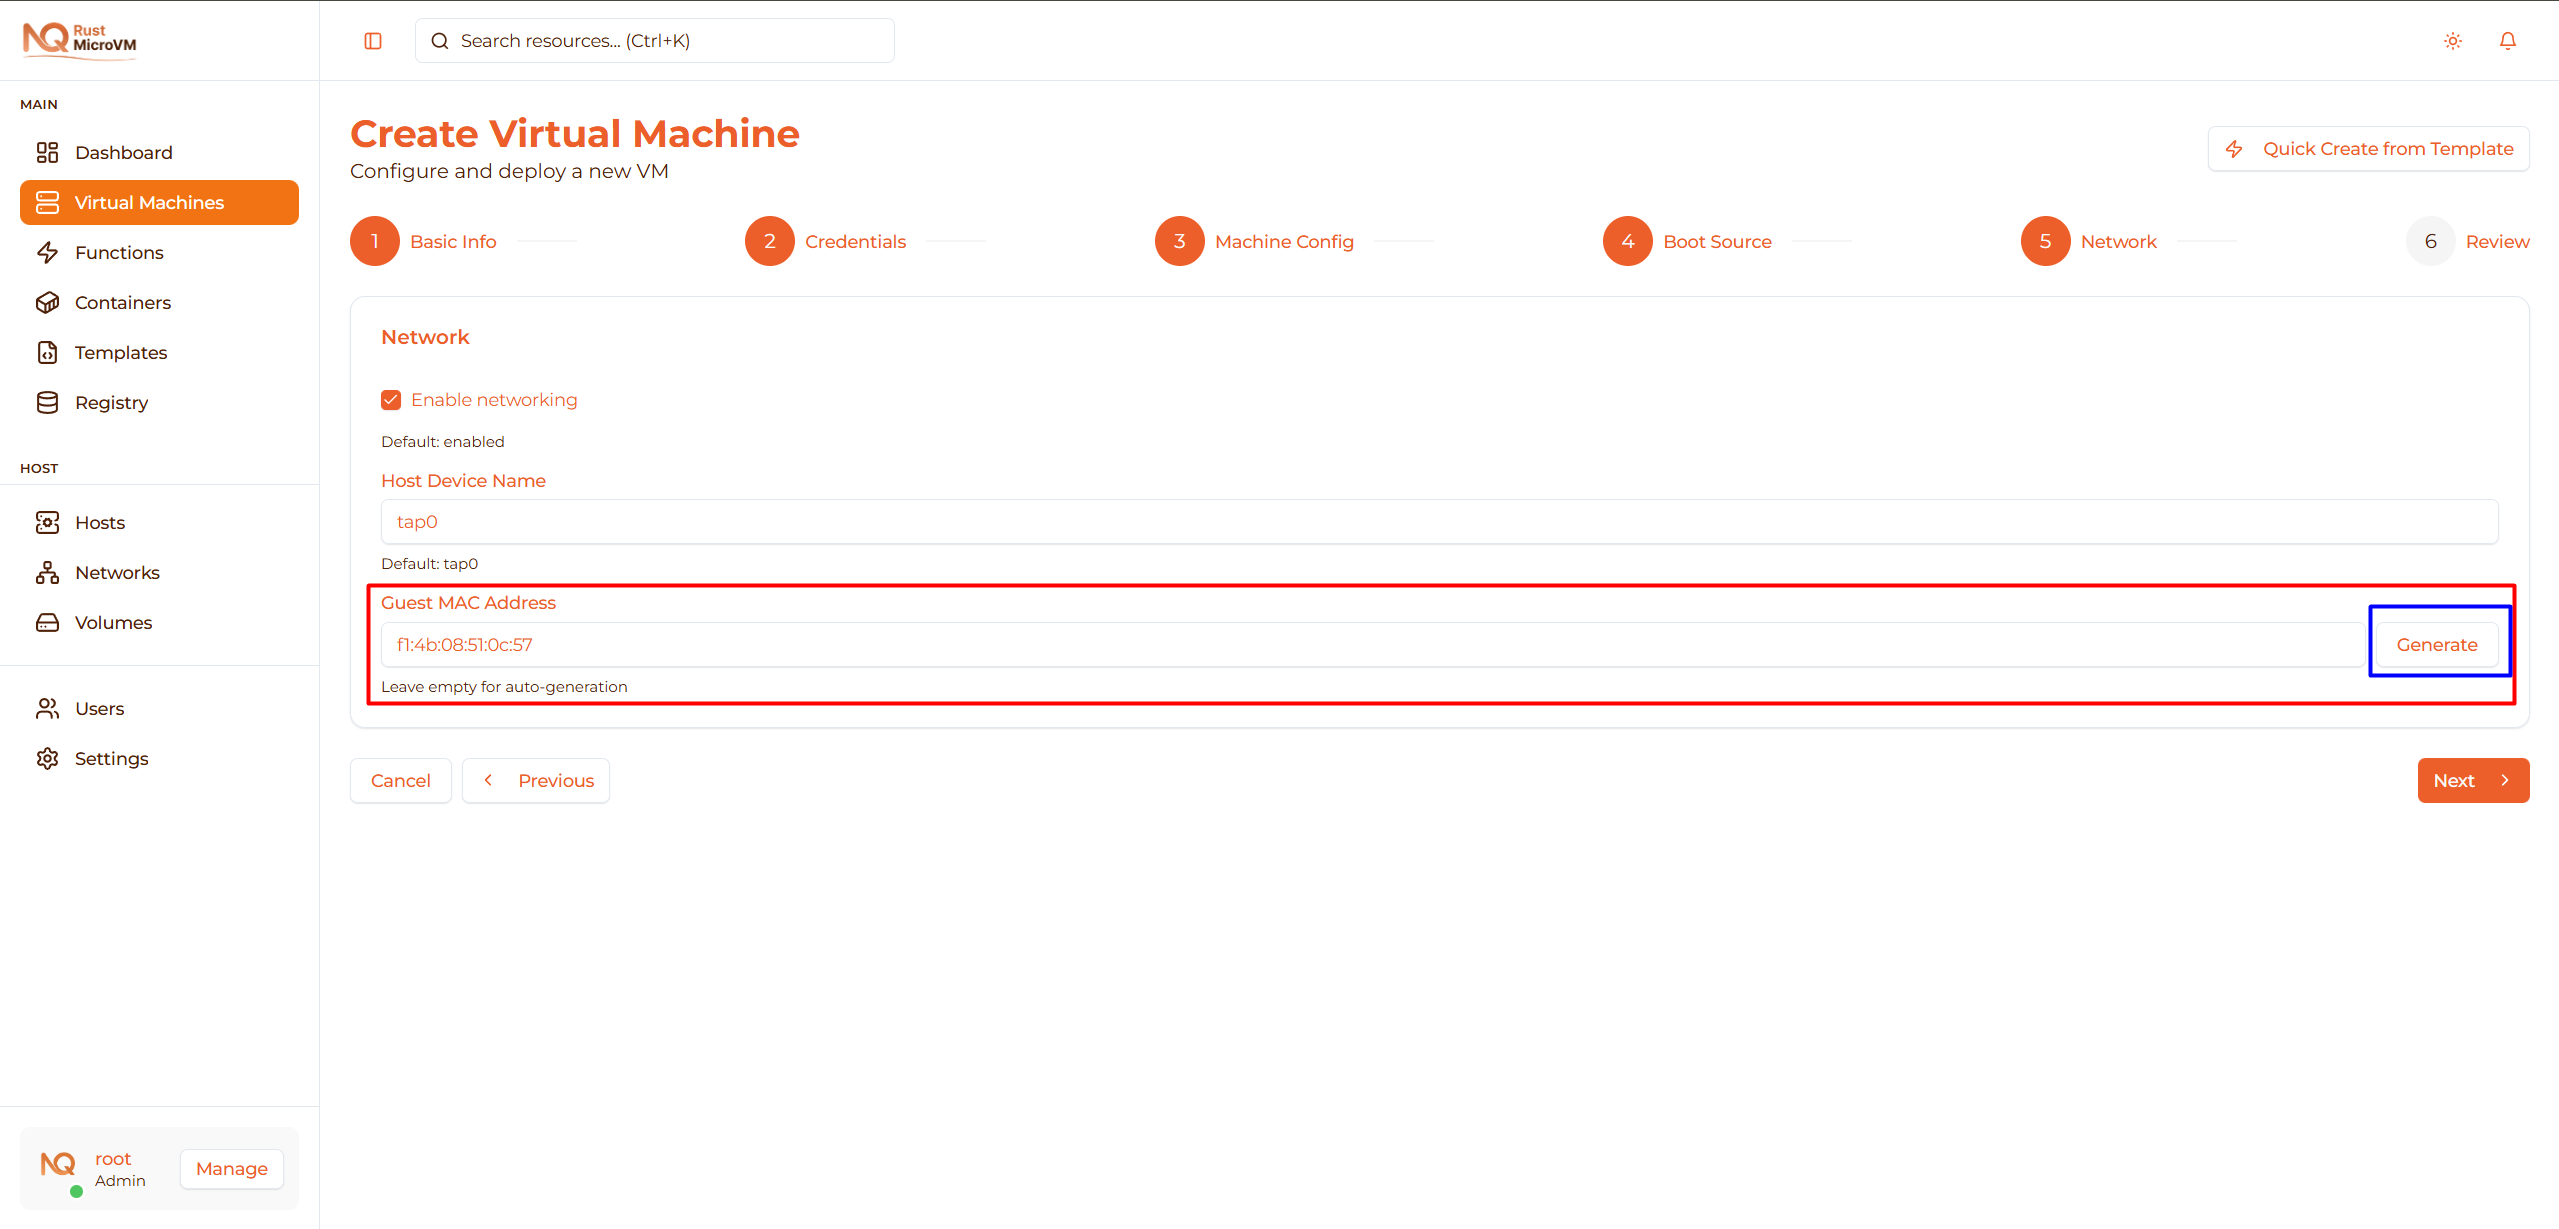
Set the MAC address for the VM’s network interface:
- Leave empty for automatic MAC generation (recommended)
- OR click “Generate” to create a random MAC address
- OR enter manually (format:
AA:FC:00:00:00:01)
Examples:
- Auto-generated: System assigns unique MAC
- Generated:
aa:bb:cc:dd:ee:ff(click Generate button) - Manual:
AA:FC:00:00:00:01
Recommendation: Leave empty or click Generate to avoid MAC conflicts.
Click Next to review your configuration.
Step 7: Review & Create
Review your VM configuration before creating:
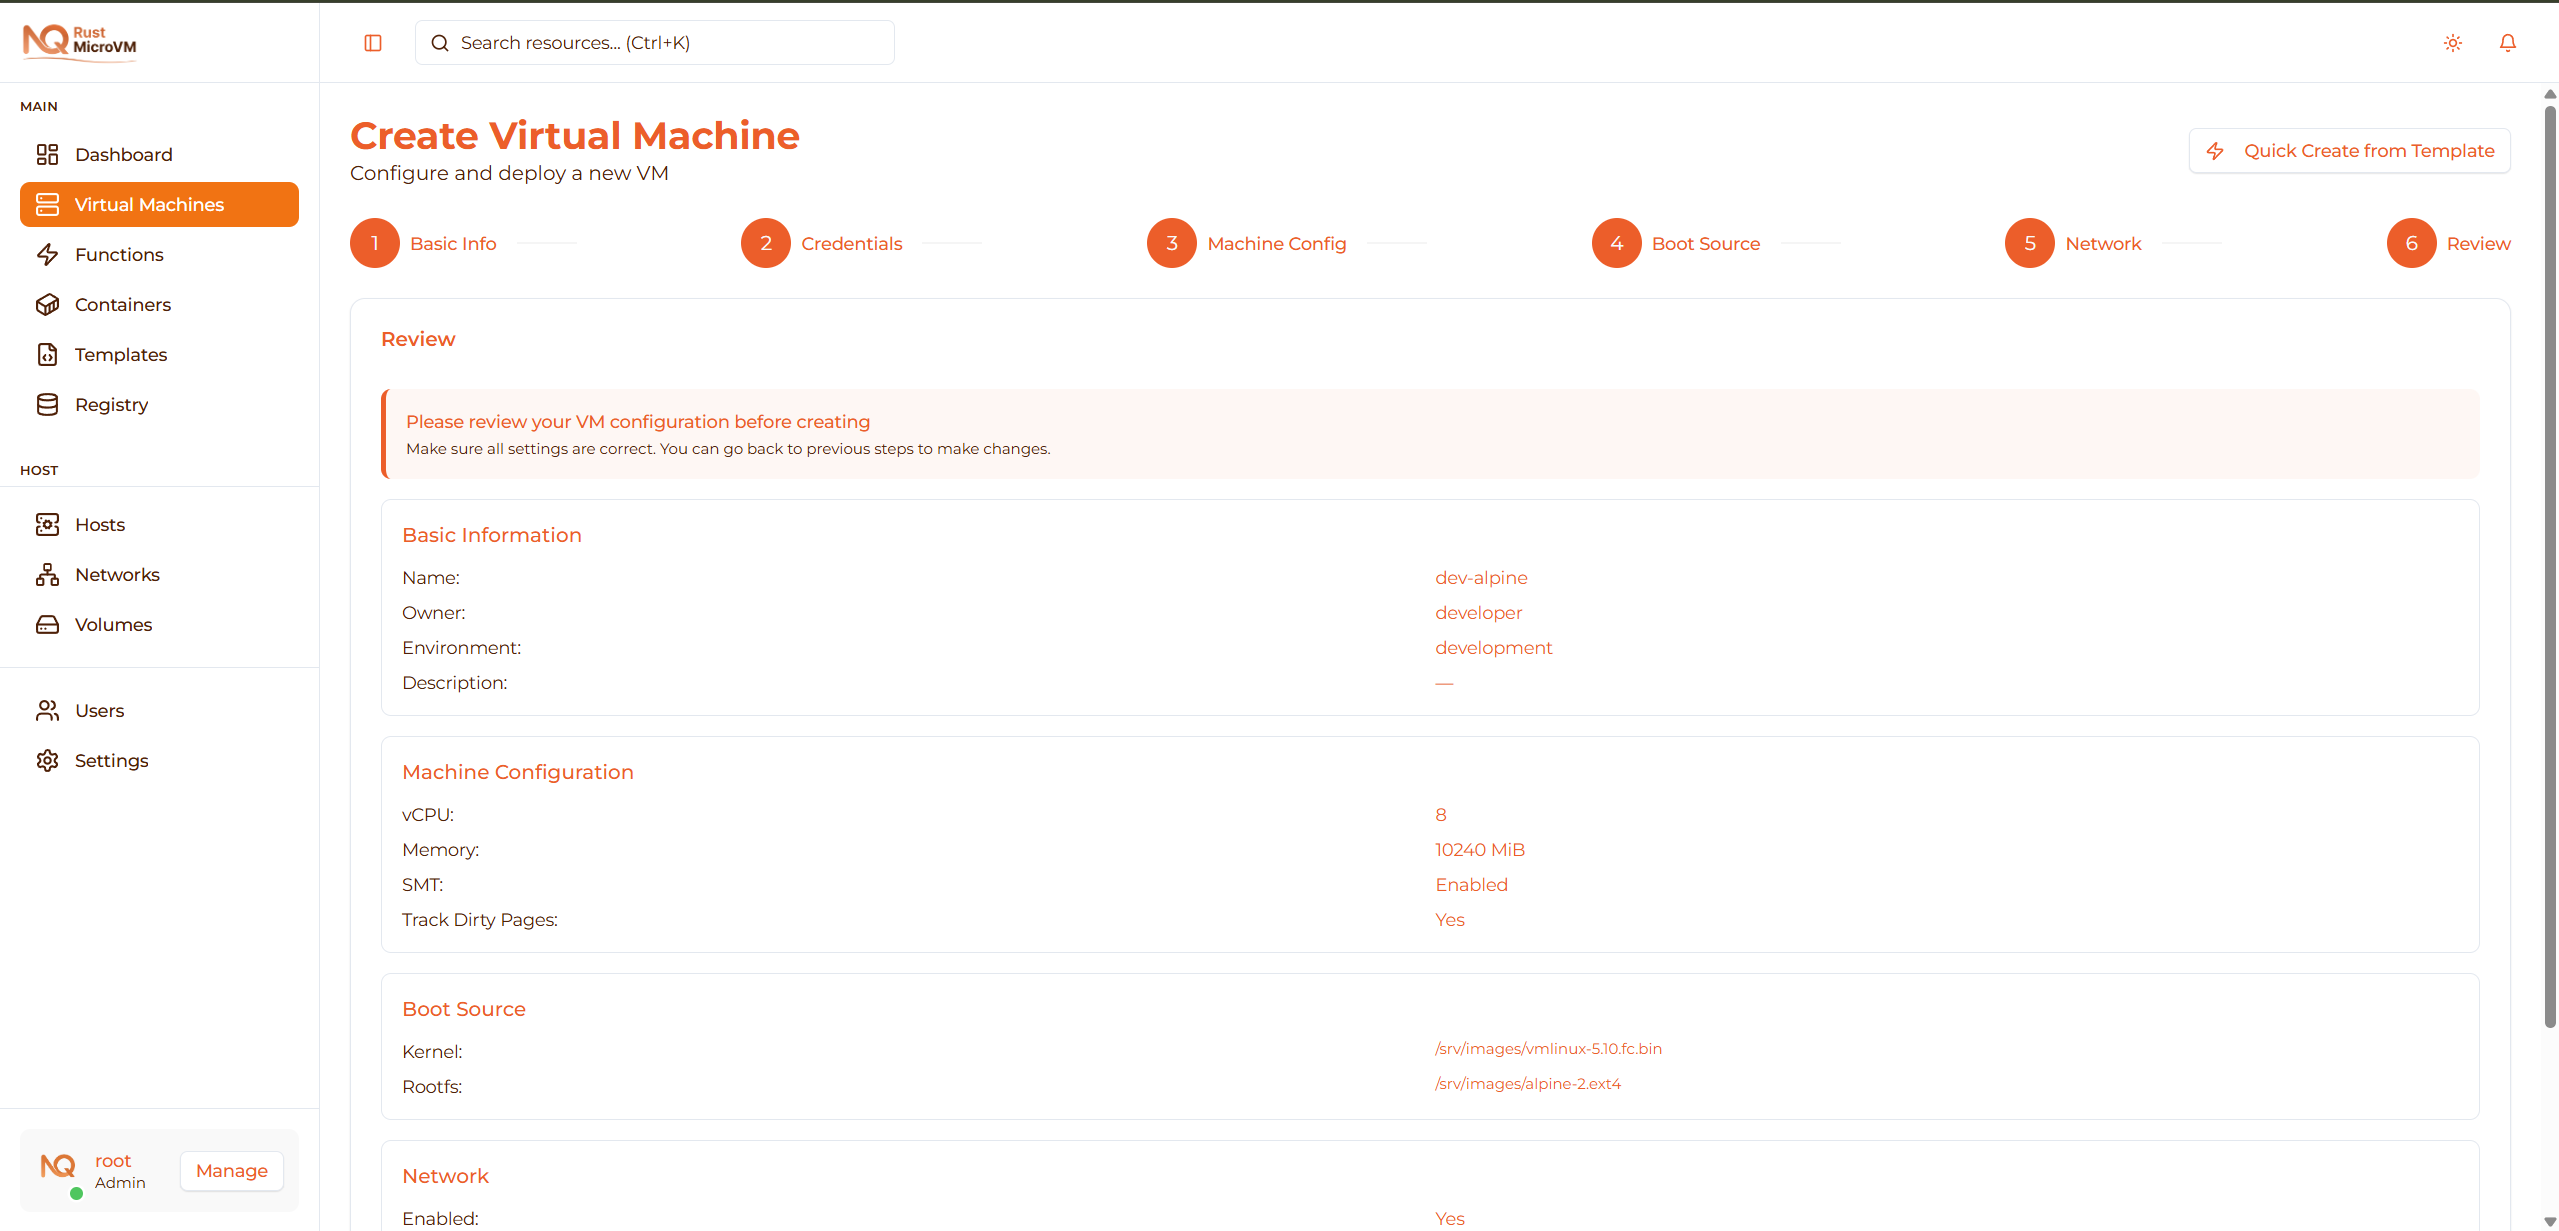
The review page shows a summary of all your settings organized into sections:
Basic Information

Review:
- Name: Your VM name
- Owner: Owner name
- Environment: Development/Staging/Production
- Description: Your description (if provided)
Machine Configuration

Verify:
- vCPU: Number of virtual CPUs
- Memory: RAM in MiB
- SMT: Enabled or Disabled
- Track Dirty Pages: Yes or No
Boot Source

Confirm:
- Kernel: Path to kernel image
- Rootfs: Path to rootfs image
Network

Check:
- Enabled: Yes or No
- Host Device: TAP device name (e.g., tap0)
- Guest MAC: MAC address (or “—” if auto-generated)
Make Changes
If you need to modify any settings:
- Click the Previous button at the bottom
- Navigate to the step you want to change
- Update the values
- Click Next to return to Review
Create VM
When everything looks correct:
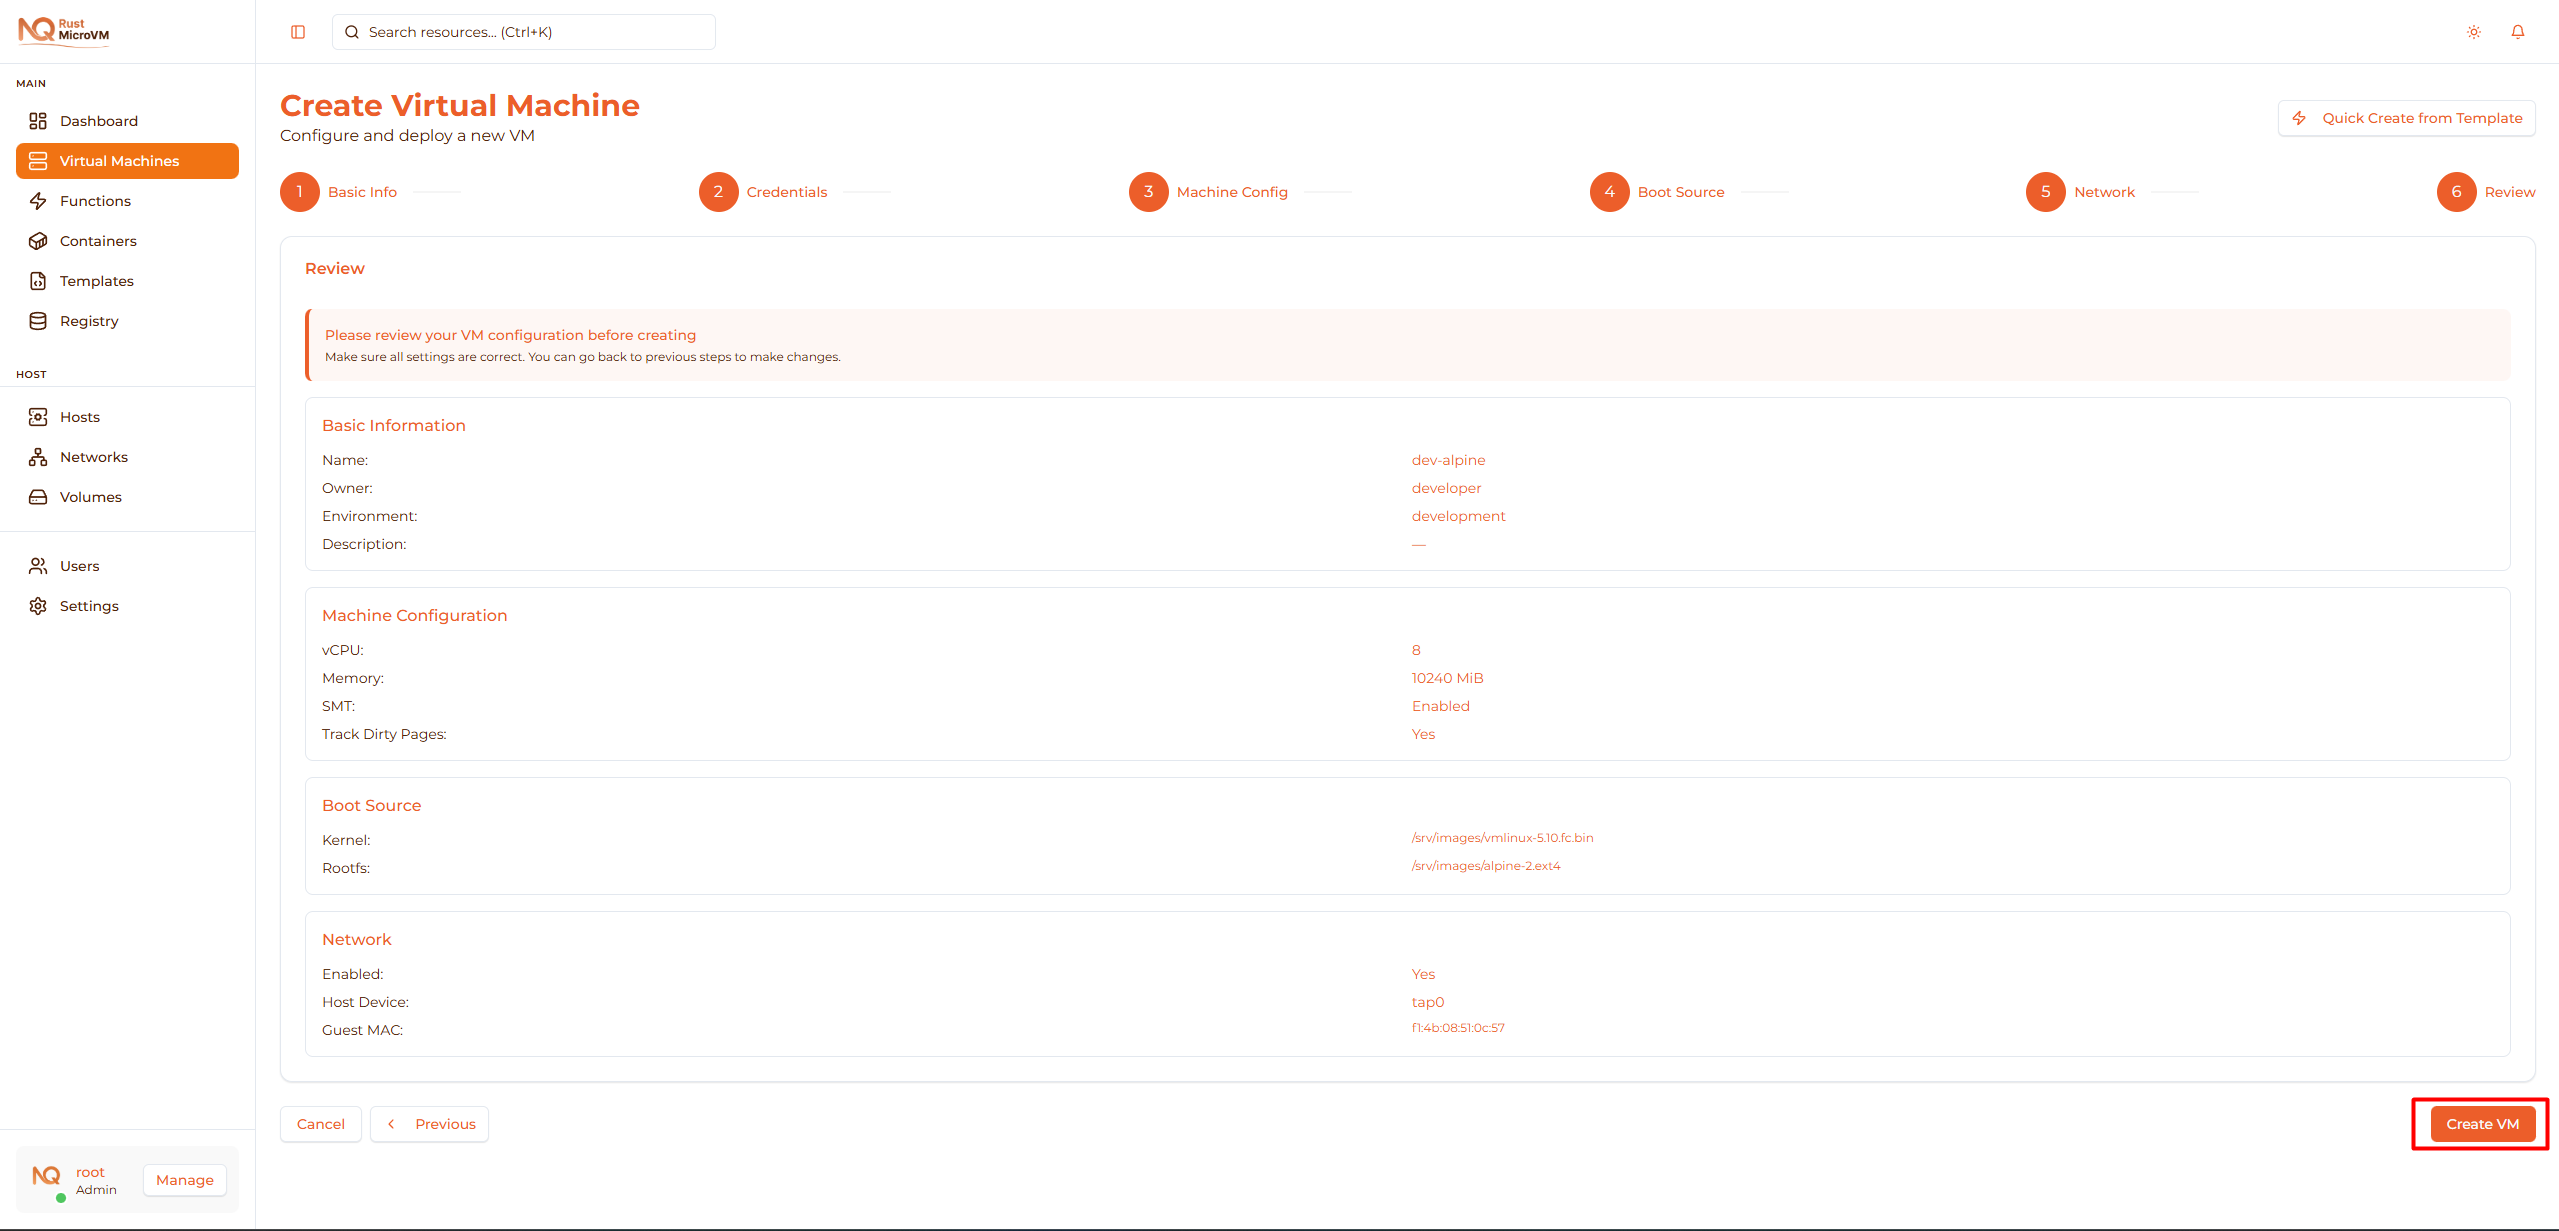
Click the Create VM button to proceed.
VM Creation Process
The system will now create your VM:
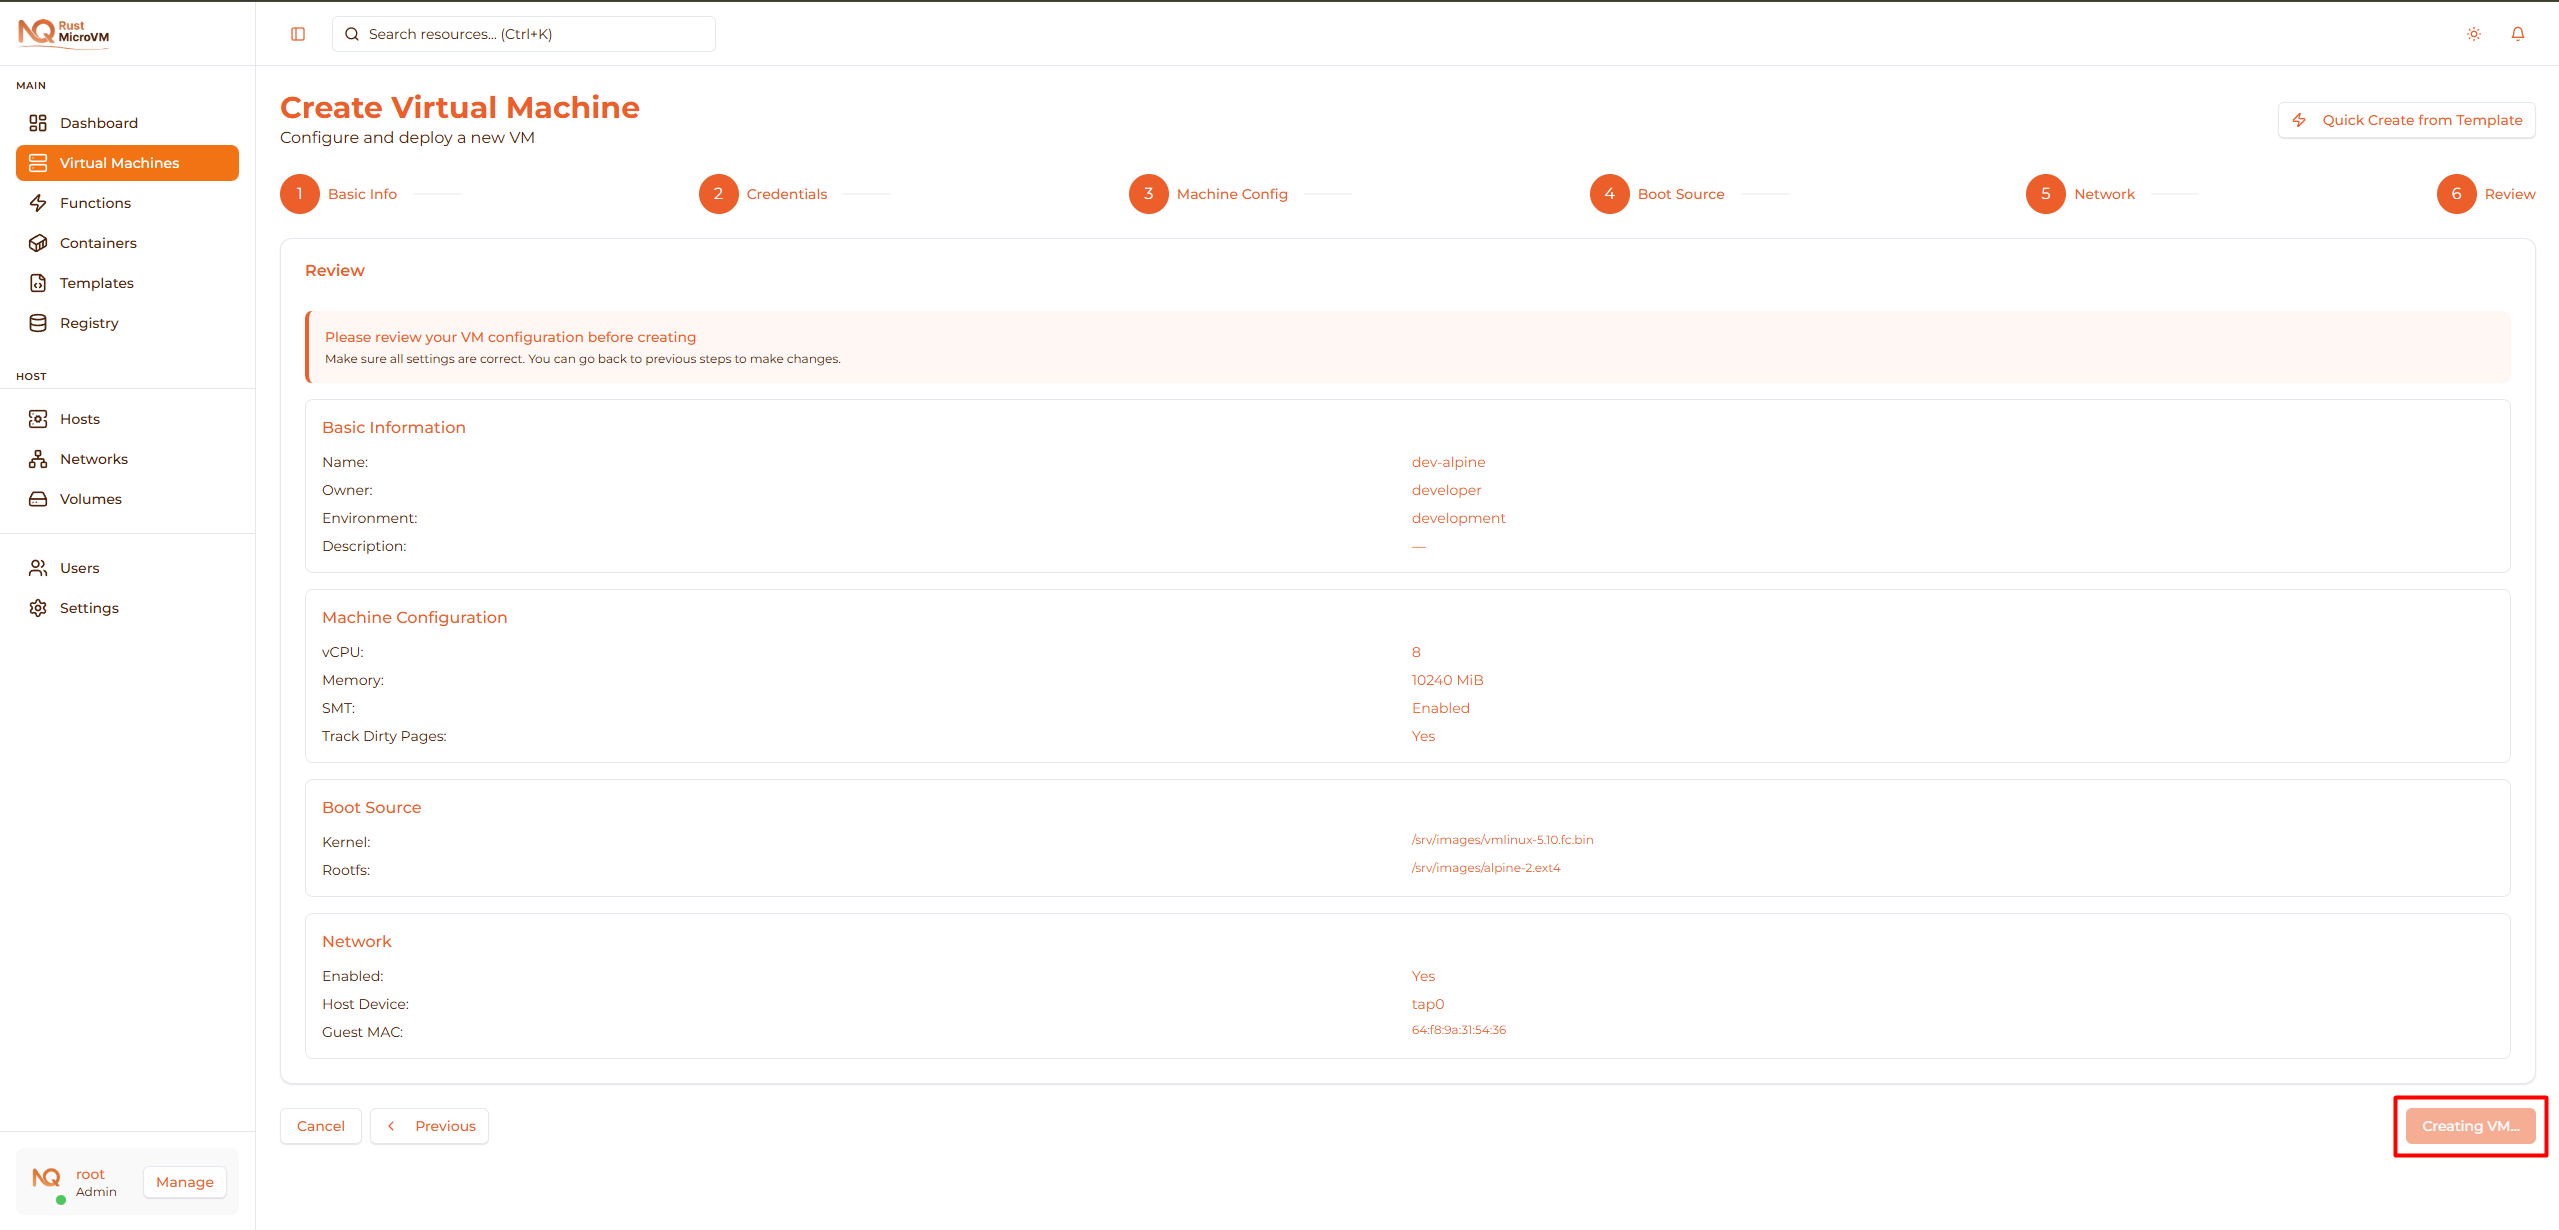
What happens behind the scenes:
- ✓ Resources allocated on host
- ✓ Firecracker VMM configured
- ✓ Kernel and rootfs attached
- ✓ Network interface created
- ✓ VM started
Time: Usually completes in 1-2 seconds!
Success!
Your VM is now running:
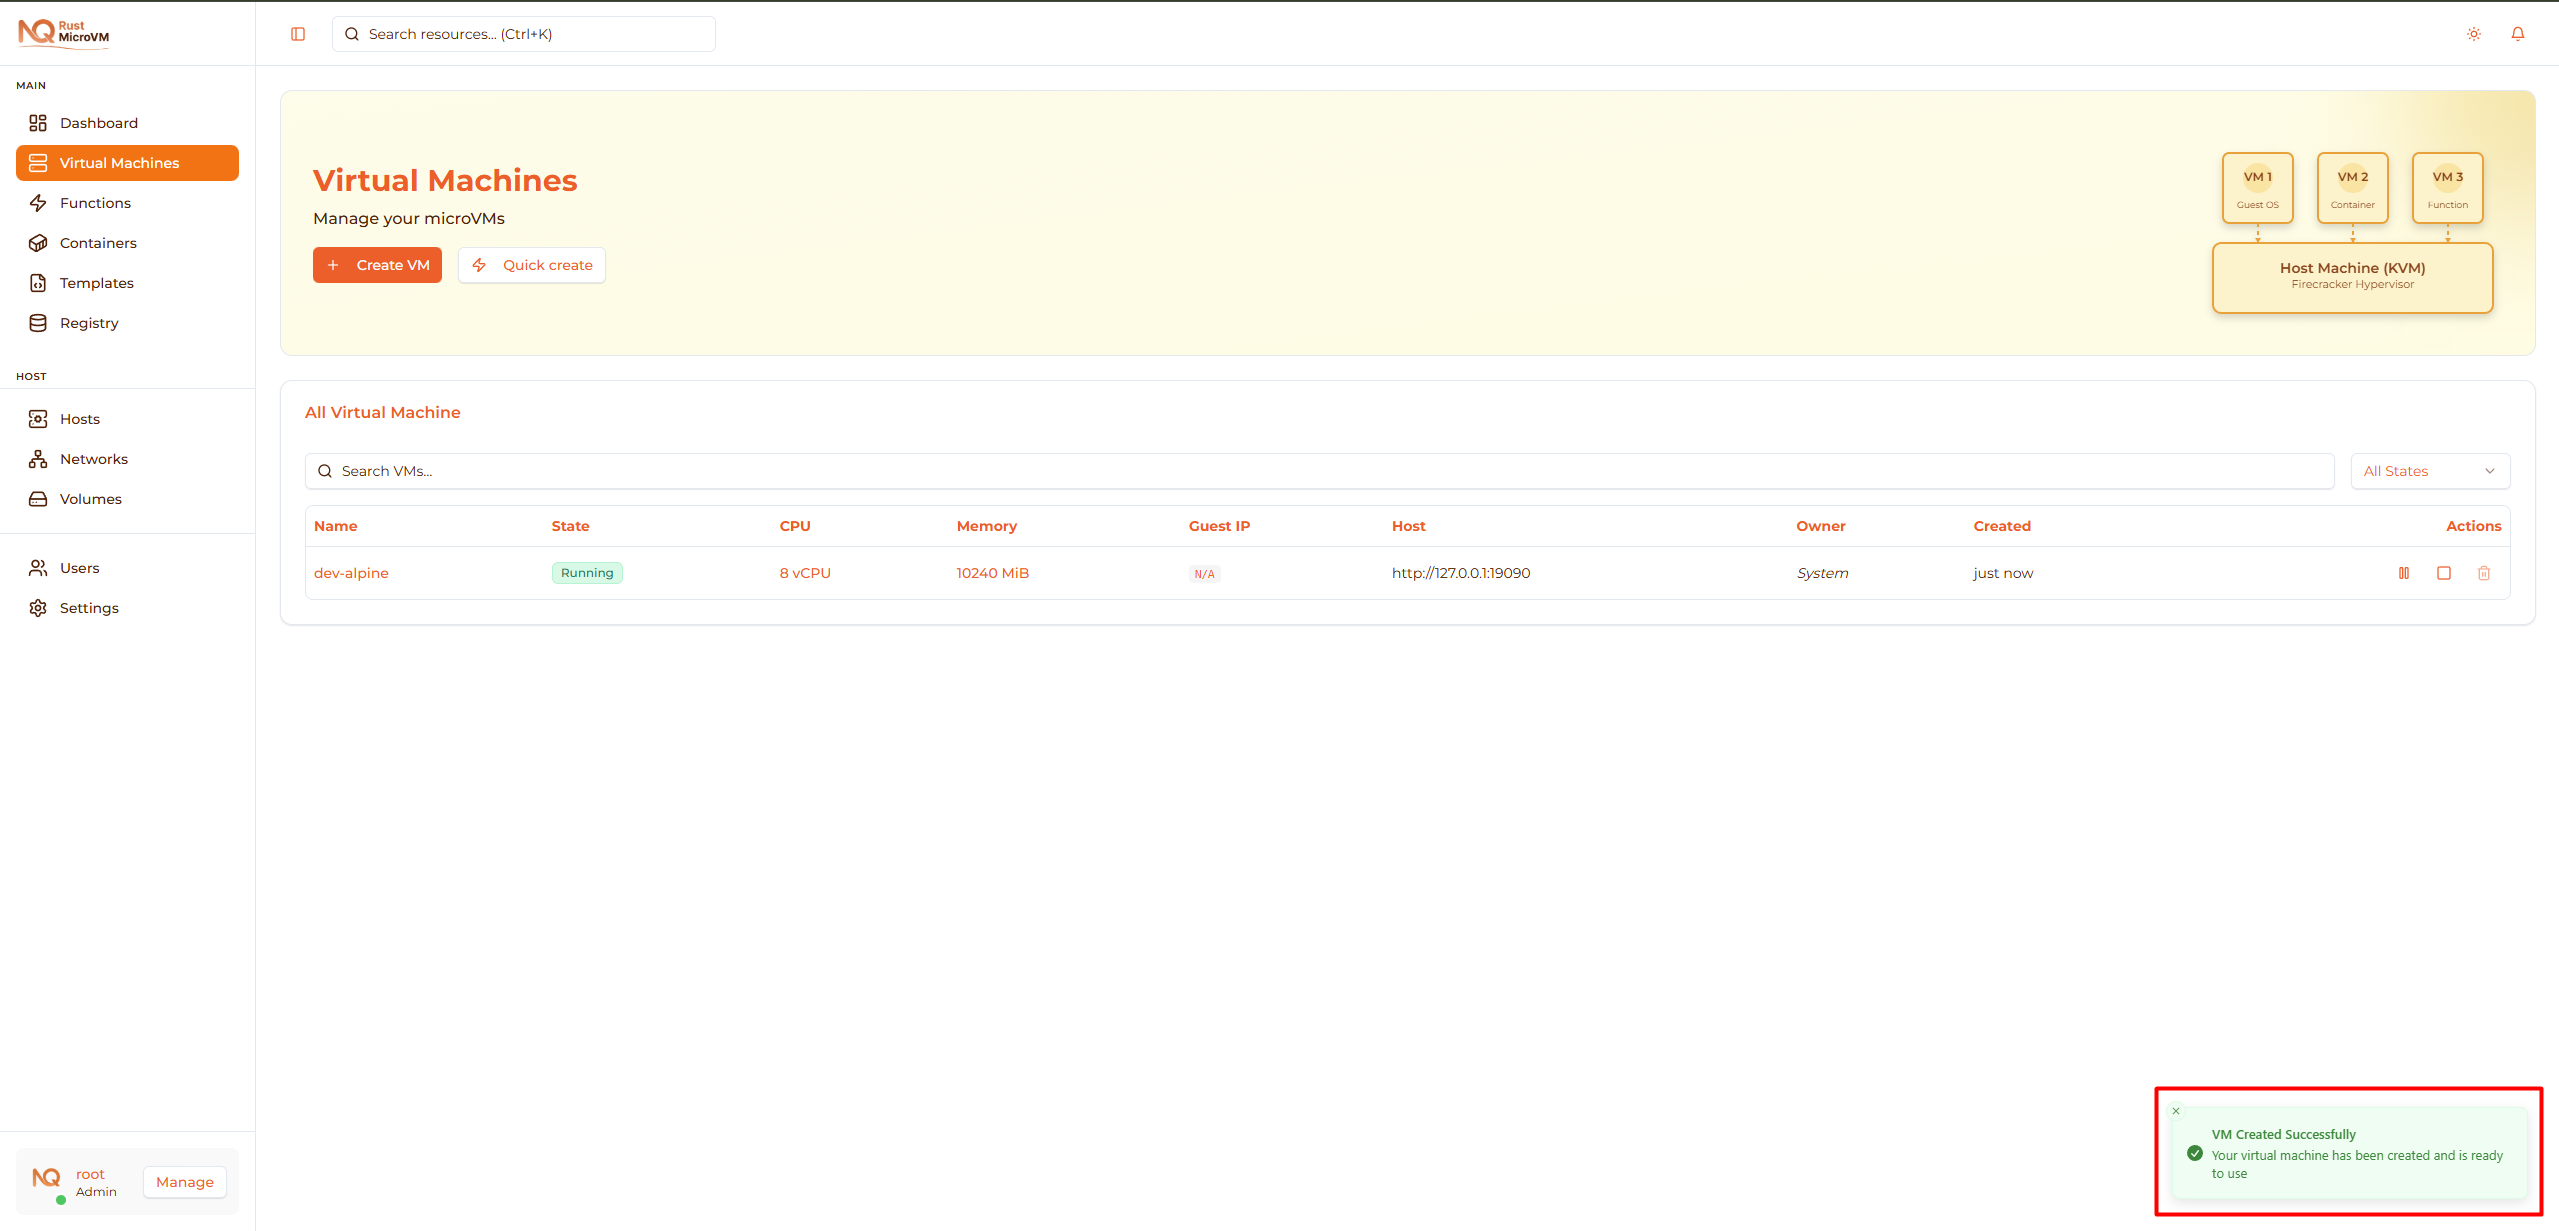
You’ll see:
- ✅ Status: Running (green indicator)
- ✅ IP Address: Assigned by DHCP (e.g., 192.168.1.100)
- ✅ Uptime: Counting up from 00:00:01
- ✅ Resource Usage: CPU and memory graphs
Verify Your VM
Check Status
On the VM detail page, verify:
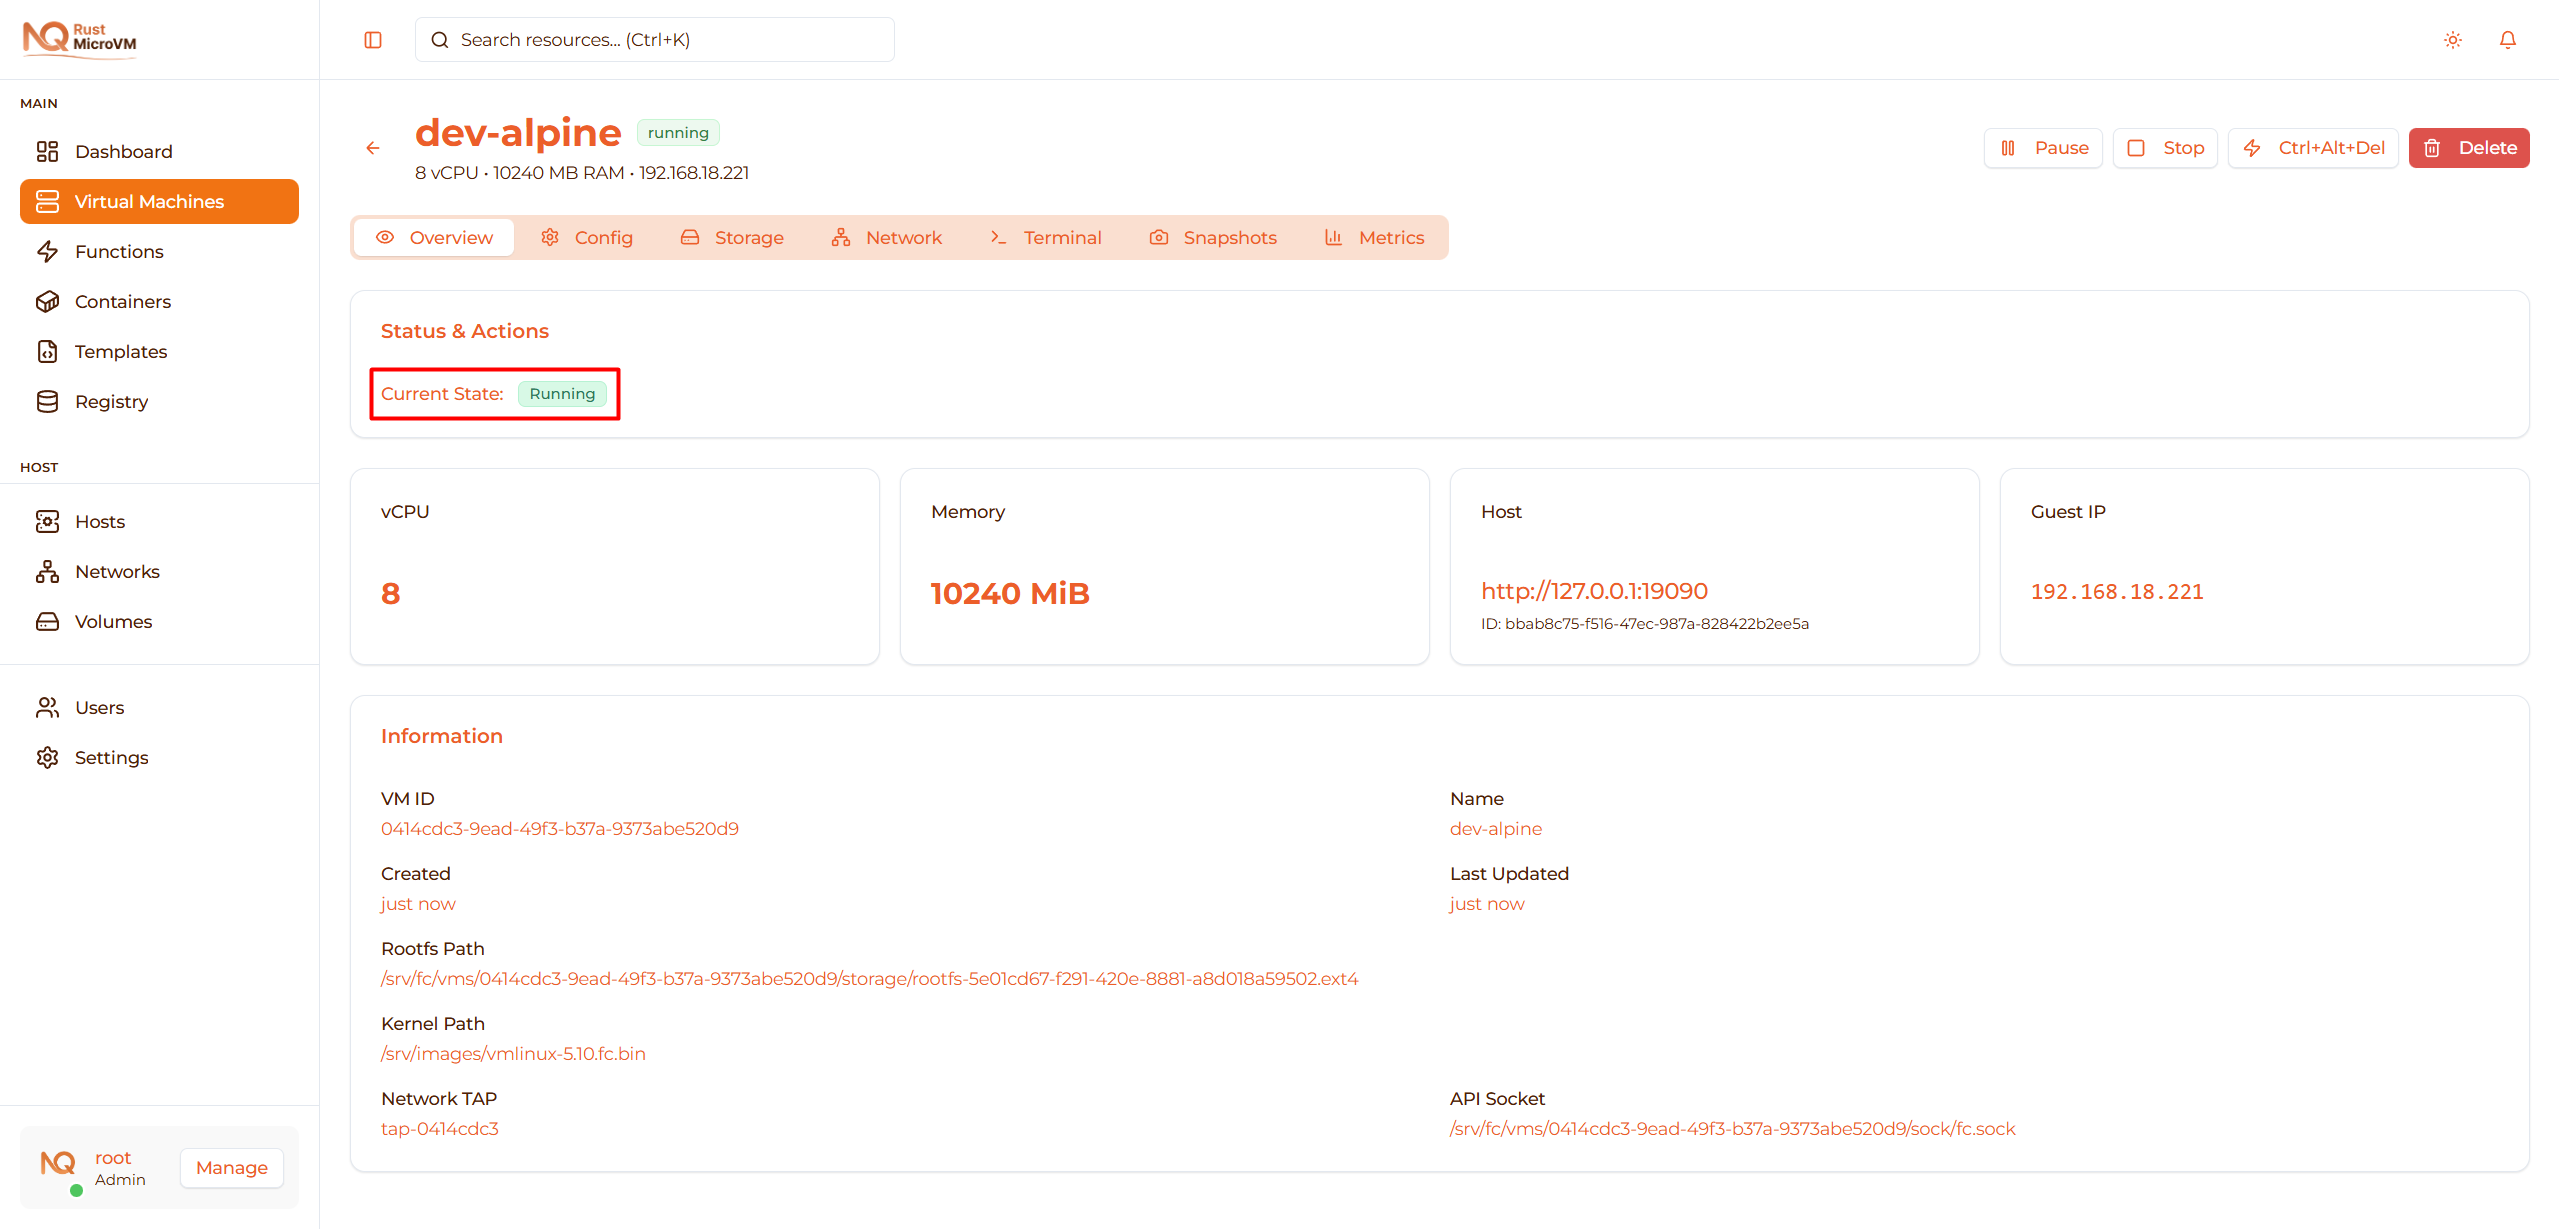
- Status shows Running with green indicator
- IP address is displayed
- CPU usage graph shows activity
- Memory usage is within limits
Test Console Access
Click the Terminal tab:
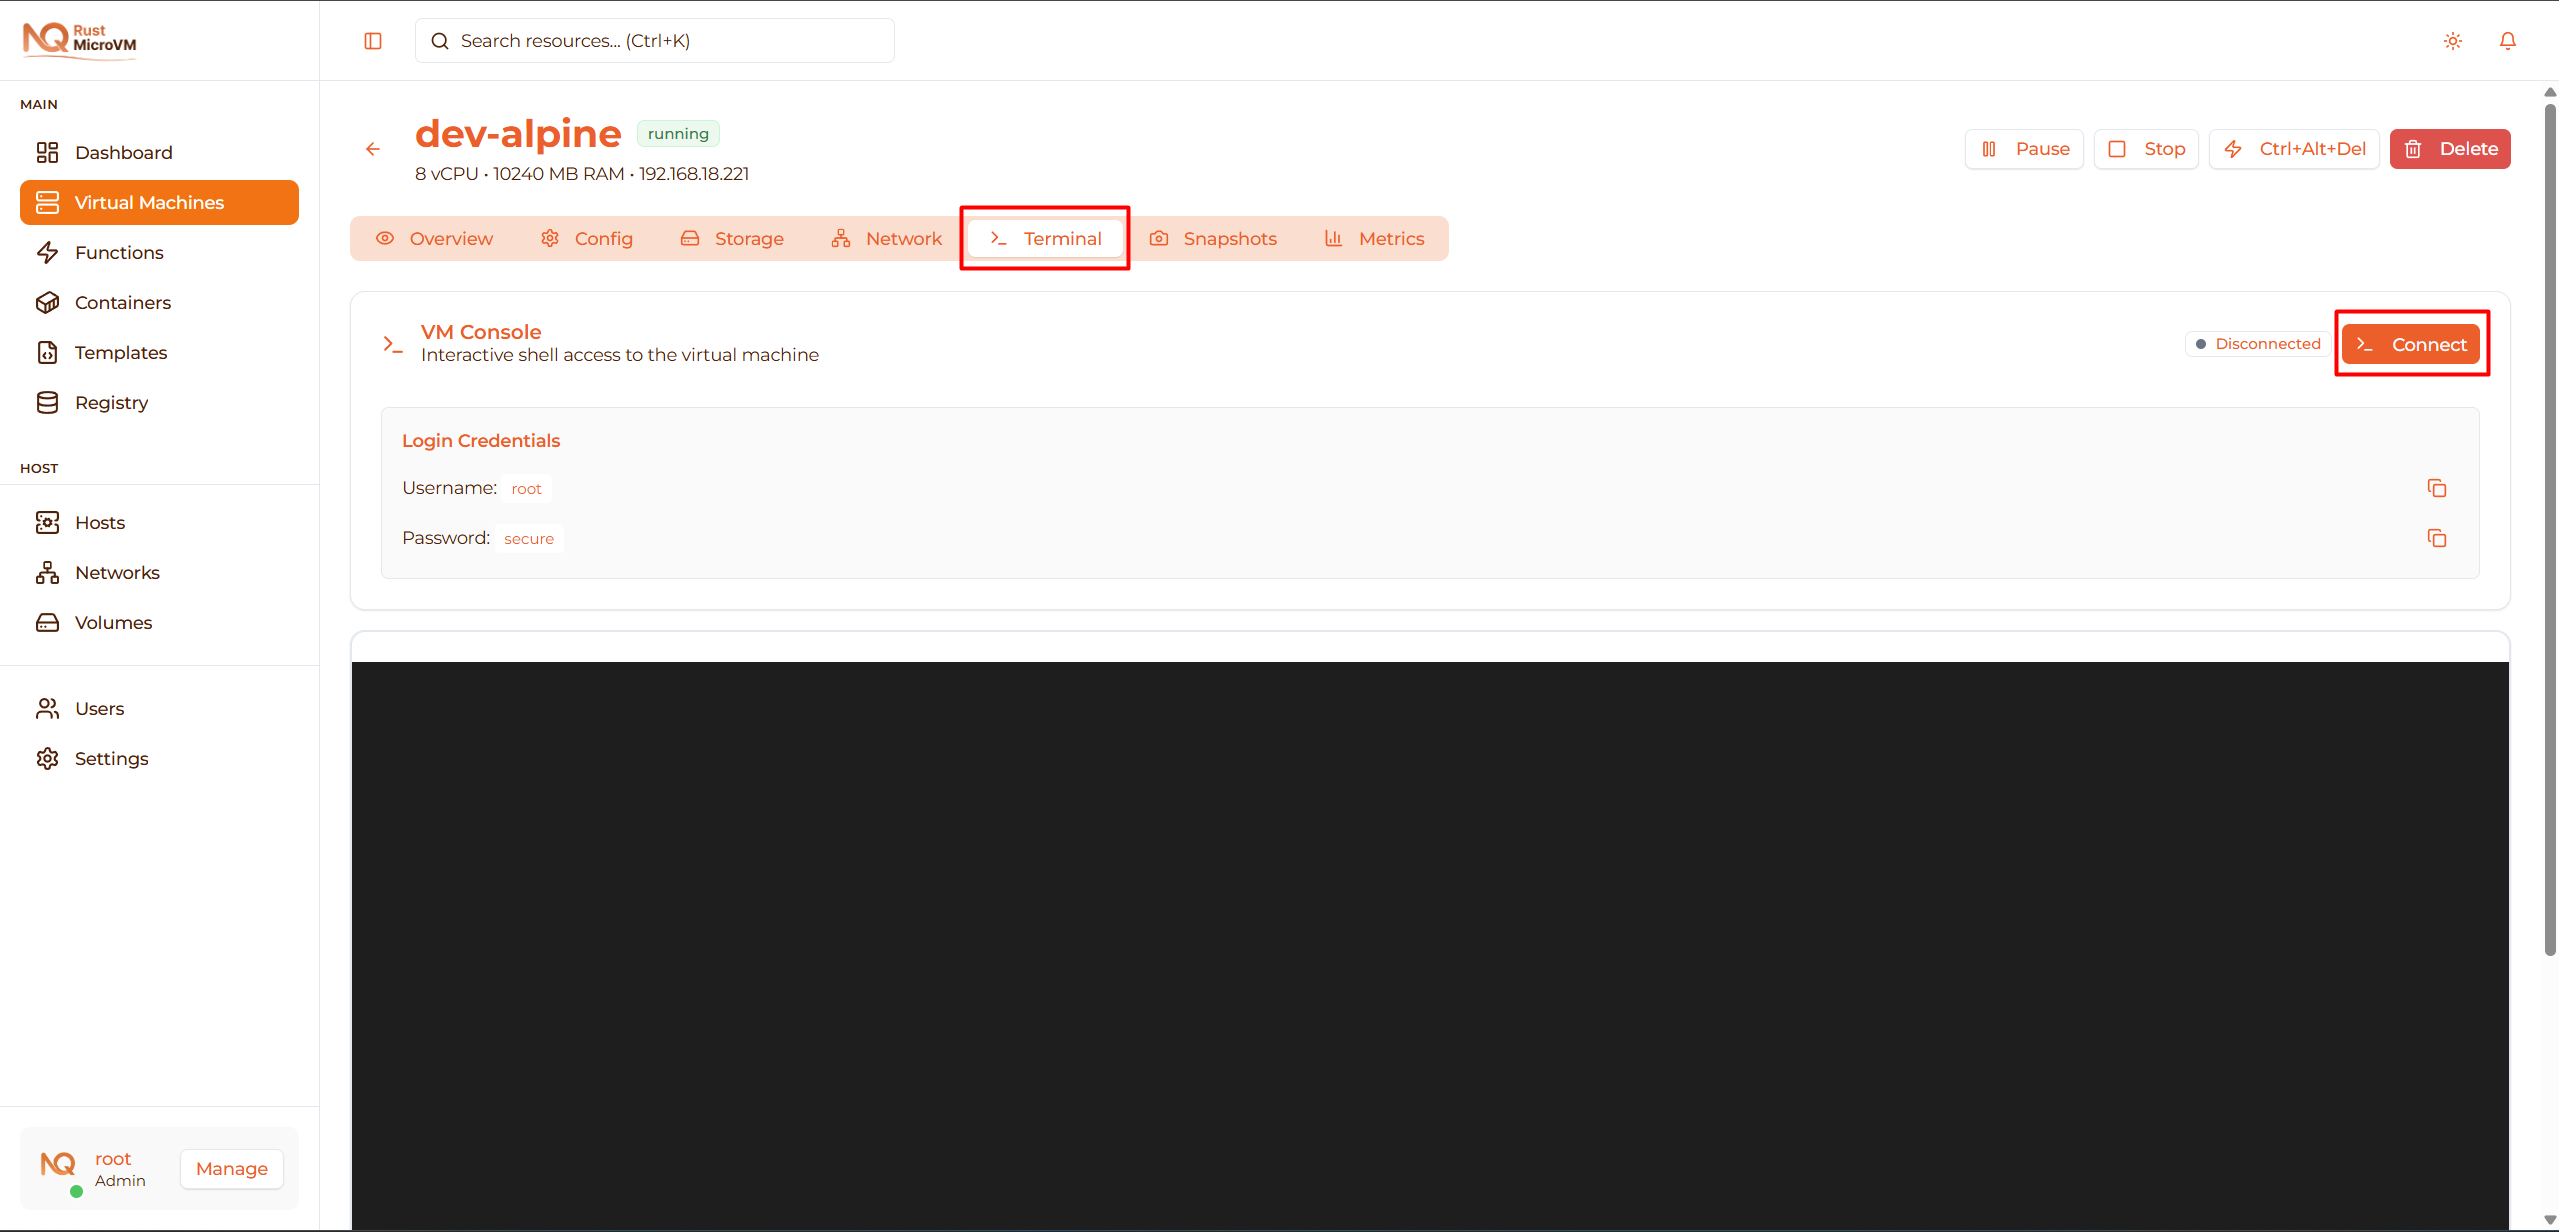
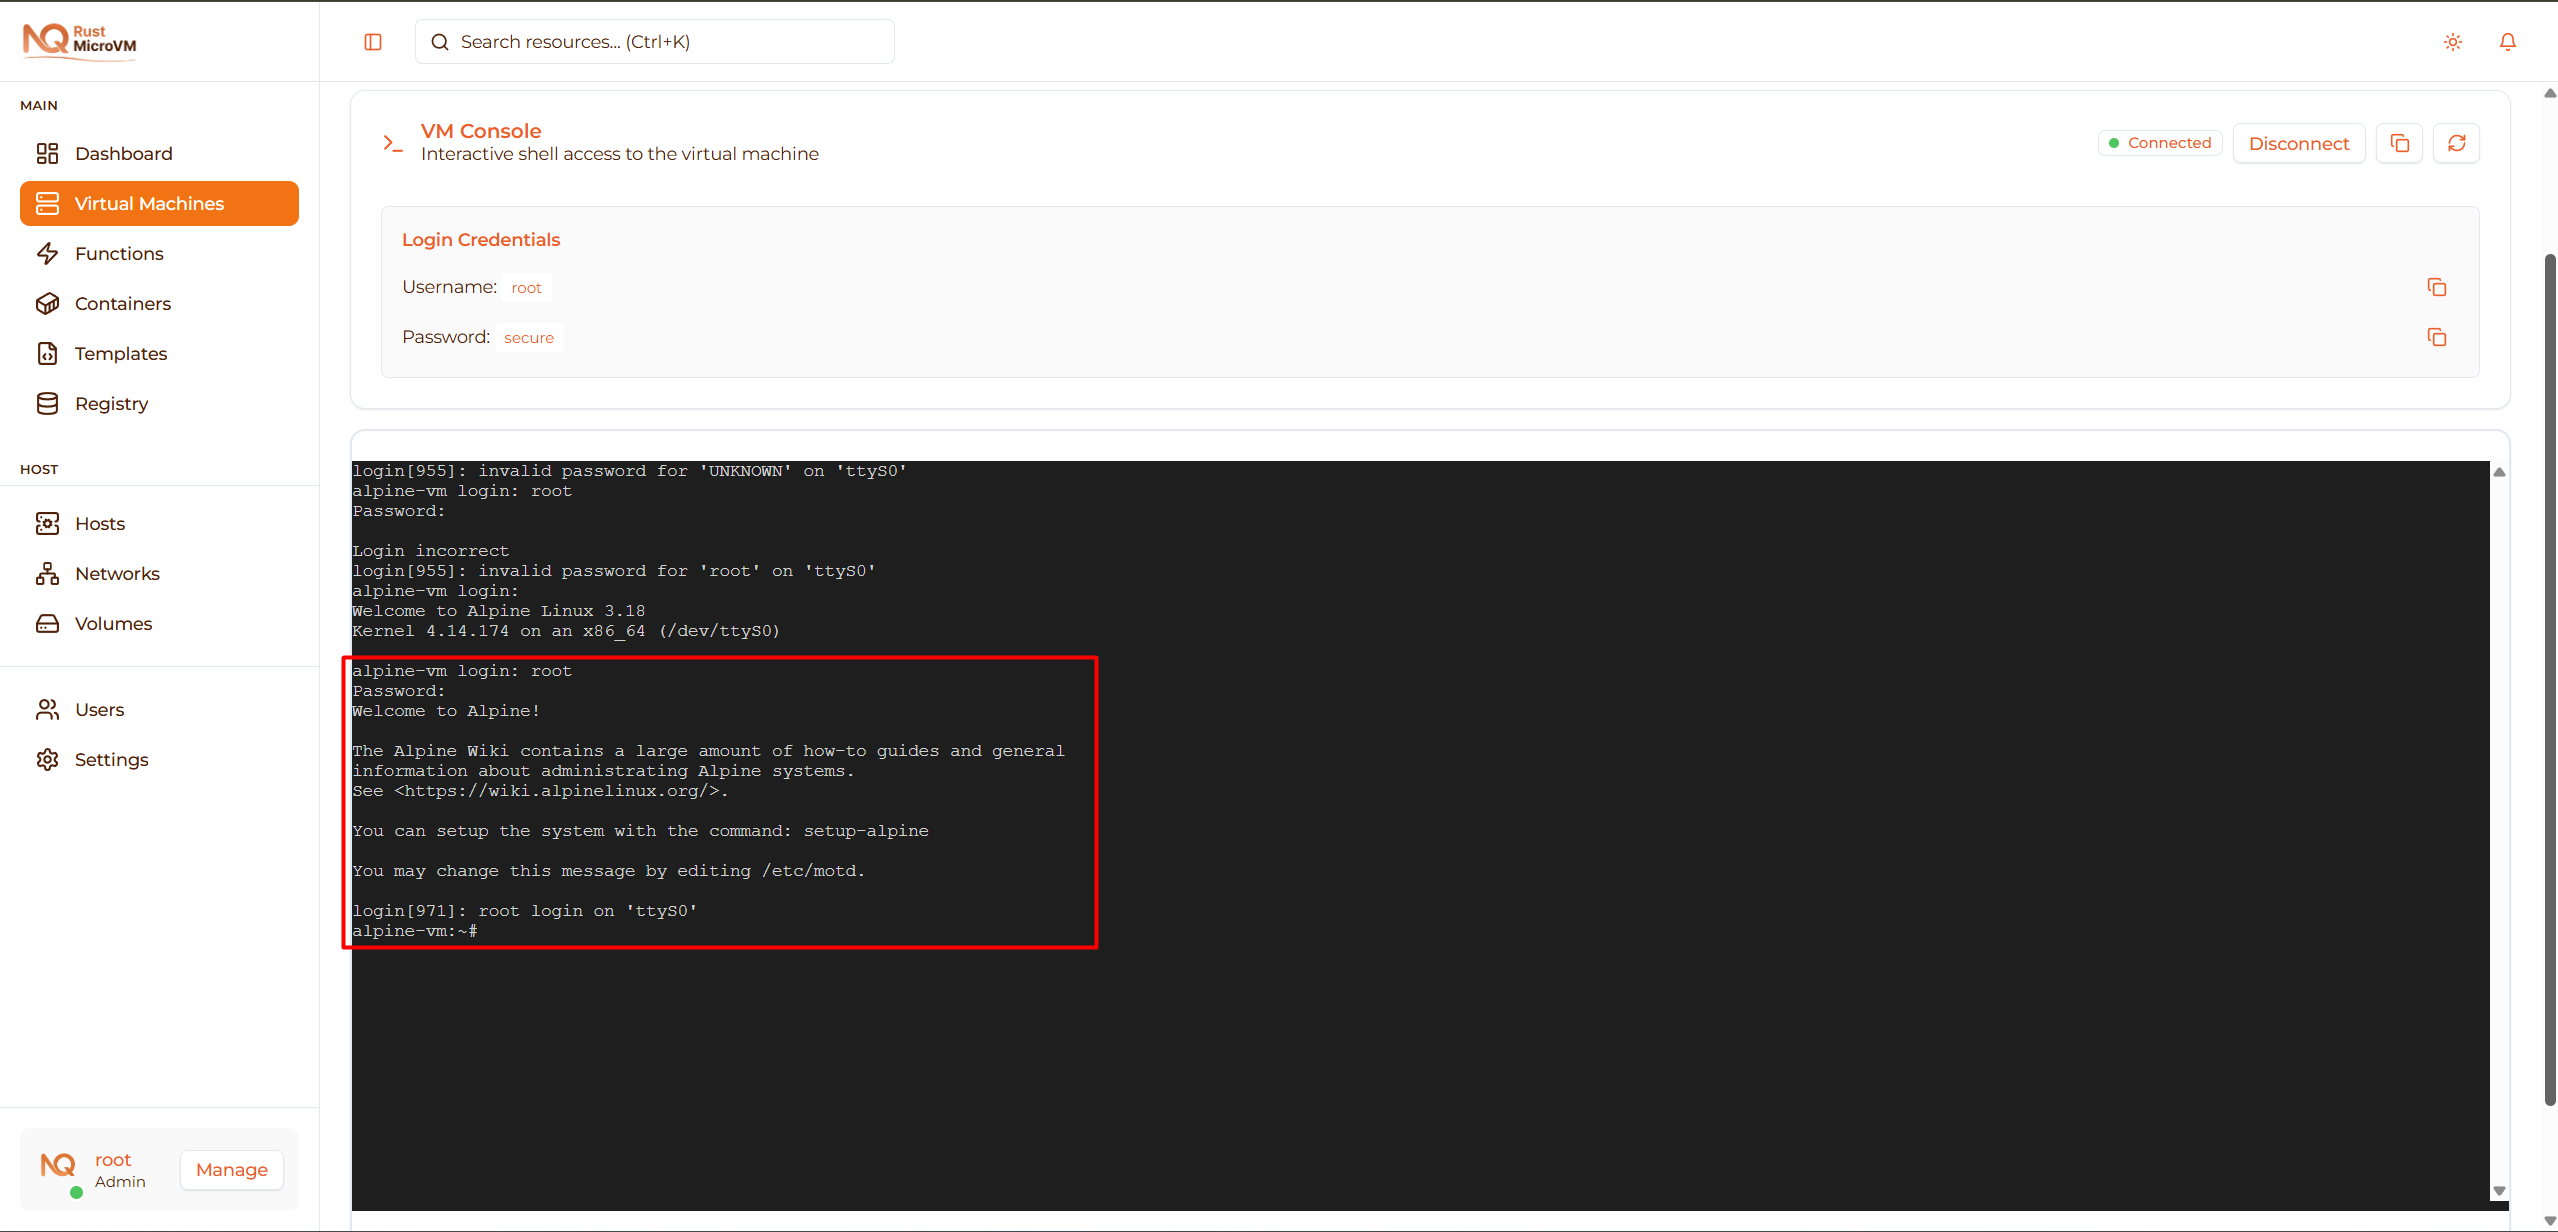
You should see a terminal prompt:
  Welcome to Alpine Linux 3.18
alpine login: root
Password:
Login:
- If you used SSH key: Login as
root(may be automatic) - If you set password: Enter your root password
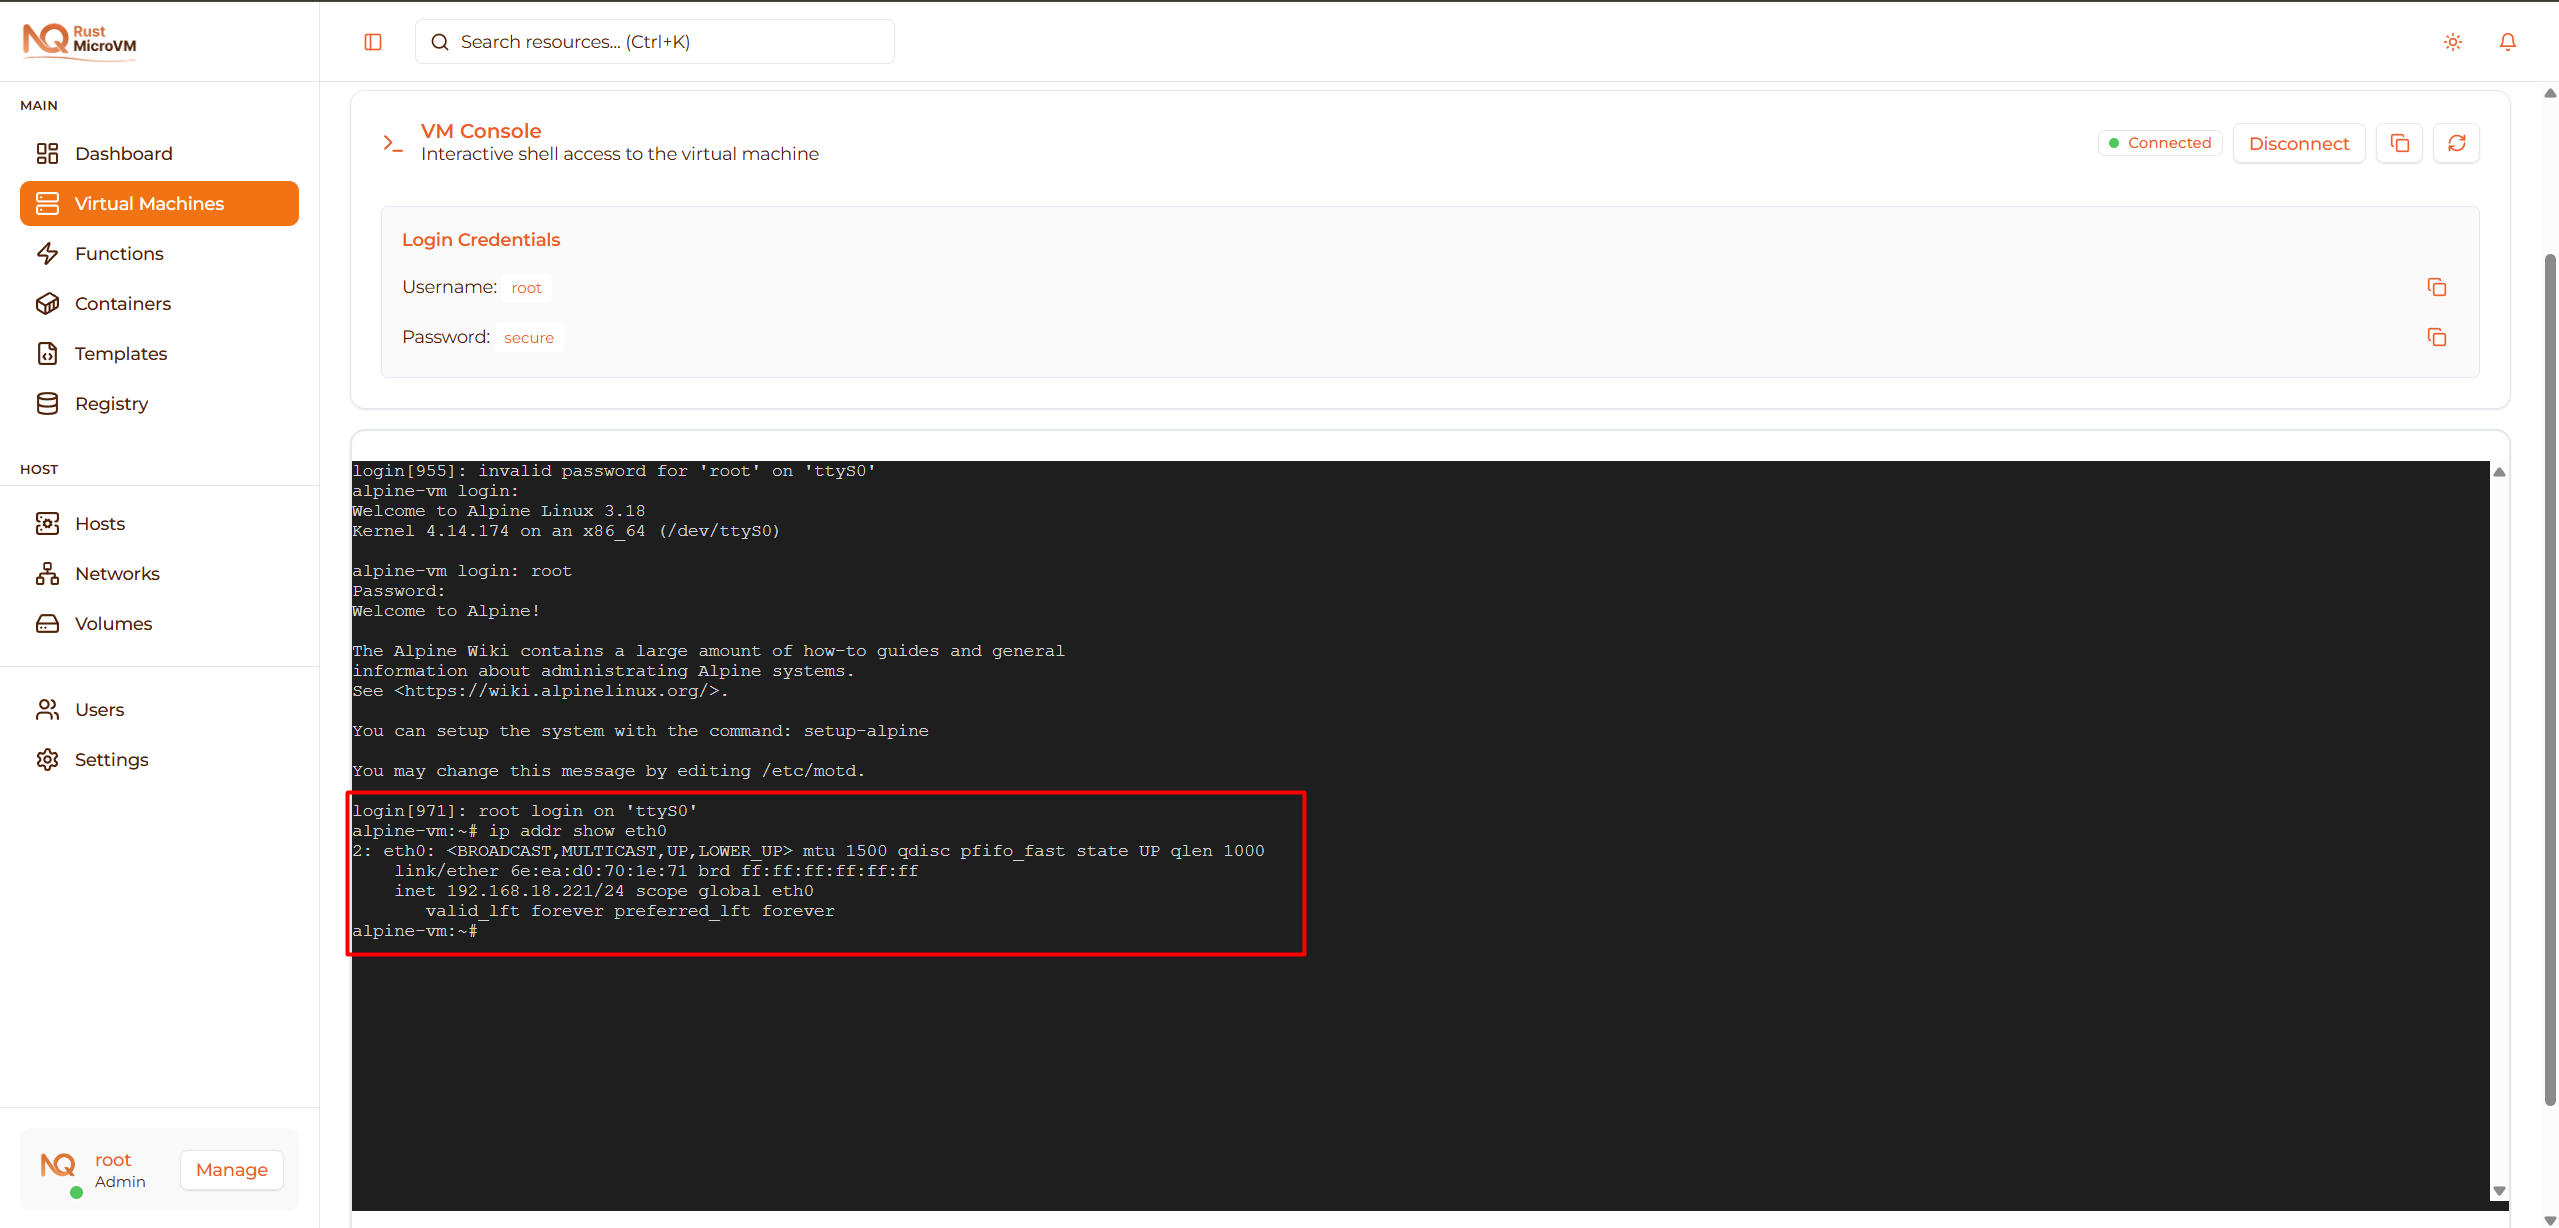
Test Network
From the console, verify network connectivity:
  # Check IP address
ip addr show eth0

# Test internet connectivity
ping -c 3 google.com

# Check DNS resolution
nslookup github.com
If all tests pass, your VM is fully operational! 🎉
Quick Start from Template
For faster VM creation, use a template:
- Go to Templates page
- Find a template (e.g., “Ubuntu 22.04 Base”)
- Click Deploy
- Enter VM name
- Click Deploy
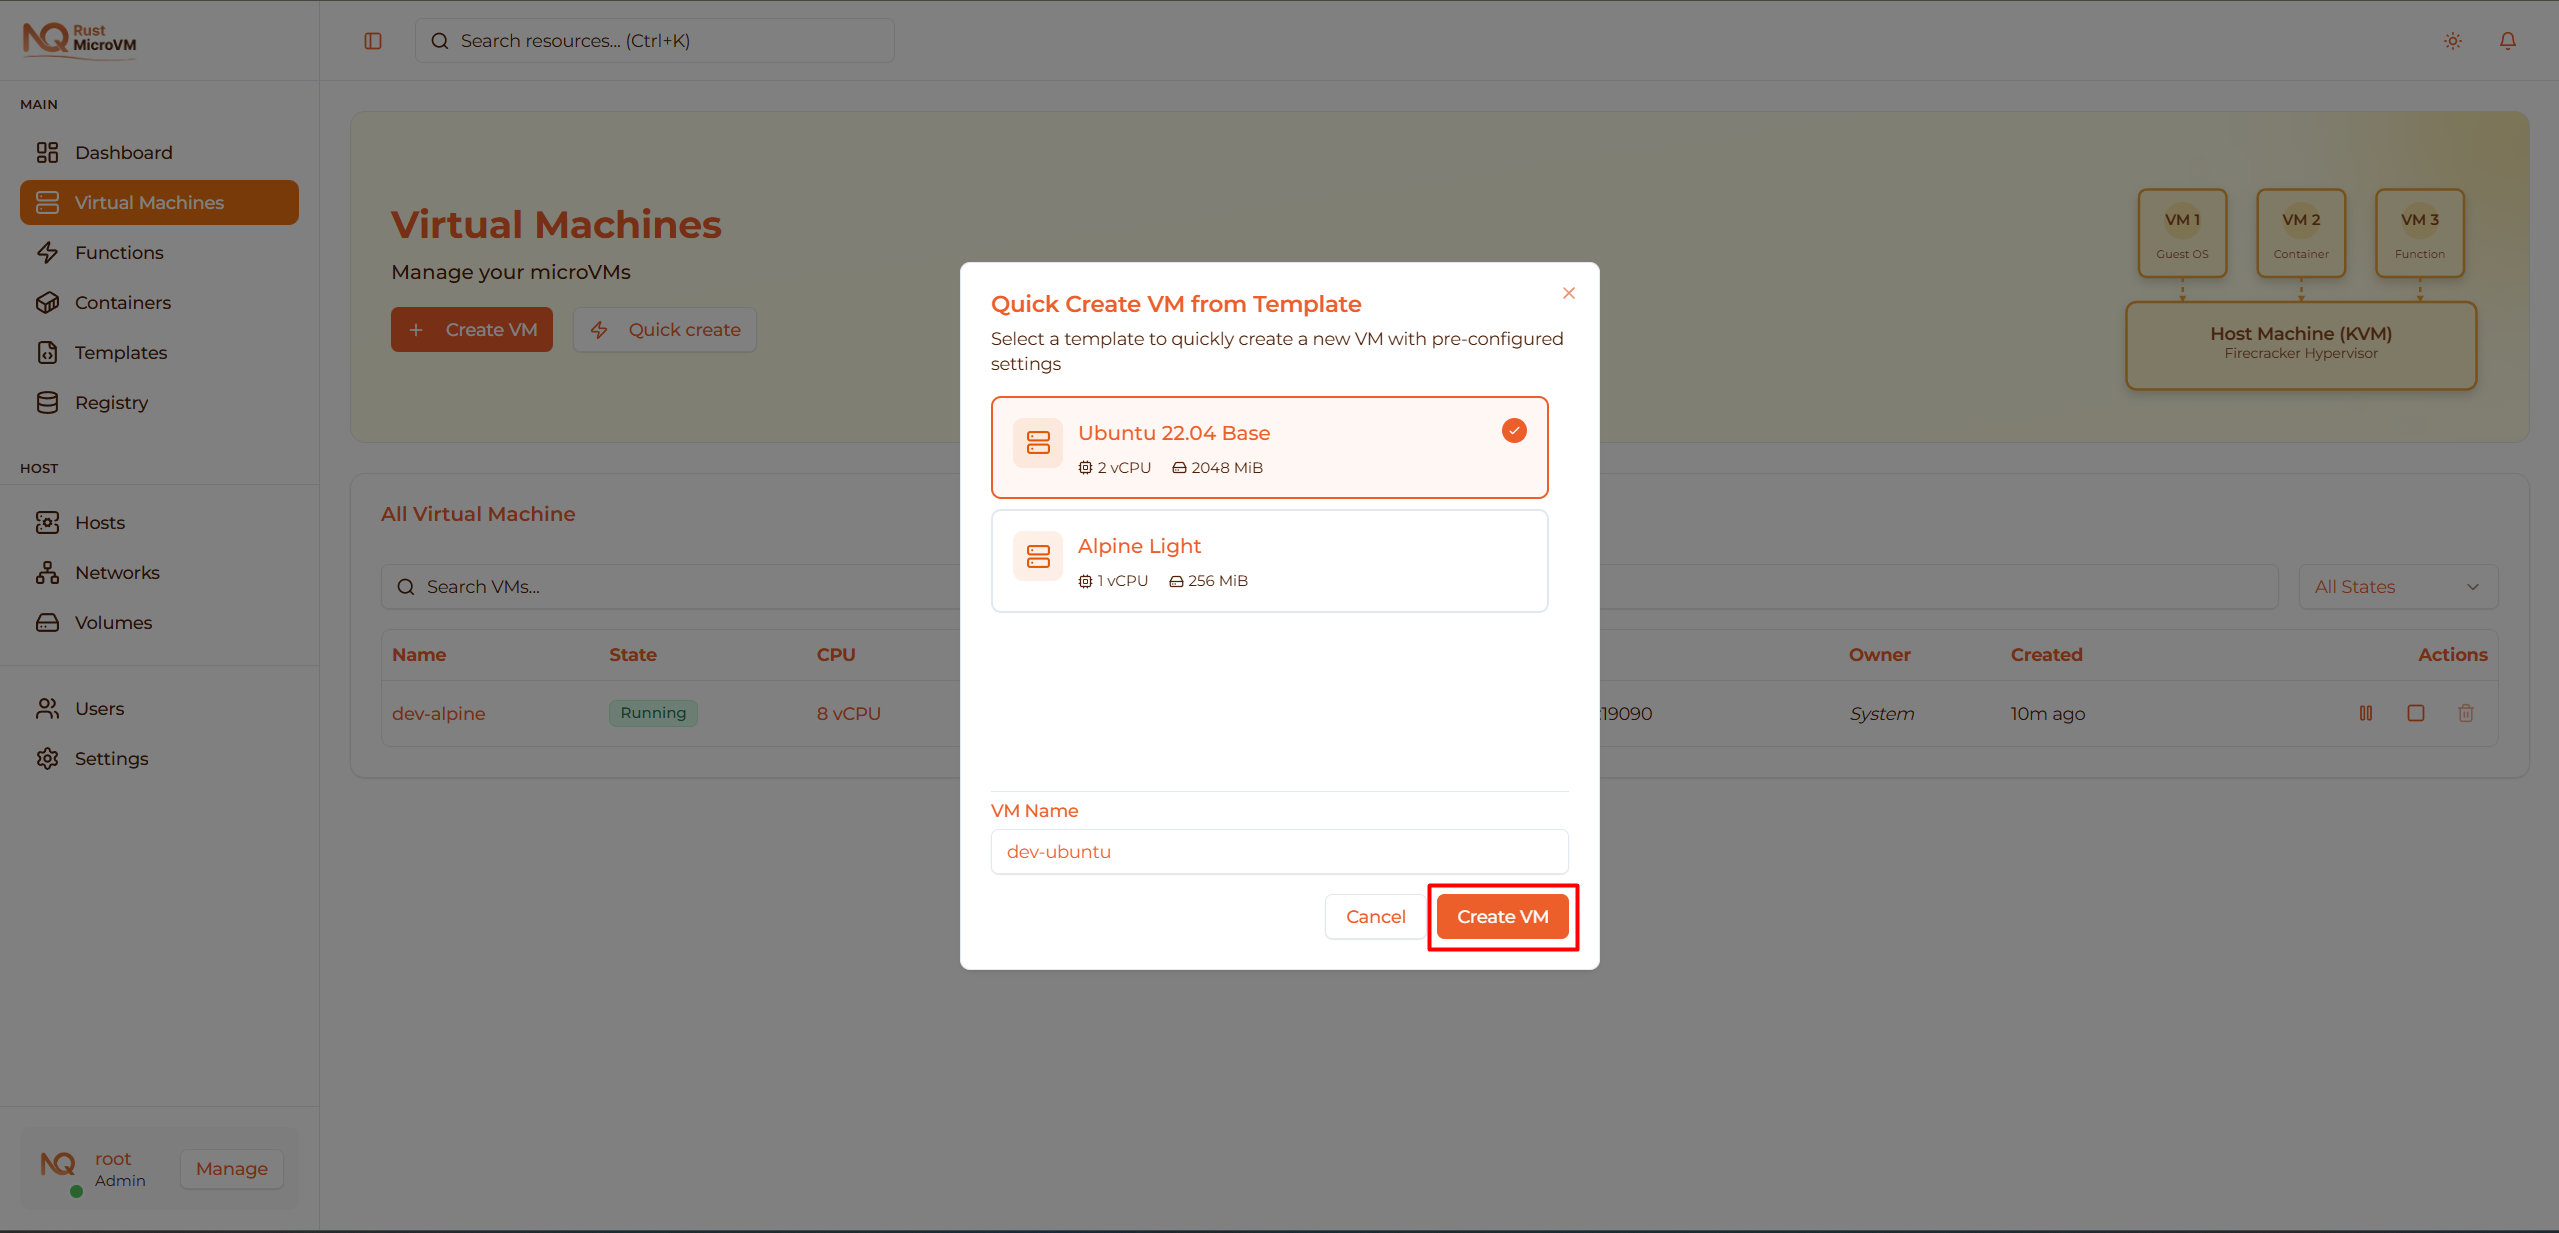
The VM is created instantly with pre-configured settings!
Troubleshooting
Issue: No Images Available
Problem: Kernel or Rootfs dropdown is empty
Solution:
- Go to Image Registry page
- Upload required images (see Upload Images)
- Return to VM creation
Issue: Not Enough Resources
Problem: Error message “Insufficient resources available”
Solution:
- Reduce CPU or memory allocation
- Stop unused VMs to free resources
- Contact administrator to add more capacity
Issue: VM Stuck in “Creating” State
Problem: VM shows “Creating” for more than 30 seconds
Solution:
- Refresh the page
- Check Hosts page to verify agent is online
- If still stuck, delete the VM and try again
- Contact administrator if problem persists
Issue: Can’t Access VM Console
Problem: Console shows “Connection failed”
Solution:
- Verify VM status is “Running”
- Check browser console for errors
- Try different browser
- Ensure WebSocket connections are not blocked by firewall
Next Steps
Now that your VM is created:
- Access VM - Learn to connect via SSH
- Manage VM - Start, stop, pause operations
- Monitoring - View performance metrics
- Backup & Snapshot - Protect your data
Best Practices
Naming Convention:
  <environment>-<purpose>-<number>
Examples:
  prod-web-01, prod-web-02
  dev-alice-ubuntu
  test-backend-api
  staging-database
Resource Sizing:
- Start with minimal resources
- Monitor actual usage (see Monitoring)
- Scale up only when needed
- Don’t over-allocate - wastes resources
Security:
- ✅ Use SSH keys instead of passwords
- ✅ Use strong, unique passwords if needed
- ✅ Disable password login in production
- ✅ Keep VMs updated with security patches
Organization:
- Use templates for repeated configurations
- Add descriptive descriptions
- Follow consistent naming convention
- Document VM purpose and owner