Create Volumes
Create a new persistent block storage volume and attach it to a VM.
Creating a Volume
- Go to Volumes in the sidebar
- Click Create Volume
- Fill in the form and click Create Volume
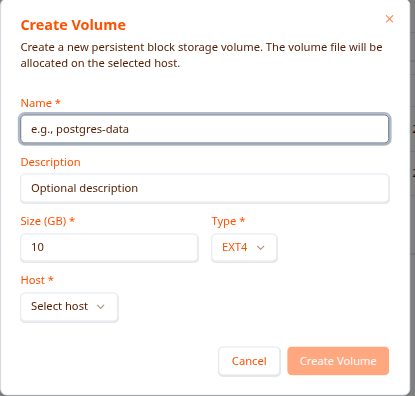
Form Fields
Name (required) A unique identifier for the volume. Use a descriptive name that reflects its purpose.
  postgres-data
web-uploads
dev-workspace-alice
Description (optional) A short note about what this volume is for.
Size (GB) (required) The size to allocate in gigabytes. Space is reserved on the host immediately.
- Minimum: 1 GB
- Plan for growth — volumes cannot be resized after creation
- Typical sizes: 10 GB (small), 50 GB (medium), 100–500 GB (large)
Type (required)
Currently EXT4 — the standard Linux filesystem, suitable for all workloads.
Host (required) The host machine where the volume file will be stored. Select from the dropdown of registered hosts. The volume can only be attached to VMs running on the same host.
After Creating
The new volume appears in the Volumes list. To use it, attach it to a VM from the VM’s Storage tab — see Manage Volumes.
Mounting Inside a VM
Once attached, mount the volume inside the VM:
  # List block devices to find the new drive
lsblk

# Create a mount point
sudo mkdir -p /mnt/data

# Mount (usually /dev/vdb for the second drive)
sudo mount /dev/vdb /mnt/data

# Verify
df -h /mnt/data
Make it permanent — add to /etc/fstab:
  # Get the UUID
sudo blkid /dev/vdb

# Add to /etc/fstab:
UUID=your-uuid-here /mnt/data ext4 defaults 0 2
Naming Tips
  Good:
  postgres-data-prod
  web-uploads-staging
  dev-alice-workspace
  logs-archive-2025-01

Bad:
  volume1
  test
  data
Troubleshooting
Creation fails
- Check the host has available disk space
- Try a smaller size
- Ensure the name is unique
- Contact your administrator if the issue persists
Next Steps
- Manage Volumes — Attach the volume to a VM
- Browse Volumes — Find existing volumes